Welcome to the SaluSpa Miami manual! This guide provides essential information for setting up, maintaining, and troubleshooting your inflatable hot tub. Ensure safe and enjoyable use by following the instructions carefully.
1.1 Overview of the SaluSpa Miami Inflatable Hot Tub
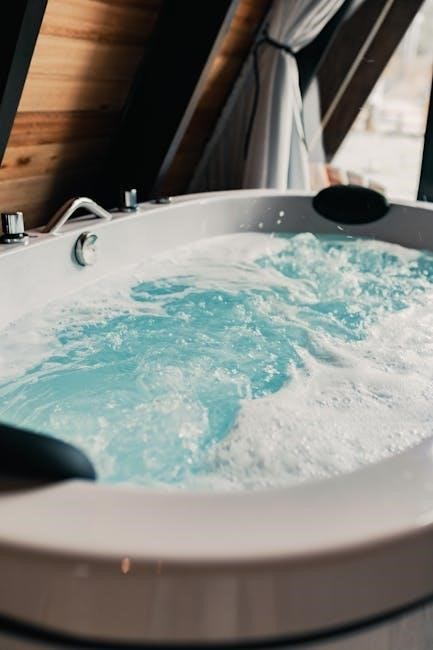
The SaluSpa Miami is a portable, inflatable hot tub designed for relaxation and convenience. It features a soothing massage system with 120 air jets, creating a warm and rejuvenating experience. The tub is spacious, accommodating up to 4 people, and is made of durable, high-quality materials. Its compact design allows for easy setup and transport. The SaluSpa Miami also includes a power-saving timer for energy efficiency and a user-friendly control panel. With its affordable price and robust build, it’s a popular choice for those seeking a luxurious spa experience at home. The manual provides detailed guidance for optimal use and maintenance.
1.2 Importance of Reading the Manual
Reading the SaluSpa Miami manual is essential for safe and effective use of your inflatable hot tub. It provides critical safety precautions, setup instructions, and maintenance tips to ensure optimal performance. The manual also explains how to troubleshoot common issues, such as error codes and heater malfunctions, saving you time and frustration. By following the guidelines, you can extend the lifespan of your hot tub and enjoy a relaxing, stress-free experience. Always refer to the manual before attempting any adjustments or repairs to avoid potential hazards and warranty voidance.
Setup and Installation
Setting up your SaluSpa Miami is straightforward, but ensure proper placement on a flat, level surface and install near a floor drain for easy water management.
2.1 Step-by-Step Setup Instructions
Begin by unpacking and inspecting all components. Choose a flat, level surface and ensure it’s near a floor drain for easy water management. Inflate the spa using the provided pump, ensuring it reaches the recommended pressure. Attach the pump and heating system securely, following the manual’s guidelines. Fill the tub with water, leaving space for the heater to function properly. Test the jets and heating system to ensure they’re working. Finally, set the power-saving timer and enjoy your relaxing experience. Always refer to the manual for specific details.
2.2 Placement and Leveling Considerations
Select a flat, level surface for your SaluSpa Miami to ensure proper function and safety. Avoid uneven ground to prevent damage or instability. Place the spa near a floor drain to manage water spillage during filling, draining, or use. For indoor installation, consider ventilation to handle humidity. Ensure the surface is durable and can support the filled tub’s weight. Always follow the manual’s guidelines for placement to maximize performance and longevity of your inflatable hot tub.

Heater and Temperature Control
The SaluSpa Miami features a power-saving timer for energy efficiency and a maximum temperature setting of 104°F for safety. Always monitor the heater’s performance and adjust as needed.
3.1 Understanding the Power-Saving Timer
The power-saving timer on the SaluSpa Miami allows you to schedule when the heater and pump activate, optimizing energy usage. This feature helps reduce electricity costs by running the system only when needed. Simply set the timer via the control panel to align with your preferred soaking schedule. Ensure the timer is programmed correctly to maintain consistent water temperature and enjoy a relaxing experience without unnecessary energy consumption. Regularly review timer settings to adapt to changing usage patterns or seasonal needs.
3.2 Maximum Temperature Settings and Safety
The SaluSpa Miami’s maximum temperature setting is 104°F (40°C) for optimal comfort and safety. Never exceed this limit, as higher temperatures can pose health risks. Users should not stay in the spa for more than 10 minutes at this maximum temperature. Always ensure the water temperature is below 100°F (38°C) for safe use. Avoid using the spa if the water exceeds 104°F. Adhere to these guidelines to maintain a safe and enjoyable experience for all users. Proper temperature control is crucial for both safety and system efficiency.

Maintenance and Upkeep
Regular maintenance is crucial for optimal performance. Clean the tub frequently to prevent dirt buildup. Check and replace filters as recommended. Monitor chemical levels to ensure water quality. Drain and refill the spa periodically to maintain hygiene. Follow these steps to keep your SaluSpa Miami in great condition.
4.1 Cleaning and Filter Maintenance
Proper cleaning and filter maintenance are essential for your SaluSpa Miami. Regularly inspect and clean the filters to ensure optimal water flow and filtration. Use a soft brush or cloth to remove debris from the tub’s surface. For deeper cleaning, use mild soap and rinse thoroughly. Replace filters as recommended to maintain water quality and prevent clogs. Regular maintenance will extend the life of your spa and ensure a relaxing experience for years to come.
4.2 Chemical Usage and Water Quality
Proper chemical usage is crucial for maintaining clean and safe water in your SaluSpa Miami. Use test strips to monitor pH levels, ensuring they remain between 7.2 and 7.8. Add chlorine or bromine tablets as needed to sanitize the water. Avoid using abrasive or corrosive chemicals, as they can damage the tub or harm users. Regularly test and adjust water quality to prevent algae growth and bacterial contamination. Always follow the recommended dosage on chemical products to maintain a healthy and enjoyable spa experience.
Troubleshooting Common Issues
Address common problems like E01 error codes, heater malfunctions, and air leaks. Refer to specific sections for detailed solutions to ensure optimal performance and safety.
5.1 E01 Error Code and Water Flow Sensors
The E01 error code indicates an issue with the water flow sensors, which monitor the system’s operation. This occurs when sensors detect improper water flow, even when the filtration or heating system is inactive. To resolve this, ensure the water level is adequate, check for blockages in the pipes or filters, and verify that all sensors are clean and functioning correctly. Refer to the troubleshooting section in your manual for detailed steps to reset the system and restore normal operation.
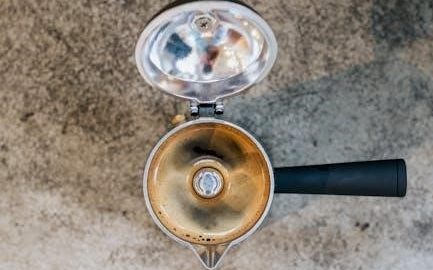
5.2 Air Leaks and Pump Functionality
Air leaks in the SaluSpa Miami can occur due to improper connections or wear and tear. If you notice a significant loss of air, inspect the valves, hoses, and seams for damage. Ensure all parts are securely attached. For pump functionality, check that it is properly powered and connected. If the pump fails to inflate the tub or circulate water, refer to the troubleshooting guide in your manual for reset instructions or replacement options. Regular maintenance can prevent such issues and extend the lifespan of your spa.
5.3 Heater Malfunction and Warranty Information
If your SaluSpa Miami’s heater stops working, check for issues like faulty sensors or power supply problems. Chemical imbalance or corrosion from improper usage can also damage the heating element. If the heater fails, contact Bestway’s customer support for warranty assistance. Ensure your spa is registered on their website for faster service. Remember, improper chemical use can void your warranty. Always follow the manual’s guidelines for maintenance and chemical dosage to prevent heater malfunctions and extend its lifespan.

Safety Precautions
Always follow safety guidelines to ensure a safe experience. Avoid exceeding 104°F water temperature and limit sessions to 10 minutes. Ensure proper ventilation and avoid indoor installation without a drainage system.
6.1 Temperature and Usage Limits
The SaluSpa Miami manual specifies temperature and usage limits for safety. Water should not exceed 104°F (40°C) to avoid health risks. Users are advised not to stay in the spa for more than 10 minutes at a time. Prolonged exposure can lead to dizziness or discomfort. Additionally, children, pregnant women, and individuals with certain medical conditions should consult a doctor before using the hot tub. Always prioritize health and safety when enjoying the spa.
6.2 Indoor Installation Considerations
Indoor installation of the SaluSpa Miami requires careful planning to ensure safety and prevent damage. The spa should be placed in a well-ventilated area to manage humidity. A floor drain or waterproof surface is recommended to handle water spills during use or maintenance. Additionally, ensure the space can accommodate the spa’s dimensions and weight. Always follow local building codes and safety guidelines. Regularly inspect the area for moisture buildup to prevent mold or structural issues. Proper installation ensures a safe and enjoyable experience for all users.

Key Features of the SaluSpa Miami
The SaluSpa Miami features a soothing massage system with 120 air jets, a spacious design for up to four people, and a power-saving timer for energy efficiency. Its inflatable and portable design makes it easy to set up and use, while the durable construction ensures long-lasting enjoyment. Perfect for relaxation and entertaining, it combines comfort and convenience in a compact, user-friendly package.
7.1 Soothing Massage System with Air Jets
The SaluSpa Miami features a soothing massage system with 120 air jets, designed to create a relaxing and rejuvenating experience. The jets release warm air bubbles, providing a gentle yet effective massage. This system is perfect for unwinding after a long day, offering a spa-like experience in the comfort of your home. The massage function is easy to control, allowing you to customize your relaxation experience. With its advanced air jet technology, the SaluSpa Miami ensures a tranquil and enjoyable soaking experience for all users.
7.2 Spacious Design for Multiple Users
The SaluSpa Miami boasts a spacious, round design that accommodates up to four people comfortably. Its ample interior space ensures everyone can relax without feeling cramped. The durable, puncture-resistant material ensures long-lasting use, while the ergonomic layout promotes comfort for all users. Whether you’re enjoying a peaceful soak alone or sharing the experience with family and friends, the SaluSpa Miami’s generous size makes it an ideal choice for social gatherings or intimate relaxation sessions.