Category Archives: Australia

kings 25a dcdc charger manual pdf download

The Kings 25A DC-DC Charger Manual provides essential guidance for installing‚ operating‚ and troubleshooting your charger‚ ensuring optimal performance and longevity for your auxiliary batteries.

Overview of the Kings 25A DC-DC Charger

The Kings 25A DC-DC Charger is a versatile device designed for charging 12V auxiliary batteries from 12-24V vehicles. It supports lithium‚ AGM‚ and lead-acid batteries‚ offering efficient multi-stage charging and built-in isolator and solar MPPT regulator functionality. Ideal for 4WD‚ marine‚ and camping applications‚ it ensures reliable performance and optimal battery health in various environments.

Importance of the Manual for Proper Usage

The manual is crucial for understanding the Kings 25A DC-DC Charger’s features‚ installation‚ and operation. It provides detailed instructions for safe usage‚ troubleshooting‚ and maintenance‚ ensuring optimal performance and longevity. By following the guidelines‚ users can avoid potential hazards‚ configure settings correctly‚ and maximize the charger’s efficiency for their specific battery type and application needs.

Key Features and Benefits of the Kings 25A DC-DC Charger

The Kings 25A DC-DC Charger offers a 25A maximum charge current‚ supporting lithium‚ AGM‚ and lead-acid batteries. It features multi-stage charging‚ a built-in isolator‚ and MPPT solar regulation for efficient battery management.

25A Maximum Charge Current for Efficient Battery Charging

The Kings 25A DC-DC Charger delivers a maximum charge current of 25A‚ ensuring rapid and efficient charging of large-capacity batteries. This feature is ideal for 4WD‚ marine‚ and camping applications‚ where high-demand power systems require reliable energy supply. The charger’s high current capacity supports optimal performance‚ making it suitable for deep-cycle batteries in demanding environments.

Compatibility with Lithium‚ AGM‚ and Lead-Acid Batteries

The Kings 25A DC-DC Charger is designed to support various battery types‚ including Lithium‚ AGM‚ and Lead-Acid. This versatility ensures compatibility with a wide range of applications‚ from traditional setups to modern lithium-based systems. The charger automatically adjusts its charging profile to suit the battery type‚ ensuring safe and efficient charging across all configurations.

Multi-Stage Charging for Optimal Battery Health

The Kings 25A DC-DC Charger employs a multi-stage charging process to ensure optimal battery health. This advanced algorithm includes bulk‚ absorption‚ and float stages‚ preventing overcharging and extending battery life. The charger automatically adjusts to the battery’s state‚ delivering the correct charge level for lithium‚ AGM‚ and lead-acid batteries‚ ensuring safe and efficient charging while maintaining peak performance.

Built-In Isolator and Solar MPPT Regulator

The Kings 25A DC-DC Charger features a built-in isolator to prevent battery drain and a solar MPPT regulator for maximum solar charging efficiency. The isolator ensures the auxiliary battery is charged without draining the starter battery when the engine is off. The MPPT regulator optimizes solar input‚ delivering up to 25A of charge current for efficient energy harvesting from solar panels‚ ideal for off-grid applications.

System Compatibility and Requirements

The Kings 25A DC-DC Charger is compatible with 12-24V vehicles and supports various battery types‚ including Lithium‚ AGM‚ and Lead-Acid‚ with recommended capacities for optimal performance.

Supported Battery Types and Capacities

The Kings 25A DC-DC Charger supports Lithium (LiFePO4)‚ AGM‚ and Lead-Acid batteries‚ with recommended capacities of 80-250 Ah for the 25A model and 120-400 Ah for the 40A model. For other Lithium-Ion batteries‚ refer to the Charging Voltage Limits section to confirm compatibility before use.

Vehicle Voltage Range (12-24V) for Universal Application

The Kings 25A DC-DC Charger is compatible with 12-24V vehicle systems‚ ensuring universal application across various vehicles‚ including 4WDs‚ RVs‚ and marine applications. Its versatile design allows seamless integration with different electrical systems‚ making it an ideal solution for charging auxiliary batteries in diverse mobile power setups.

Installation and Setup Guide

The Kings 25A DC-DC Charger installation involves securely mounting the unit‚ connecting the correct cables‚ and ensuring proper fuse installation for safe and efficient operation.

Step-by-Step Installation Instructions

  • Mount the charger near the auxiliary battery‚ ensuring good airflow and protection from moisture.
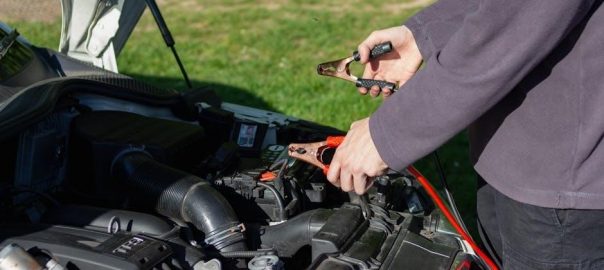
  • Disconnect the vehicle’s starter battery negative (-) terminal before connecting the charger.
  • Connect the brown cable to the auxiliary battery positive (+) terminal‚ fitting a 50A fuse close to the battery.
  • Link the input cables to the vehicle’s starter battery‚ ensuring correct polarity.
  • For solar charging‚ attach the green cable to the solar panel positive (+) terminal‚ using a 12V panel with Voc < 25V.
  • Power on the charger and verify operation; enable MPPT if using solar input.

Recommended Wiring and Fuse Requirements

For safe and efficient operation‚ use high-quality wiring suitable for the charger’s current. Install a 50A fuse near the auxiliary battery on the positive cable. Ensure correct polarity when connecting cables to avoid damage. Use appropriate wire gauges to minimize voltage drop. Refer to the manual for specific fuse and wiring recommendations to ensure compliance with safety standards and optimal performance.

Connection to Auxiliary Battery and Solar Panels

Connect the brown cable to the auxiliary battery’s positive terminal and ensure a 50A fuse is fitted close to the battery. For solar charging‚ attach the green cable to the solar panel’s positive terminal‚ ensuring the panel is 12V nominal with a maximum voltage (Voc) below 25V. Secure the charger near the auxiliary battery for optimal performance and safety.

Troubleshooting Common Issues

Identify and resolve common problems such as connection issues‚ fuse checks‚ and error lights by following the manual’s detailed diagnostic steps and solutions.

Charger Not Turning On or Not Charging

If the charger fails to turn on or charge‚ check connections‚ fuses‚ and input voltage. Ensure the auxiliary battery is properly linked and all cables are secure. Verify the fuse isn’t blown and the voltage supply meets requirements. Consult the manual for detailed diagnostic steps to resolve the issue effectively.

Error Lights and Alarm Conditions

The charger features indicator lights that signal system status and potential issues. If an error light illuminates‚ refer to the manual to identify the specific condition‚ such as over-voltage‚ under-voltage‚ or thermal faults. Address the issue promptly to prevent damage. Detailed troubleshooting steps and solutions are provided in the manual to ensure safe and effective resolution. Always follow the guidelines to maintain optimal performance.

Connection and Voltage Issues

Ensure all connections are secure and correctly wired. Check for loose terminals or incorrect polarity‚ which can cause malfunction. Verify voltage levels at the input and output terminals using a multimeter. If voltage is unstable or outside the specified range‚ consult the manual for troubleshooting steps. Proper connections and voltage stability are crucial for safe and efficient charging.

Safety Precautions and Guidelines

Always wear protective gear when handling batteries and electrical systems. Avoid overcharging‚ which can cause damage or fire hazards. Ensure proper ventilation and keep the charger away from water or flammable materials. Follow all manufacturer guidelines for safe installation and operation to prevent electrical shock or system malfunctions.

Handling and Electrical Safety Measures

Always disconnect the battery negative terminal before installation to prevent electrical risks. Wear protective gloves and goggles when handling electrical components. Ensure proper ventilation and avoid overcharging‚ as it may cause damage or fire hazards. Keep the charger away from water or flammable materials. Follow the manual’s guidelines for safe installation and operation. Regularly inspect cables and connections for damage.

Environmental Considerations for Installation

Ensure the charger is installed in a well-ventilated‚ dry environment to avoid moisture exposure. Protect it from extreme temperatures and direct sunlight. Avoid installing near flammable materials or sources of ignition. Secure the charger firmly to prevent vibration damage‚ especially in mobile applications like 4WDs or boats. Follow the manual’s guidelines to ensure safe and durable operation in various environmental conditions.

Downloading the Kings 25A DC-DC Charger Manual

The official Kings 25A DC-DC Charger Manual is available for free download as a PDF from the manufacturer’s website or trusted online marketplaces‚ ensuring easy access.

Official Sources for the PDF Manual

The Kings 25A DC-DC Charger Manual is available for free download as a PDF from the official Kings website and trusted online retailers. Ensure authenticity by downloading from reputable sources to access comprehensive installation‚ troubleshooting‚ and usage guidelines.

Additional Resources and Online Marketplaces

For convenient access‚ the Kings 25A DC-DC Charger Manual can also be found on online marketplaces like Amazon and eBay‚ as well as specialized PDF-sharing platforms. Users can additionally check the official Kings website and social media pages for direct links. Always verify the authenticity of the source to ensure you download the correct and updated version of the manual.

Advanced Features and Settings

Solar Charging and MPPT Functionality

The Kings 25A DC-DC Charger features advanced MPPT (Maximum Power Point Tracking) technology‚ optimizing solar charging efficiency by dynamically adjusting to solar panel output conditions.

Smart Charging Algorithms for Battery Longevity

Built-in smart charging algorithms ensure multi-stage charging‚ preventing overcharging and extending battery life‚ while supporting lithium‚ AGM‚ and lead-acid batteries for versatile applications.

The Kings 25A DC-DC Charger incorporates advanced MPPT (Maximum Power Point Tracking) technology‚ optimizing solar charging efficiency by dynamically adjusting energy transfer from solar panels to the battery. This feature ensures maximum power extraction‚ even under varying solar conditions‚ making it ideal for off-grid applications. The charger is compatible with 12V nominal solar panels‚ providing a reliable and efficient charging solution.

By utilizing MPPT functionality‚ the charger maximizes energy harvest from solar panels‚ ensuring a stable and consistent charge for auxiliary batteries. Proper connections‚ as detailed in the manual‚ are essential for safe and efficient operation.

Refer to the manual for detailed setup and configuration guidelines.

The Kings 25A DC-DC Charger employs advanced smart charging algorithms to ensure optimal battery health and longevity. These algorithms automatically adjust charging modes based on battery type (Lithium‚ AGM‚ or Lead-Acid) and state of charge‚ preventing overcharging or undercharging. The charger also monitors temperature and voltage‚ ensuring a safe and efficient charging process that extends battery life.

Customizable settings allow users to tailor charging parameters for specific battery needs‚ enhancing performance and durability.

Customer Reviews and Ratings

The Kings 25A DC-DC Charger has received positive feedback for its efficiency and compatibility with various battery types. Users praise its reliability and multi-stage charging capability‚ while some note room for improvement in specific features. Overall‚ it is highly rated for its performance in 4WD and marine applications. Most users are satisfied with its durability and charging accuracy.

Positive Feedback and User Experiences

Users praise the Kings 25A DC-DC Charger for its efficiency and compatibility with lithium‚ AGM‚ and lead-acid batteries. Many highlight its multi-stage charging and built-in isolator as key advantages. The charger’s durability and reliability in 4WD‚ marine‚ and camping applications are frequently commended. Customers appreciate its ease of installation and the comprehensive manual‚ which simplifies understanding advanced features like solar MPPT functionality. Overall‚ it’s a top choice for off-grid power solutions.

Areas for Improvement and Common Complaints

Some users report issues with the charger not turning on or failing to charge batteries‚ often linked to error lights or voltage mismatches. A few note confusion over lithium battery compatibility‚ particularly with older models. Others mention connectivity problems and the need for clearer troubleshooting guidelines in the manual. These issues highlight areas for potential firmware updates or improved documentation.

Accessories and Optional Equipment

Recommended accessories include high-quality cables‚ connectors‚ and solar panels to enhance performance; Battery monitors and additional fuses ensure safety and reliability for optimal charging experiences.

Recommended Cables and Connectors

Use high-quality cables and connectors to ensure reliable connections. A 50A fuse is recommended for the auxiliary battery cable. Choose cables with the correct gauge to minimize voltage drop. Solar panel connectors and battery monitors are optional but enhance performance and safety. Always follow the manual’s specifications for optimal charging efficiency and system reliability.

Solar Panels and Battery Monitors for Enhanced Performance

  • Install a 12V nominal solar panel with Voc <25V for optimal solar charging performance.
  • Use a compatible battery monitor‚ such as the BMPRO 700‚ to track battery health and charging efficiency.
  • These accessories enhance system performance‚ ensuring efficient power management and prolonged battery life;

Warranty and Support Information

The Kings 25A DC-DC Charger is backed by a 2-year manufacturer warranty. Contact customer support for assistance with repairs‚ replacements‚ or technical inquiries.

Manufacturer Warranty Details

The Kings 25A DC-DC Charger is covered by a 2-year manufacturer warranty‚ ensuring repairs or replacements for defects in materials and workmanship. The warranty period begins from the date of purchase and is non-transferable. For detailed terms and conditions‚ refer to the official manual or contact customer support. Warranty claims require proof of purchase and adherence to proper usage guidelines outlined in the manual.

Customer Support and Service Options

The Kings 25A DC-DC Charger is backed by comprehensive customer support‚ including online troubleshooting guides and direct assistance via email or phone. The official manual provides detailed solutions for common issues‚ while warranty claims and technical inquiries are addressed promptly. For additional help‚ users can access FAQs and community forums or contact authorized service centers within the 2-year warranty period.

Applications and Use Cases

The Kings 25A DC-DC Charger is ideal for 4WD‚ marine‚ and camping applications‚ providing reliable power for emergency systems and off-grid setups‚ ensuring consistent battery performance.

4WD‚ Marine‚ and Camping Applications

The Kings 25A DC-DC Charger is perfect for 4WD adventures‚ marine vessels‚ and camping trips‚ ensuring reliable battery charging in remote locations. Its compatibility with lithium‚ AGM‚ and lead-acid batteries makes it versatile for various setups. The charger’s efficient multi-stage charging and high current capacity support large-capacity batteries‚ ideal for powering camping gear‚ marine electronics‚ and off-grid systems‚ providing consistent energy for lights‚ fridges‚ and communication devices.

Emergency Power Solutions and Off-Grid Systems

The Kings 25A DC-DC Charger excels in emergency power solutions and off-grid systems‚ providing reliable battery charging for critical setups. Its multi-stage charging ensures a steady power supply‚ while the built-in isolator prevents battery drain. Ideal for remote locations‚ it seamlessly integrates with solar panels‚ offering a robust solution for off-grid energy needs and emergency power backup systems in harsh environments.

Maintenance and Upkeep

Regular cleaning and inspection of the charger ensure optimal performance. Store it in a dry‚ cool environment to prevent damage. Refer to the manual for software updates.

Cleaning and Inspecting the Charger

Regular cleaning of the Kings 25A DC-DC Charger is essential for maintaining efficiency. Use a soft‚ dry cloth to wipe away dust and debris from the unit and vents. Inspect all connections and cables for damage or wear. Ensure the charger is stored in a cool‚ dry environment to prevent moisture damage. Refer to the manual for detailed maintenance procedures and software update instructions to ensure optimal performance and longevity.

Storage and Operational Environment

Store the Kings 25A DC-DC Charger in a cool‚ dry place‚ protected from direct sunlight and moisture. Avoid extreme temperatures and humidity. Ensure the unit is well-ventilated during operation. For storage‚ disconnect the charger from power sources and cover it to prevent dust accumulation. Operate within the recommended voltage range (12-24V) and follow guidelines for temperature and environmental conditions outlined in the manual for optimal performance and longevity.

Software Updates and Firmware

Regularly check the official Kings website for software updates and firmware improvements to ensure optimal performance. Download and install the latest version following the manual’s instructions to enhance functionality‚ fix issues‚ and maintain compatibility with your system. Updates may improve charging algorithms‚ add features‚ or address specific user concerns‚ ensuring your charger operates at its best.

The Kings 25A DC-DC Charger Manual is a vital resource for users‚ offering clear guidance on installation‚ operation‚ and troubleshooting to ensure efficient and reliable battery charging.

Final Thoughts on the Kings 25A DC-DC Charger

The Kings 25A DC-DC Charger is a reliable and efficient solution for charging auxiliary batteries‚ offering compatibility with lithium‚ AGM‚ and lead-acid types. Its multi-stage charging and built-in isolator ensure optimal performance and longevity. Users praise its durability and versatility for 4WD‚ marine‚ and camping applications. Referencing the manual is crucial for proper setup and troubleshooting‚ ensuring safe and effective operation in various environments.

Encouragement to Refer to the Manual for Optimal Use

Referencing the Kings 25A DC-DC Charger Manual is essential for optimal performance and safety. It provides detailed installation steps‚ troubleshooting guides‚ and maintenance tips to ensure your charger operates efficiently. By following the manual‚ you can maximize the charger’s potential‚ prolong battery life‚ and avoid common issues. Download the PDF manual today for a comprehensive guide tailored to your needs.

kings 25a dcdc charger manual pdf download

1.1 Overview of the Kings 25A DC-DC Charger

Welcome to the Kings 25A DC-DC Charger Manual, your guide to understanding and using this advanced charging solution for 12V auxiliary batteries in vehicles.

The Kings 25A DC-DC Charger is a versatile, high-performance device designed to charge 12V auxiliary batteries from 12-24V vehicle systems. It is ideal for camping, RVs, and marine applications, offering efficient multi-stage charging. With MPPT solar compatibility, it maximizes energy harvest from solar panels. The charger supports both lead-acid and lithium-ion batteries, ensuring flexibility for various setups. Its robust design, user-friendly interface, and advanced safety features make it a reliable solution for off-grid power needs. This manual provides detailed guidance on installation, operation, and troubleshooting to ensure optimal performance and safety.

1.2 Importance of the Manual

This manual is essential for safely and effectively using the Kings 25A DC-DC Charger. It provides detailed instructions for installation, operation, and troubleshooting, ensuring optimal performance and longevity. Reading the manual thoroughly helps users understand the charger’s features, modes, and compatibility with batteries and solar panels. It highlights safety precautions to prevent electrical hazards and damage to the device. The manual also guides users in selecting the correct settings for their battery type and troubleshooting common issues. By following the manual, users can maximize efficiency, avoid costly mistakes, and ensure reliable charging for their auxiliary power systems.

Product Features

The Kings 25A DC-DC Charger features multi-stage charging, MPPT solar regulation, lithium compatibility, and IP66 rating, ensuring efficient and reliable performance for 12V auxiliary batteries.

2.1 Key Features

The Kings 25A DC-DC Charger offers advanced multi-stage charging, ensuring optimal battery health and performance. It supports both lead-acid and lithium-ion batteries, with customizable charging profiles. The charger features an integrated MPPT solar regulator, maximizing solar energy utilization. Its robust design includes an IP66 rating for durability in harsh environments. With a 25A charging capacity, it efficiently handles auxiliary battery charging from 12-24V vehicles. The charger also includes safety features like overcharge protection and automatic shutdown, ensuring safe and reliable operation. These features make it ideal for camping, RVs, and off-grid applications, providing a versatile and efficient charging solution.

2.2 Benefits of the Charger

The Kings 25A DC-DC Charger offers exceptional efficiency, versatility, and reliability for charging 12V auxiliary batteries. Its multi-stage charging ensures optimal battery health, while MPPT solar compatibility maximizes energy harvesting. The charger supports both lead-acid and lithium-ion batteries, catering to diverse needs. Its IP66 rating ensures durability in harsh environments, making it ideal for outdoor and off-grid applications. Safe operation is guaranteed with overcharge protection and automatic shutdown features. This charger is a cost-effective, high-performance solution for campers, RV owners, and adventurers, providing consistent power delivery and extending battery lifespan. Its user-friendly design and robust construction make it a reliable choice for various charging requirements.

Technical Specifications

The Kings 25A DC-DC Charger features a max charging current of 25A, with a solar input voltage range of 9-25V and vehicle input of 11.9-25V, ensuring compatibility with 12V systems.

3.1 Electrical Specifications

The Kings 25A DC-DC Charger is designed for 12V systems, with a maximum charging current of 25A. It supports a solar input voltage range of 9-25V and a vehicle input range of 11.9-25V. The minimum solar input start-up voltage is 14.5V, while the vehicle input starts at 12.2V. The charger is compatible with 12V nominal solar panels (Voc < 25V) and ideal for systems requiring efficient power conversion. Its electrical design ensures stable and reliable charging for auxiliary batteries, making it suitable for various applications, including camping, marine, and off-grid setups. The specifications ensure optimal performance across different power sources.

3.2 Compatibility Overview

The Kings 25A DC-DC Charger is compatible with 12V and 24V vehicle systems, supporting a wide range of applications. It works seamlessly with lead-acid, AGM, and lithium-ion batteries, ensuring flexibility for different setups. The charger is also compatible with 12V nominal solar panels (Voc < 25V) and features MPPT technology for efficient solar energy utilization. Its design supports various vehicle types, including marine and RV applications, making it a versatile choice for off-grid and mobile power systems. This compatibility ensures reliable performance across different power sources and battery types, catering to diverse user needs and setups.

Installation Guide

Installation involves disconnecting the vehicle’s battery, connecting the charger to the vehicle’s electrical system, and linking it to the auxiliary battery. Ensure all connections are secure before use.

4;1 Pre-Installation Checks

Before installing the Kings 25A DC-DC Charger, ensure the vehicle’s battery is disconnected to prevent electrical hazards. Verify the auxiliary battery type (lead-acid, AGM, or lithium-ion) and its compatibility with the charger. Check the vehicle’s voltage range (12-24V) to ensure it matches the charger’s input requirements. Inspect all cables and connections for damage or wear. Ensure the charger’s rated current (25A) does not exceed the vehicle’s electrical system capacity. Review the manual to confirm wiring diagrams and installation steps. If unsure, consult a qualified technician to avoid potential risks. Proper preparation ensures a safe and efficient installation process.

4.2 Step-by-Step Installation Instructions

Mount the charger in a well-ventilated area, away from water and heat sources. Connect the red cable to the auxiliary battery’s positive terminal and the black cable to the negative terminal. Attach the yellow ignition wire to the vehicle’s ignition circuit. Secure all connections firmly. If using solar, connect the green cable to the solar panel’s positive terminal and ensure the panel is properly configured. Turn on the ignition to test the charger. Verify the display or indicators show proper charging. Tighten all connections and double-check wiring before final use. Always follow the manual for specific configurations.

Charging Modes

The Kings 25A DC-DC charger operates in three modes: Bulk, Float, and MPPT. These modes ensure efficient charging, battery maintenance, and optimal solar energy utilization for extended battery life.

5.1 Bulk Charging Mode

The Bulk Charging Mode is the first stage of the Kings 25A DC-DC charger’s operation, designed to rapidly charge deeply discharged batteries. During this phase, the charger delivers its maximum current rating of 25A to quickly restore the battery’s state of charge. This mode is ideal for replenishing batteries that have been drained to a low voltage, ensuring efficient and fast energy replenishment. The charger automatically transitions to Float Mode once the battery reaches a predetermined voltage, preventing overcharging and maintaining battery health. This intelligent multi-stage charging system ensures optimal performance and longevity for your auxiliary battery.

5.2 Float Charging Mode

The Float Charging Mode is the second stage of the Kings 25A DC-DC charger’s operation, designed to maintain the battery at its full charge without overcharging. Once the battery reaches its maximum voltage, the charger automatically reduces the charging current to a lower, safer level. This mode ensures the battery remains fully charged while preventing degradation from overcharging. It is ideal for long-term maintenance and is activated after the Bulk Charging Mode has completed. The float mode is essential for preserving battery health and extending its lifespan, making it suitable for applications where the battery is regularly used and recharged.

5.3 MPPT Mode for Solar

The Kings 25A DC-DC Charger features an MPPT (Maximum Power Point Tracking) mode, designed to optimize solar charging efficiency. This advanced algorithm continuously adjusts the charging current to maximize energy transfer from the solar panel to the battery, even under varying sunlight conditions. The charger supports a solar input voltage range of 9-25V, with a minimum start-up voltage of 14.5V. When connected to a compatible 12V solar panel (Voc < 25V), the MPPT mode ensures efficient energy harvesting, making it ideal for off-grid applications. The Green cable is used for solar input, connecting directly to the panel’s positive terminal for seamless integration. This mode maximizes solar charging performance and prolongs battery life.

Solar Panel Compatibility

The Kings 25A DC-DC Charger is compatible with 12V solar panels, supporting a voltage range of 9-25V. It features MPPT for efficient solar energy utilization, ensuring optimal charging performance.

6.1 Solar Panel Requirements

The Kings 25A DC-DC Charger is compatible with 12V solar panels, requiring a nominal voltage of 12V and an open-circuit voltage (Voc) of less than 25V. For optimal performance, solar panels should be rated between 9V and 25V to ensure safe and efficient charging. The charger features an MPPT (Maximum Power Point Tracking) algorithm, which maximizes energy transfer from the solar panel to the battery, even under varying sunlight conditions. The recommended solar panel size is 360W for the 25A model, ensuring efficient charging of auxiliary batteries in off-grid applications.

6.2 Connecting Solar Panels

To connect solar panels to the Kings 25A DC-DC Charger, ensure the solar panel is compatible with the charger’s specifications. The solar input voltage range is 9-25V, with a minimum start-up voltage of 14.5V. Connect the positive terminal of the solar panel to the Green cable (solar input) on the charger, and the negative terminal to the charger’s ground. The charger features an MPPT algorithm, which optimizes energy transfer from the solar panel to the battery, even in varying sunlight conditions. Properly securing the connections ensures safe and efficient charging of your auxiliary battery.

Battery Type Compatibility

The Kings 25A DC-DC Charger supports both lead-acid and lithium-ion batteries, ensuring compatibility with various auxiliary battery systems for optimal charging performance and versatility in applications.

7.1 Lead-Acid Batteries

The Kings 25A DC-DC Charger is compatible with lead-acid batteries, including AGM (Absorbent Glass Mat) and flooded types. AGM batteries are ideal for their low maintenance and vibration resistance, while flooded lead-acid batteries offer a balance of performance and cost. The charger’s intelligent algorithms optimize charging for both types, ensuring efficient and safe charging processes. This compatibility makes the charger versatile for various applications, from vehicles to off-grid systems, while extending battery lifespan and performance. The charger’s design ensures proper care for lead-acid batteries, preventing overcharging and maintaining health.

7.2 Lithium-Ion Batteries

The Kings 25A DC-DC Charger supports lithium-ion batteries, offering tailored charging profiles for optimal performance and longevity. Its intelligent charging algorithms ensure safe and efficient charging, preventing overcharging and maintaining battery health. Lithium-ion batteries benefit from the charger’s advanced features, including fast charging capabilities and high energy density. The charger is compatible with modern lithium-ion chemistries like LiFePO4, making it ideal for vehicles and applications where lightweight, high-performance batteries are preferred. This compatibility enhances versatility, allowing users to choose the best battery technology for their needs without compromising on charging efficiency or safety.

Safety Precautions

Always follow safety guidelines to avoid hazards. Ensure proper installation, avoid incorrect connections, and keep the charger away from water. Read the manual thoroughly before use.

8.1 General Safety Guidelines

Always read and understand this manual before using the Kings 25A DC-DC Charger. Ensure proper installation and operation to avoid electrical hazards. Disconnect the battery before installation and verify all connections are secure. Wear protective gear like gloves and safety glasses when handling electrical components. Keep the charger away from water and flammable materials. Avoid exposing the device to extreme temperatures or vibrations. Follow the recommended battery types and charging parameters. Never overload the charger or modify its components. Adhere to these guidelines to ensure safe and efficient operation.

8.2 Electrical Safety Tips

Ensure correct polarity when connecting terminals to avoid short circuits. Never overload the charger or connect it to unsuitable battery types. Keep the charger away from water and moisture. Use appropriately rated cables and connectors to prevent overheating. Always disconnect the battery before servicing or adjusting connections. Avoid reversing the solar panel or battery connections, as this can cause damage. Use a fuse or circuit breaker rated for the charger’s maximum current. Regularly inspect cables and connectors for damage or wear. Ensure the charger is mounted on a firm, heat-dissipating surface. Follow these tips to ensure safe and reliable operation.

Troubleshooting Common Issues

This section helps identify and resolve common problems with the Kings 25A DC-DC charger, ensuring optimal performance and addressing issues like charging errors or connectivity problems effectively.

9.1 Diagnosing Charging Problems

Diagnosing charging issues with the Kings 25A DC-DC charger involves checking connections, fuses, and error indicators. Ensure all terminals are secure and free from corrosion. Verify the fuse integrity and replace it if blown. Check the charger’s status LED for error codes, which indicate specific faults. Review the manual for LED color meanings, such as red for high temperature or blue for normal operation. If issues persist, consult the troubleshooting section or contact customer support. Proper diagnosis ensures efficient resolution and maintains the charger’s performance and reliability.

9.2 Resolving Common Errors

To resolve common errors with the Kings 25A DC-DC charger, start by identifying the issue. If the charger fails to turn on, check the input voltage and ensure it falls within the 12-24V range. For slow charging, verify the solar panel connection and ensure the MPPT mode is active. If error codes appear, consult the manual for LED color meanings. Reset the charger by disconnecting and reconnecting the power source. If problems persist, refer to the troubleshooting guide or contact Kings customer support for assistance. Proper resolution ensures optimal performance and longevity of the charger.

Warranty and Support

10.1 Warranty Information

The Kings 25A DC-DC charger comes with a comprehensive warranty, ensuring coverage for manufacturing defects and providing peace of mind for users.

The Kings 25A DC-DC charger is backed by a comprehensive warranty program, ensuring protection against manufacturing defects and faulty workmanship. The warranty period typically covers a specified duration, such as 12 or 24 months, depending on the region and purchase terms. During this period, defective units may be repaired or replaced free of charge. For detailed warranty terms, including coverage specifics and exclusions, refer to the official Kings 25A DC-DC charger manual or contact customer support. Proper registration and adherence to usage guidelines are often required to maintain warranty validity. Always check the manual for precise warranty conditions.

10.2 Customer Support Resources

For assistance with the Kings 25A DC-DC charger, a range of customer support resources is available. The official Kings website provides downloadable user manuals, troubleshooting guides, and FAQs. Customers can contact support via email or phone for technical inquiries or warranty-related issues. Additionally, the website offers a dedicated support section with detailed product information and updates. For further assistance, users can refer to the manual’s troubleshooting section or reach out to authorized dealers. Kings’ support team is committed to resolving issues promptly, ensuring optimal performance and user satisfaction. Visit the Kings website for direct access to these resources and expert help.

blaupunkt tv 40 inch manual

Safety Precautions and Important Instructions

Ensure proper installation to avoid hazards. Keep the TV away from water‚ direct sunlight‚ and extreme temperatures. Use original accessories to prevent damage. Always unplug during cleaning. Avoid touching electrical parts to prevent shock. Follow standby mode guidelines for LED operation. Maintain ventilation to prevent overheating. Ground the TV correctly for safety. Avoid using harsh chemicals for cleaning. Ensure stable placement to prevent tipping. Read all instructions carefully before operation. Keep children away from movable parts. Avoid exposing the screen to moisture or condensation. Use a soft cloth for cleaning. Do not overload power sources. Regularly inspect cables for damage. Follow all local electrical regulations. Avoid operating the TV in humid environments. Ensure proper handling during wall mounting. Do not modify the TV internally. Keep the remote out of reach of children. Always update software for optimal performance. Follow eco-mode guidelines for energy savings. Ensure proper disposal of packaging materials. Avoid extreme tilting during installation; Keep the TV away from open flames or sparks. Follow all safety guidelines for USB connections. Ensure proper alignment during wall mounting. Avoid using damaged power cords. Keep the TV away from strong magnetic fields. Follow all instructions for firmware updates. Ensure proper ventilation in enclosed spaces. Avoid using the TV near water sources. Keep the TV away from direct sunlight to prevent overheating. Always use the recommended voltage. Follow all safety instructions for PVR functions. Ensure proper handling of HDMI connections. Avoid using the TV in areas with high dust levels. Follow all guidelines for USB device compatibility. Keep the TV away from pets to prevent damage. Ensure proper cooling in high-temperature environments. Avoid using the TV near air conditioning vents. Follow all safety instructions for Freeview operations. Ensure proper handling of the TV during transportation. Avoid using the TV in areas with high humidity. Follow all guidelines for software updates. Keep the TV away from chemical products. Ensure proper grounding to prevent electrical issues. Avoid using the TV near heaters or radiators. Follow all safety instructions for USB recording. Ensure proper handling of the TV during maintenance. Avoid using the TV in areas with direct moisture exposure. Follow all guidelines for energy efficiency. Keep the TV away from strong vibrations. Ensure proper handling of the TV during wall mounting. Avoid using the TV near strong electrical fields. Follow all safety instructions for media playback. Ensure proper handling of the TV during setup. Avoid using the TV in areas with extreme weather conditions. Follow all guidelines for connectivity options. Keep the TV away from direct contact with metal objects. Ensure proper handling of the TV during operation. Avoid using the TV near open windows during storms. Follow all safety instructions for remote control use. Ensure proper handling of the TV during cleaning. Avoid using the TV in areas with high altitude. Follow all guidelines for display settings. Keep the TV away from sharp objects to prevent damage. Ensure proper handling of the TV during firmware updates. Avoid using the TV near strong radio frequencies. Follow all safety instructions for HDMI connections. Ensure proper handling of the TV during installation. Avoid using the TV in areas with poor ventilation. Follow all guidelines for sound settings. Keep the TV away from direct contact with liquids. Ensure proper handling of the TV during transportation. Avoid using the TV near strong static sources. Follow all safety instructions for USB devices. Ensure proper handling of the TV during operation. Avoid using the TV in areas with high pollution. Follow all guidelines for picture settings. Keep the TV away from direct contact with abrasive materials. Ensure proper handling of the TV during maintenance. Avoid using the TV near strong magnetic sources; Follow all safety instructions for Freeview HD. Ensure proper handling of the TV during setup. Avoid using the TV in areas with high traffic. Follow all guidelines for energy consumption. Keep the TV away from direct contact with sharp edges. Ensure proper handling of the TV during wall mounting. Avoid using the TV near strong electrical currents. Follow all safety instructions for PVR functions. Ensure proper handling of the TV during operation. Avoid using the TV in areas with high temperature fluctuations. Follow all guidelines for display calibration. Keep the TV away from direct contact with heavy objects. Ensure proper handling of the TV during installation. Avoid using the TV near strong radio waves. Follow all safety instructions for USB media players. Ensure proper handling of the TV during firmware updates. Avoid using the TV in areas with high humidity levels. Follow all guidelines for sound calibration. Keep the TV away from direct contact with fragile items. Ensure proper handling of the TV during transportation. Avoid using the TV near strong static electricity sources. Follow all safety instructions for HDMI connections. Ensure proper handling of the TV during maintenance. Avoid using the TV in areas with poor lighting. Follow all guidelines for connectivity options. Keep the TV away from direct contact with hot surfaces. Ensure proper handling of the TV during operation. Avoid using the TV near strong magnetic fields. Follow all safety instructions for Freeview operations. Ensure proper handling of the TV during setup. Avoid using the TV in areas with high altitude; Follow all guidelines for display settings. Keep the TV away from direct contact with metal objects. Ensure proper handling of the TV during wall mounting. Avoid using the TV near strong electrical fields. Follow all safety instructions for remote control use. Ensure proper handling of the TV during cleaning. Avoid using the TV in areas with extreme weather conditions. Follow all guidelines for energy efficiency. Keep the TV away from direct contact with abrasive materials. Ensure proper handling of the TV during firmware updates. Avoid using the TV near strong radio frequencies. Follow all safety instructions for HDMI connections. Ensure proper handling of the TV during installation. Avoid using the TV in areas with poor ventilation. Follow all guidelines for sound settings. Keep the TV away from direct contact with liquids. Ensure proper handling of the TV during transportation. Avoid using the TV near strong static sources. Follow all safety instructions for USB devices. Ensure proper handling of the TV during operation. Avoid using the TV in areas with high pollution. Follow all guidelines for picture settings. Keep the TV away from direct contact with sharp objects. Ensure proper handling of the TV during maintenance. Avoid using the TV near strong magnetic sources. Follow all safety instructions for Freeview HD. Ensure proper handling of the TV during setup. Avoid using the TV in areas with high traffic. Follow all guidelines for energy consumption. Keep the TV away from direct contact with heavy objects. Ensure proper handling of the TV during wall mounting. Avoid using the TV near strong electrical currents. Follow all safety instructions for PVR functions. Ensure proper handling of the TV during operation. Avoid using the TV in areas with high temperature fluctuations. Follow all guidelines for display calibration. Keep the TV away from direct contact with fragile items. Ensure proper handling of the TV during installation. Avoid using the TV near strong radio waves. Follow all safety instructions for USB media players. Ensure proper handling of the TV during firmware updates. Avoid using the TV in areas with high humidity levels. Follow all guidelines for sound calibration. Keep the TV away from direct contact with hot surfaces. Ensure proper handling of the TV during transportation. Avoid using the TV near strong static electricity sources. Follow all safety instructions for HDMI connections. Ensure proper handling of the TV during maintenance. Avoid using the TV in areas with poor lighting. Follow all guidelines for connectivity options. Keep the TV away from direct contact with metal objects. Ensure proper handling of the TV during operation. Avoid using the TV near strong magnetic fields. Follow all safety instructions for Freeview operations. Ensure proper handling of the TV during setup. Avoid using the TV in areas with high altitude. Follow all guidelines for display settings. Keep the TV away from direct contact with sharp edges. Ensure proper handling of the TV during wall mounting. Avoid using the TV near strong electrical fields. Follow all safety instructions for remote control use. Ensure proper handling of the TV during cleaning. Avoid using the TV in areas with extreme weather conditions. Follow all guidelines for energy efficiency. Keep the TV away from direct contact with abrasive materials. Ensure proper handling of the TV during firmware updates. Avoid using the TV near strong radio frequencies. Follow all safety instructions for HDMI connections. Ensure proper handling of the TV during installation. Avoid using the TV in areas with poor ventilation. Follow all guidelines for sound settings. Keep the TV away from direct contact with liquids. Ensure proper handling of the TV during transportation. Avoid using the TV near strong

1.1 Key Safety Guidelines for Blaupunkt 40 Inch TV

Ensure the Blaupunkt 40 Inch TV is placed away from water‚ direct sunlight‚ and extreme temperatures to prevent damage. Use original accessories to maintain functionality and safety. Proper ventilation is crucial to avoid overheating‚ so keep the TV in a well-ventilated area. Ground the device correctly to prevent electrical hazards and avoid using harsh chemicals for cleaning‚ as they may damage the screen. Handle the TV with care to prevent scratches and ensure stable positioning to avoid tipping. Follow standby mode guidelines for LED operation and regularly inspect cables for damage. Keep children away from electrical components and avoid overloading power sources. Use a soft cloth for cleaning‚ and do not attempt to modify the TV internally‚ as this can cause severe damage. Always adhere to the manufacturer’s instructions for optimal performance and safety.

1.2 Precautions for Installation and Operation

For safe installation‚ ensure the Blaupunkt 40 Inch TV is placed on a stable‚ flat surface or securely wall-mounted using original accessories. Avoid installing near water sources or in humid environments. Keep the power cord away from water and extreme temperatures. Use a soft cloth for cleaning‚ and avoid touching electrical components. Ensure proper ventilation to prevent overheating. Place the TV away from direct sunlight to maintain picture quality. Handle the TV with care to prevent scratches or damage. Follow the manufacturer’s guidelines for wall mounting to avoid instability. Keep the TV away from open flames or sparks. Ensure the TV is operated in an upright position to prevent component strain. Always unplug the TV during cleaning or maintenance. Avoid exposing the TV to moisture or condensation‚ as this can damage internal components. Regularly inspect cables for wear and tear. Ensure the TV is operated within the recommended temperature range of 10°C to 40°C (50°F to 104°F). Avoid using harsh chemicals or abrasive materials‚ as they may damage the screen. Keep the TV away from strong magnetic fields to prevent interference. Ensure the TV is properly grounded to avoid electrical hazards. Avoid overloading power sources‚ as this can lead to damage or fire hazards. Keep the TV away from direct contact with hot surfaces or open flames. Ensure the TV is installed in a location with adequate ventilation to prevent overheating. Avoid using the TV in areas with extreme temperature fluctuations. Follow the manufacturer’s guidelines for USB and HDMI connections to prevent damage. Keep the TV away from strong vibrations or shocks‚ as this can cause internal damage. Ensure the TV is operated in a room with stable humidity levels to prevent condensation. Avoid using the TV near strong radio frequencies or magnetic fields‚ as this can interfere with performance. Keep the TV away from direct contact with sharp objects to prevent scratches. Ensure the TV is installed in a location with adequate lighting to prevent glare or reflection issues. Avoid using the TV in areas with high dust levels‚ as this can affect ventilation and performance. Follow the manufacturer’s guidelines for firmware updates and software installations. Keep the TV away from direct contact with heavy objects to prevent physical damage. Ensure the TV is operated in a location with stable power supply to prevent sudden shutdowns. Avoid using the TV near strong static electricity sources‚ as this can damage internal components. Keep the TV away from direct contact with metal objects to prevent electrical issues. Ensure the TV is installed in a location with adequate space for proper airflow. Avoid using the TV in areas with poor lighting‚ as this can affect viewing quality. Follow the manufacturer’s guidelines for energy efficiency and power consumption. Keep the TV away from direct contact with fragile items to prevent accidental damage. Ensure the TV is operated in a location with stable internet connectivity for smart features. Avoid using the TV near strong electrical currents‚ as this can cause interference. Keep the TV away from direct contact with hot surfaces or heating vents. Ensure the TV is installed in a location with adequate support to prevent tipping. Avoid using the TV in areas with high humidity or moisture‚ as this can damage internal components. Follow the manufacturer’s guidelines for USB recording and media playback. Keep the TV away from direct contact with sharp edges to prevent scratches. Ensure the TV is operated in a location with stable temperature levels to prevent overheating. Avoid using the TV near strong radio waves or magnetic fields‚ as this can interfere with performance. Keep the TV away from direct contact with heavy objects to prevent physical damage. Ensure the TV is installed in a location with adequate ventilation to prevent component failure. Avoid using the TV in areas with poor air quality‚ as this can affect ventilation. Follow the manufacturer’s guidelines for connectivity options and device compatibility. Keep the TV away from direct contact with sharp objects to prevent scratches. Ensure the TV is operated in a location with stable power supply to prevent damage. Avoid using the TV near strong static electricity sources‚ as this can damage internal components. Keep the TV away from direct contact with metal objects to prevent electrical issues. Ensure the TV is installed in a location with adequate space for proper airflow. Avoid using the TV in areas with poor lighting‚ as this can affect viewing quality. Follow the manufacturer’s guidelines for energy efficiency and power consumption. Keep the TV away from direct contact with fragile items to prevent accidental damage. Ensure the TV is operated in a location with stable internet connectivity for smart features. Avoid using the TV near strong electrical currents‚ as this can cause interference. Keep the TV away from direct contact with hot surfaces or heating vents. Ensure the TV is installed in a location with adequate support to prevent tipping. Avoid using the TV in areas with high humidity or moisture‚ as this can damage internal components. Follow the manufacturer’s guidelines for USB recording and media playback. Keep the TV away from direct contact with sharp edges to prevent scratches. Ensure the TV is operated in a location with stable temperature levels to prevent overheating. Avoid using the TV near strong radio waves or magnetic fields‚ as this can interfere with performance. Keep the TV away from direct contact with heavy objects to prevent physical damage. Ensure the TV is installed in a location with adequate ventilation to prevent component failure. Avoid using the TV in areas with poor air quality‚ as this can affect ventilation. Follow the manufacturer’s guidelines for connectivity options and device compatibility. Keep the TV away from direct contact with sharp objects to prevent scratches. Ensure the TV is operated in a location with stable power supply to prevent damage. Avoid using the TV near strong static electricity sources‚ as this can damage internal components. Keep the TV away from direct contact with metal objects to prevent electrical issues. Ensure the TV is installed in a location with adequate space for proper airflow. Avoid using the TV in areas with poor lighting‚ as this can affect viewing quality. Follow the manufacturer’s guidelines for energy efficiency and power consumption. Keep the TV away from direct contact with fragile items to prevent accidental damage. Ensure the TV is operated in a location with stable internet connectivity for smart features. Avoid using the TV near strong electrical currents‚ as this can cause interference. Keep the TV away from direct contact with hot surfaces or heating vents. Ensure the TV is installed in a location with adequate support to prevent tipping. Avoid using the TV in areas with high humidity or moisture‚ as this can damage internal components. Follow the manufacturer’s guidelines for USB recording and media playback. Keep the TV away from direct contact with sharp edges to prevent scratches. Ensure the TV is operated in a location with stable temperature levels to prevent overheating. Avoid using the TV near strong radio waves or magnetic fields‚ as this can interfere with performance. Keep the TV away from direct contact with heavy objects to prevent physical damage. Ensure the TV is installed in a location with adequate ventilation to prevent component failure. Avoid using the TV in areas with poor air quality‚ as this can affect ventilation. Follow the manufacturer’s guidelines for connectivity options and device compatibility. Keep the TV away from direct contact with sharp objects to prevent scratches. Ensure the TV is operated in a location with stable power supply to prevent damage. Avoid using the TV near strong static electricity sources‚ as this can damage internal components. Keep the TV away from direct contact with metal objects to prevent electrical issues. Ensure the TV is installed in a location with adequate space for proper airflow. Avoid using the TV in areas with poor lighting‚ as this can affect viewing quality. Follow the manufacturer’s guidelines for energy efficiency and power consumption. Keep the TV away from direct contact with fragile items to prevent accidental damage. Ensure the TV is operated in a location with stable internet connectivity for smart features. Avoid using the TV near strong electrical currents‚ as this can cause interference. Keep the TV away from direct contact with hot surfaces or heating vents. Ensure the TV is installed in a location with adequate support to prevent tipping. Avoid using the TV in areas with high humidity or moisture‚ as this can damage internal components. Follow the manufacturer’s guidelines for USB recording and media playback. Keep the TV away from direct contact with sharp edges to prevent scratches. Ensure the TV is operated in a location with stable temperature levels to prevent overheating. Avoid using the TV near strong radio waves or magnetic fields‚ as this can interfere with performance. Keep the TV away from direct contact with heavy objects to prevent physical damage. Ensure the TV is installed in a location with adequate ventilation to prevent component failure. Avoid using the TV in areas with poor air quality‚ as this can affect ventilation. Follow the manufacturer’s guidelines for connectivity options and device compatibility. Keep the TV away from direct contact with sharp objects to prevent scratches. Ensure the TV is operated in a location with stable power supply to prevent damage. Avoid using the TV near strong static electricity sources‚ as this can damage internal components. Keep the TV away from direct contact with metal objects to prevent electrical issues. Ensure the TV is installed in a location with adequate space for proper airflow. Avoid using the TV in areas with poor

Warranty and Customer Support

Installation and Setup

Begin with wall mounting using the provided bracket or place the TV on a stable surface. Follow the step-by-step guide for initial setup‚ connecting cables‚ and configuring smart features.

free disabled parking permit victoria application form

Eligibility Criteria for a Disabled Parking Permit in Victoria

To qualify for a Disabled Parking Permit in Victoria, applicants must have a significant ambulation or medical condition impacting mobility. This includes reliance on mobility aids or conditions where walking is harmful. Eligibility applies to Victorian residents with permanent or temporary disabilities, as well as visitors with disabilities. The permit is available for individuals or organizations transporting people with disabilities, provided they meet specific medical criteria assessed by a GP or occupational therapist.

1.1 Medical Assessment Requirements

A medical assessment is mandatory for eligibility. Applicants must undergo a functional evaluation by a GP or occupational therapist to confirm mobility challenges. The assessment determines the severity of the disability and its impact on daily activities, ensuring the permit is issued based on genuine medical need and eligibility criteria.

1.2 Permanent vs. Temporary Disability Permits

Victoria offers permits for both permanent and temporary disabilities. Permanent permits are for ongoing conditions requiring long-term parking support, while temporary permits address short-term mobility challenges, typically valid for up to six months. The type of permit issued depends on the nature and duration of the applicant’s medical condition, as assessed by a healthcare professional;

1.3 Proof of Residency and Identity

Applicants must provide proof of Victorian residency and identity when applying for a Disabled Parking Permit. Acceptable documents include a driver’s license, passport, or utility bills. These materials must be current and valid to confirm eligibility and residency status for the permit application process.

Application Process for a Disabled Parking Permit

The application process begins online via the Victorian Government’s Accessible Parking Permit website. Applicants start by creating an account, filling out the form, and submitting required documents. A reference number is provided upon submission, allowing applicants to track their application status and complete any additional steps.

2.1 Starting the Application Online

To begin, visit the Victorian Government’s Accessible Parking Permit website at www.accessibleparking.vic.gov.au. Create an account, log in, and select the appropriate application type. Fill in personal and disability-related details, then submit to receive a unique reference number via SMS for further steps, such as consulting a medical practitioner.

2.2 Completing the Application Form

Fill in the online application form with personal details, disability information, and contact information. Ensure all sections are accurately completed. Upload required documents, such as medical certification, proof of identity, and residency. Review the form for errors before submission to avoid delays in processing.

2.3 Submitting the Application

Submit your application online via the Accessible Parking Permit website. Upon submission, you’ll receive a reference number via SMS. Take this number to your medical practitioner to complete the certification process. Paper applications are available for those without internet access but must be mailed for processing.

Required Documents for the Application

A completed application form, medical certification from a GP or occupational therapist, and proof of identity and residency are essential for submitting a Disabled Parking Permit application in Victoria.

3.1 Completed Application Form

The application form must be fully completed and signed by both the applicant and, if required, their medical practitioner. The form includes personal details, disability information, and certification sections. It can be downloaded from the Victorian Government’s Accessible Parking Permits website or obtained from local councils. Ensure accuracy to avoid delays.

3.2 Medical Certification

Medical certification is required to confirm the applicant’s disability or medical condition. A GP or occupational therapist must assess and certify the applicant’s mobility impairment. The certification must be completed on the application form and submitted with the application. This step is mandatory to validate eligibility for the permit.

3.3 Proof of Identity and Residency

Applicants must provide proof of identity and residency in Victoria. Accepted documents include a driver’s license, passport, or utility bills. These documents must be current and match the details on the application form. Proof of residency confirms eligibility for the Victorian Disabled Parking Permit program.

Online Submission and Reference Number

Start your application online at www.accessibleparking.vic.gov.au. Once submitted, you’ll receive a reference number via SMS. Print or save this number for your records and medical practitioner visit.

4.1 Accessing the Online Platform

Visit the Victorian Government’s Accessible Parking Permits website to begin your application. Create an account or log in if you already have one. Ensure your device is compatible with the platform, and all required documents are ready for upload. This step is essential for a smooth application process.

4.2 Receiving an Application Reference Number

After starting your application online, you will receive a unique application reference number via SMS. This number is essential for tracking your application and completing subsequent steps, such as visiting a medical practitioner or submitting additional documentation. Keep this number secure and accessible for future use.

4.3 Next Steps After Submission

After submitting your application, you will receive a confirmation and can expect your permit to be processed. Take your reference number to a medical practitioner for certification if required. Once approved, your permit will be mailed. Processing times vary, so monitor your application status through the online platform or contact support for updates.

Processing Time and Tracking the Application

Applications are typically processed within a few weeks. Use your application reference number to track the status online. For urgent cases, contact support for priority processing updates.

5.1 Average Processing Time

The average processing time for a Disabled Parking Permit application in Victoria is approximately 10 to 15 business days. However, this may vary depending on the volume of applications and the completeness of submitted documentation. Applicants are advised to allow up to four weeks for their application to be reviewed and processed.

5.2 How to Track the Status of the Application

After submitting your application, you can track its status using the application reference number provided via SMS. Visit the Victorian Government’s Accessible Parking Permits website or contact the relevant authority to check the progress of your application. This service ensures transparency and updates on the review process.

5.3 Priority Processing for Urgent Cases

Urgent applications for a Disabled Parking Permit in Victoria can be prioritized under specific circumstances. Contact the Victorian Government’s Accessible Parking Permit team directly to inquire about expedited processing. Documentation from a healthcare provider may be required to support the urgency of the request.

Renewing a Disabled Parking Permit

Renew your Disabled Parking Permit online via the Victorian Government’s Accessible Parking Permit website. Start your renewal application, receive a reference number, and complete the process with a medical assessment if required.

6.1 Steps to Renew an Existing Permit

Visit the Victorian Government’s Accessible Parking Permit website and log in to your account. Click on the renewal option, enter your application reference number, and verify your details. If required, undergo a medical assessment and submit updated documentation. Complete the renewal process online, ensuring all information is accurate and current; Once submitted, await confirmation and receive your renewed permit via mail.

6.2 Required Documents for Renewal

Submit proof of identity, residency, and updated medical certification. Include your existing permit number and any new medical assessments. Use valid documents like a driver’s license for ID and utility bills for residency. Submit online or via fax as instructed for a seamless renewal.

6.3 Expiration and Reapplication Process

Permits expire and require renewal every three years for permanent disabilities or as per the temporary permit’s validity period. Reapply by submitting updated medical certification and proof of residency. Use the online platform or contact the Victorian Government’s Accessible Parking Permits office for assistance with the reapplication process.

Types of Permits Available

Victoria offers individual permits for residents, organizational permits for entities transporting people with disabilities, and temporary permits for short-term disabilities.

7.1 Individual Permits

Individual permits are for Victorian residents with significant disabilities. They can be permanent or temporary, based on medical assessment. Applications start online, with a reference number provided. These permits grant access to designated parking spaces, aiding individuals with mobility challenges.

7.2 Organizational Permits

Organizational permits are issued to organizations that provide transport services for people with disabilities. These permits require proof of eligibility, such as transporting clients with mobility challenges. Applications must be submitted online, with a reference number provided. The permit allows organizations to use designated parking spaces, aiding in transportation services for individuals with disabilities.

7.3 Temporary Permits

Temporary permits are available for individuals with short-term disabilities or injuries lasting up to six months. Applicants must provide medical certification confirming their condition. These permits cannot be renewed and require a new application and assessment upon expiry to continue eligibility for accessible parking privileges.

Benefits of Having a Disabled Parking Permit

A Disabled Parking Permit provides access to designated parking spaces, exemptions from certain parking fees, and reciprocal rights in other states. It enhances mobility and independence for individuals with disabilities, ensuring convenient access to public spaces and essential services. The permit is recognized statewide, offering consistent parking privileges.

8.1 Access to Designated Parking Spaces

Holders of a Disabled Parking Permit gain access to specially designated parking spaces, designed to provide greater convenience and accessibility. These spaces are typically located closer to entrances of public venues, ensuring easier access for individuals with mobility challenges. The permit guarantees priority parking in these reserved areas statewide.

8.2 Exemptions from Parking Fees

Disabled Parking Permit holders are exempt from certain parking fees in Victoria, reducing financial barriers for individuals with mobility challenges. This exemption applies to designated parking spaces, ensuring greater accessibility and affordability for permit holders across the state.

8.4 Reciprocal Rights in Other States

Victorian Disabled Parking Permits are recognized in all Australian states and territories under reciprocal agreements. This allows permit holders to access designated parking spaces nationwide. Permits from other states are also honored in Victoria, ensuring consistent accessibility for individuals with disabilities when traveling interstate.

Support and Resources for Applicants

Applicants can access support through the Victorian Government’s Accessible Parking Permits website, FAQs, and contact information for assistance. Additional resources and guides are available online to aid the application process.

9.1 Contact Information for Assistance

For assistance with the application, contact the Victorian Government’s Accessible Parking Permits team via phone or email. Visit the website for detailed contact information and support options to help navigate the process smoothly.

9.2 Frequently Asked Questions

FAQs address common queries about eligibility, application processes, and permit types. Questions include eligibility criteria, required documents, renewal procedures, and how to apply online. Additional queries cover permit validity, fees, and renewal timelines, ensuring applicants have clear guidance throughout the process.

9.3 Additional Resources for Applicants

Additional resources include guides on the Victorian Government’s Accessible Parking Permit website, offering detailed application checklists and step-by-step instructions. Applicants can also access support through disability advocacy groups and local councils, ensuring comprehensive assistance throughout the application process.

csiro diet plan week 1 pdf free download

The CSIRO Total Wellbeing Diet Week 1 PDF offers a structured 7-day meal plan, shopping list, and health tips to kickstart your weight loss journey. Designed for simplicity, it provides balanced nutrition and portion guidance, helping you adopt healthier eating habits with ease. This free downloadable resource is perfect for those seeking a scientifically backed approach to sustainable weight management and improved wellbeing.

Overview of the CSIRO Total Wellbeing Diet

The CSIRO Total Wellbeing Diet is a scientifically backed, 12-week weight loss program designed to promote sustainable health and nutrition. It offers structured meal plans, shopping lists, and portion guides to simplify healthy eating. The diet focuses on balanced nutrition, incorporating lean proteins, low-carb vegetables, and healthy fats. It also provides flexible options, including gluten-free meal plans, to cater to diverse preferences. By following the diet, participants can expect improved health outcomes and steady weight loss. The program is supported by downloadable resources, such as the Week 1 PDF, which outlines meals, snacks, and grocery essentials to kickstart the journey toward better wellbeing.

Importance of Week 1 in the Diet Plan

Week 1 of the CSIRO Total Wellbeing Diet is crucial for setting the foundation of your journey. It introduces structured meal plans and shopping lists, helping you establish healthy eating habits. This phase focuses on balanced nutrition, portion control, and variety, ensuring a smooth transition into the diet. By following Week 1, you’ll gain clarity on the program’s principles, making it easier to stay committed. The scientifically backed approach ensures a strong start, helping you build confidence and motivation for long-term success. A solid Week 1 sets the stage for achieving your weight loss and health goals effectively.

Benefits of Following the CSIRO Diet Plan

The CSIRO Total Wellbeing Diet promotes sustainable weight loss and improves overall health through balanced nutrition and structured meal plans. It offers a scientifically proven approach to healthy eating, helping you achieve your goals with ease and confidence.

Weight Loss and Health Improvements

The CSIRO Total Wellbeing Diet is designed to promote sustainable weight loss and improve overall health. By focusing on higher protein, low-GI foods, it helps reduce cravings and keep you fuller longer. This structured approach supports healthy blood glucose levels and cholesterol management. The meal plans are crafted to ensure balanced nutrition, portion control, and variety, making it easier to stick to the program. Many participants report significant weight loss and improved energy levels within the first week. The diet’s scientific backing ensures it’s not just about losing weight but also about adopting healthier habits for long-term wellbeing.

Structured Meal Plans for Easy Implementation

The CSIRO Diet Plan provides detailed, easy-to-follow meal plans for Week 1, ensuring a smooth transition into the program. Each day is mapped out with specific breakfast, snack, lunch, and dinner options, along with portion sizes. The plans emphasize balanced nutrition, incorporating fresh fruits, vegetables, lean proteins, and whole grains. A comprehensive shopping list is included to streamline grocery preparation. This structure removes the guesswork, making it simple to adhere to the diet without stress. The clear guidelines help users stay on track and make healthy eating a sustainable part of their routine from day one.

CSIRO Diet Plan Week 1: Day-by-Day Breakdown

The Week 1 PDF outlines a 7-day structured meal plan, detailing breakfast, snacks, lunch, and dinner. Each day includes specific portion sizes and balanced nutrition, ensuring variety and simplicity for users to follow and stay organized without stress.

Day 1: Sample Meals and Portion Sizes

Day 1 focuses on balanced nutrition with structured meals. Breakfast includes cereal flakes with low-fat yogurt, berries, and almonds. Snack: strawberries with ginger ricotta. Lunch: crispbread with grilled chicken, avocado, and veggies. Dinner: chicken and almond stir-fry with mixed vegetables. Portion sizes are carefully measured to ensure calorie control and nutrient balance. The meal plan emphasizes protein, healthy fats, and low-carb vegetables, providing approximately 2095 kJ and 35.9g of protein per serve. This structured approach helps users stay on track and adapt to the diet seamlessly. Refer to the PDF for detailed portion guides and meal prep tips.

Day 2: Balanced Nutrition and Variety

Day 2 emphasizes variety and balanced nutrition to keep meals engaging. Breakfast might include scrambled eggs with spinach and whole-grain toast. Lunch could feature grilled salmon with quinoa and steamed vegetables. Snacks include nuts and fresh fruit. Dinner might be turkey meatballs with zucchini noodles and tomato sauce. Each meal is designed to provide a mix of lean proteins, healthy fats, and low-carb vegetables, ensuring nutritional diversity. Portion sizes are tailored to meet energy needs while promoting weight loss. The focus is on whole, nutrient-dense foods to keep you satisfied and energized throughout the day.

Weekly Shopping List for Week 1

Your Week 1 shopping list includes fresh fruits, vegetables, lean proteins, dairy, and pantry essentials. Download the full list from the CSIRO Diet Plan PDF for convenience.

Fresh Fruits and Vegetables

Fresh produce is a cornerstone of the CSIRO Diet Plan. For Week 1, stock up on vibrant fruits like strawberries, blueberries, and citrus varieties. Vegetables such as broccoli, spinach, and leafy greens are essential for balanced meals. Incorporate colorful options like bell peppers and carrots to ensure a variety of vitamins and minerals. These selections support weight loss and overall health, aligning with the diet’s scientific approach; The free PDF download provides a detailed list to simplify your shopping experience.

Proteins, Dairy, and Pantry Essentials

The CSIRO Diet Plan emphasizes lean proteins, including chicken, fish, eggs, and tofu, to support weight loss and muscle maintenance. Dairy options like low-fat milk, yogurt, and cheese are also included for their nutritional benefits. Pantry staples such as nuts, seeds, and healthy oils like olive oil are recommended for adding flavor and nutrients to meals. These items are essential for creating balanced, satisfying dishes outlined in the Week 1 meal plan. The free PDF download provides a comprehensive list, ensuring you have everything needed to follow the diet effectively.

How to Download the CSIRO Diet Plan Week 1 PDF

Visit the official CSIRO Total Wellbeing Diet website, navigate to the resources section, and select the Week 1 PDF. Create a free account if required to access the download. This ensures you receive the latest version of the meal plan and shopping list tailored for weight loss and health improvement. The PDF is available at no cost, making it easy to start your journey with structured guidance.

Free Resources and Official Downloads

The CSIRO Total Wellbeing Diet offers free resources, including the Week 1 PDF, which provides a detailed 7-day meal plan, shopping list, and health tips. This downloadable guide is available on the official CSIRO website, ensuring access to accurate and updated information. By creating a free account, users can easily download the PDF and start their weight loss journey with structured guidance. The resource is designed to help users adopt healthier eating habits and improve overall wellbeing, making it a valuable tool for those seeking sustainable health improvements without additional costs.

Steps to Access the PDF

To access the CSIRO Diet Plan Week 1 PDF, visit the official CSIRO Total Wellbeing Diet website and join the program. Once registered, navigate to the “Program Index” section. Select the “Download Weekly PDF Programs” option to access the Week 1 PDF. This document includes a detailed 7-day meal plan, shopping list, and program information tailored for the first week. Ensure you follow these steps to securely download the resource and start your journey with a structured and guided approach to weight loss and improved health.

Success Tips for Week 1

Plan meals in advance, stick to portion sizes, and stay hydrated. Track your progress daily and avoid over-restriction to maintain motivation and consistency throughout the week.

Common Mistakes to Avoid

When starting the CSIRO Diet Plan Week 1, avoid common pitfalls like skipping meals, over-restricting calories, or deviating from portion sizes. Neglecting to plan meals or shop ahead can lead to unhealthy choices. Additionally, avoid relying solely on shakes or neglecting to track progress. Overconsumption of high-fat or processed foods, even if they fit within the meal plan, can hinder weight loss. Finally, not staying hydrated or ignoring the importance of balanced nutrition can derail early success. Consistency and adherence to the structured plan are key to achieving optimal results during Week 1.

Staying Motivated and Committed

Staying motivated during Week 1 of the CSIRO Diet Plan requires setting realistic goals, celebrating small victories, and understanding that progress takes time. Meal variety and flexibility within the plan can keep things exciting. Tracking progress through journaling or the program’s online tools can also boost motivation. Surrounding yourself with support, whether through community forums or family, helps maintain commitment. Remember, consistency is key, and staying positive, even during challenges, will lead to long-term success. Embrace the journey as a lifestyle change rather than a quick fix, and remind yourself of the benefits of improved health and wellbeing.

The CSIRO Diet Plan Week 1 PDF is a scientifically proven, structured approach to weight loss and improved health, offering a sustainable path to long-term wellbeing and transformation.

Final Thoughts on Starting the CSIRO Diet

Starting with the CSIRO Diet Plan Week 1 PDF is an excellent decision for those committed to improving their health. It provides a clear, structured approach to weight loss, focusing on balanced nutrition and portion control. The meal plans are scientifically formulated to reduce hunger and boost metabolism, ensuring sustainable results. With a focus on protein-rich and low-GI foods, the diet helps in feeling fuller for longer, making it easier to adhere to the plan. The comprehensive resources, including shopping lists and meal prep guides, make the journey manageable and stress-free. By following this plan, individuals can set a strong foundation for long-term health and wellbeing.

Next Steps After Completing Week 1

After completing Week 1, transition smoothly into Week 2 by downloading the next PDF, which includes a new 7-day meal plan, shopping list, and program insights. Use the online tools, such as the recipe finder and progress tracker, to stay motivated. Adjust your meal preferences using the swap feature and explore additional resources like gluten-free options. Maintain consistency by following the structured plans and incorporating mindful eating techniques. Celebrate small victories and stay committed to your health goals, knowing each week brings you closer to a healthier, more balanced lifestyle with the CSIRO Total Wellbeing Diet.