Monthly Archives: September 2024

round mirror size guide

A round mirror can enhance any room’s aesthetics, but choosing the right size is crucial. This guide helps you select the perfect diameter for your space, ensuring harmony and functionality.

Importance of Choosing the Right Size for Your Space

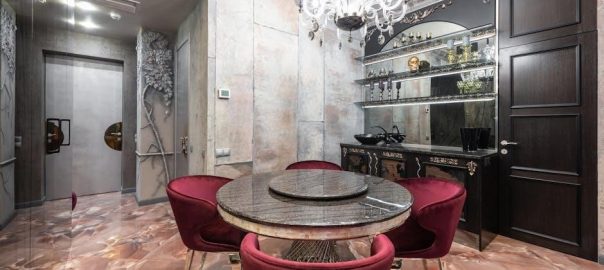
Selecting the appropriate round mirror size ensures balance and harmony in your room. A mirror that is too large can overwhelm the space, while one that is too small may lack impact. The right size enhances lighting, creates the illusion of a larger area, and complements surrounding decor. For bathrooms, a mirror should typically be 70-80% of the vanity’s width to maintain proportion. In other areas, consider the wall size and furniture scale to avoid overpowering the room. Proper sizing ensures functionality and aesthetic appeal, making it a crucial step in interior design. A well-chosen round mirror can elevate your space, reflecting light and adding style effortlessly.

Understanding Round Mirror Basics

Round mirrors are measured by diameter, offering versatility in styles like framed, frameless, or decorative. Their circular shape enhances spaces by reflecting light and creating a sense of openness.

How Round Mirror Size is Measured

Measuring a round mirror involves determining its diameter, which is the straight-line distance across the mirror’s face. This measurement ensures the mirror fits seamlessly into your space.

Common Shapes and Styles of Round Mirrors

Round mirrors come in various shapes and styles, offering versatility for different décors. They are typically circular, but some feature ornate frames or unique designs, adding aesthetic appeal to any room.

Round Mirror Size Chart

A round mirror size chart categorizes diameters into small (24-30″), medium (31-45″), and large (46″+), helping you choose the perfect fit for your space and style needs.

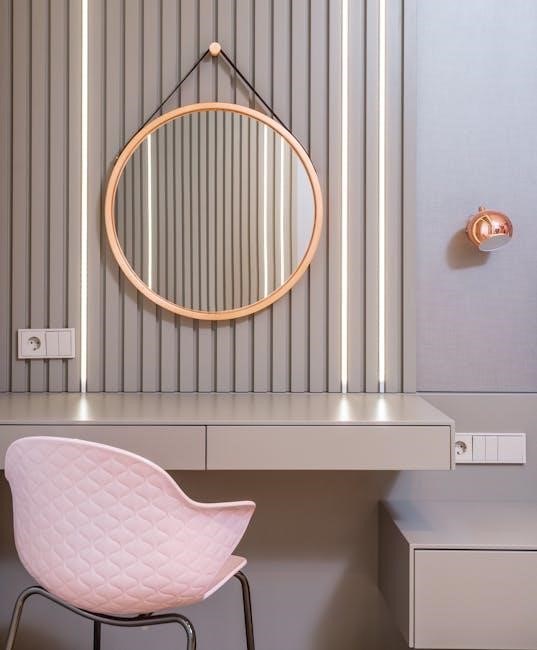
Small Round Mirrors (24-30 inches)

Small round mirrors, ranging from 24 to 30 inches in diameter, are ideal for compact spaces or as accent pieces. They work well in bathrooms, hallways, or bedrooms, adding a touch of elegance without overwhelming the room. These mirrors are perfect for smaller vanities or as part of a decorative wall arrangement; Their modest size makes them versatile for creating a balanced look. For instance, a 24-inch mirror can complement a single-sink vanity, while a 30-inch mirror offers slightly more visibility. When choosing, consider the room’s proportions and the desired aesthetic impact. Frames in various styles, from modern metal to rustic wood, can enhance their appeal. Measure your space carefully to ensure the mirror fits seamlessly, whether hung alone or paired with others for a unique design statement.

Medium Round Mirrors (31-45 inches)

Medium round mirrors, spanning 31 to 45 inches in diameter, strike a balance between elegance and functionality. They are well-suited for standard-sized bathrooms, offering ample visibility while maintaining a sleek appearance. A 36-inch mirror, for example, pairs nicely with a double-sink vanity, creating a harmonious look. These mirrors are also versatile for living rooms or entryways, serving as a focal point or complementing existing decor. Frames in materials like brushed nickel or gold can add sophistication; When selecting, ensure the mirror’s size aligns with the room’s proportions, typically covering 70-80% of the vanity’s width for optimal balance. Proper placement enhances light reflection, making the space feel larger. Medium round mirrors are a practical choice for those seeking both style and utility in their interior design.

Large Round Mirrors (46 inches and above)

Larger round mirrors, measuring 46 inches or more, are perfect for grand spaces or creating a striking focal point. These mirrors are ideal for expansive bathrooms, where they can complement double or triple vanities, adding a luxurious touch. A 48-inch mirror, for instance, can cover the width of a large vanity, ensuring ample visibility while enhancing the room’s ambiance. In living areas, oversized round mirrors can serve as a decorative centerpiece, reflecting light and creating the illusion of a larger space. Frames in bold finishes like gold or black can elevate their aesthetic appeal. When choosing, consider the room’s proportions to avoid overwhelming the area. Proper sizing ensures functionality and style, making large round mirrors a sophisticated choice for modern interiors seeking a dramatic yet elegant statement piece.

Choosing the Right Size for Your Vanity

Choosing the right mirror size for your vanity involves measuring its width and ensuring fit. A mirror should fit the sink and be 70-80% of the vanity’s width.

Measuring Your Vanity for the Perfect Fit

Measuring your vanity accurately is essential for selecting the right round mirror size. Start by measuring the width of your vanity sink or countertop. A good rule of thumb is to choose a mirror that is 70-80% of the vanity’s width to create balance. Ensure the mirror is at least as wide as the sink to maintain harmony. If your vanity has double sinks, measure the total width of the area you want the mirror to cover. Also, consider the height of the wall where the mirror will hang, leaving space above the sink for lighting or decor. Use a tape measure to get precise dimensions and note the wall’s dimensions to avoid overcrowding. This ensures the mirror complements the space without overpowering it. Proper measurement guarantees a seamless fit and aesthetic appeal.

Proportion Guidelines for Bathroom Mirrors

Proportion is key when selecting a round mirror for your bathroom. A mirror should complement the vanity and overall space without overwhelming it. Aim for the mirror to be 70-80% of the vanity’s width, creating a balanced look. For example, a 36-inch wide vanity pairs well with a 28-30 inch mirror. If your vanity is wider, say 48 inches, a 38-40 inch mirror is ideal. Additionally, consider the height of the ceiling; larger mirrors can make the room feel taller. Ensure the mirror is at least as wide as the sink basin to maintain harmony. Avoid mirrors that are too small, as they can make the space feel disjointed. Proper proportions enhance functionality and aesthetics, ensuring your bathroom feels cohesive and polished. Always measure carefully to achieve the perfect fit for your round mirror.

Round Mirror Trends

Round mirrors are a top trend in 2025, with the REFLECT collection by Julie Brandt offering stylish options in various sizes, featuring modern metal frames and designs.

Popular Sizes and Designs in 2025

In 2025, round mirrors continue to dominate home decor trends, offering versatility and elegance. Popular sizes range from 24 inches for compact spaces to over 48 inches for statement pieces. Designs feature sleek metal frames, such as gold and black finishes, adding a modern touch. The REFLECT collection by Julie Brandt for BRANDT Copenhagen is a standout, available in round and rectangular shapes. These mirrors are not just functional but serve as decorative focal points, enhancing rooms like bathrooms, hallways, and living areas. With a focus on proportion, they are designed to complement vanity widths, typically between 70-80%, ensuring a balanced look. Whether used as an accent or a central feature, round mirrors in 2025 blend seamlessly with contemporary interiors, offering both style and practicality.

honeywell 9000 installation manual

Welcome to the Honeywell 9000 Installation Manual‚ your guide to installing and configuring the Honeywell Wi-Fi 9000 Color Touchscreen Thermostat․ This manual provides step-by-step instructions for a seamless setup‚ ensuring optimal performance and smart home integration․

1․1 Overview of Honeywell 9000 Thermostat

The Honeywell 9000 Thermostat is a Wi-Fi-enabled‚ color touchscreen device designed for smart home integration․ It offers advanced features like scheduling‚ energy-saving modes‚ and remote access via the Honeywell Home app․ With its intuitive interface and compatibility with various HVAC systems‚ this thermostat provides precise temperature control and enhances home comfort․ Its sleek design and user-friendly navigation make it a popular choice for modern households seeking efficient climate management solutions;

1․2 Key Features and Benefits

The Honeywell 9000 Thermostat features a stunning color touchscreen that simplifies temperature control․ Its sleek design complements any home decor while offering advanced functionalities․ The thermostat’s intuitive interface allows for easy navigation of features like scheduling and energy-saving modes․ This combination of style and functionality makes it a preferred choice for users seeking both aesthetic appeal and technological advancement․

System Requirements and Compatibility

The Honeywell 9000 Thermostat is compatible with standard HVAC systems‚ requiring a reliable internet connection and adherence to technical specifications for optimal performance and smart integration․

2․1 Compatibility with HVAC Systems

The Honeywell 9000 Thermostat is designed to work with most standard HVAC systems‚ including conventional heating‚ cooling‚ and heat pump configurations․ It supports single-stage‚ multi-stage‚ and dual-fuel systems‚ ensuring compatibility with a wide range of setups․

For optimal performance‚ ensure your HVAC system meets the thermostat’s technical requirements․ Always verify system specifications before installation to guarantee seamless integration and reliable operation․

2․2 Technical Specifications and Requirements

The Honeywell 9000 Thermostat operates on 24V AC power‚ requiring a common wire (C-wire) for consistent operation․ It supports single-stage‚ multi-stage‚ and heat pump systems‚ with a 1-2-1 configuration․ The thermostat is compatible with most standard HVAC systems and works with both conventional and heat pump setups․ Ensure your system meets these requirements for proper functionality․

The thermostat features a high-resolution touchscreen display and supports Wi-Fi connectivity for remote access․ It is designed to work with Honeywell’s Total Connect Comfort platform‚ enabling smart home integration and energy management․ Always verify system compatibility before installation to ensure optimal performance․

Pre-Installation Steps

Before installation‚ ensure power is disconnected from your HVAC system․ Gather all necessary tools and materials‚ and review safety precautions to avoid electrical hazards․

3․1 Tools and Materials Needed

To install the Honeywell 9000 thermostat‚ you will need a screwdriver‚ pliers‚ wire strippers‚ and a voltage tester․ Ensure you have the thermostat unit‚ mounting hardware‚ and wiring connectors․ Additional materials like wall anchors or spacers may be required depending on your wall type․ Always refer to the included hardware list for specific components to ensure a smooth installation process․

3․2 Safety Precautions and Power Shutdown

Before starting the installation‚ disconnect the power supply to your HVAC system at the circuit breaker or fuse box․ Verify the power is off using a voltage tester to ensure safety․ Avoid damaging wiring or components․ If replacing an old thermostat‚ handle mercury-containing parts carefully․ Wear protective gloves and eyewear․ Follow all safety guidelines to prevent injuries or system damage during the process․

Installation Process

The Honeywell 9000 installation involves mounting the thermostat‚ connecting wires‚ and powering on․ Follow step-by-step instructions for a smooth and efficient setup process ensuring success․

4․1 Mounting the Thermostat

Mounting the Honeywell 9000 thermostat begins with installing the wall plate․ Ensure the surface is level and clean․ Use the provided screws or anchors for secure placement․ Align the thermostat properly to avoid tilting․ Gently snap the thermostat onto the wall plate until it clicks․ Verify stability and ensure all wires are neatly organized․ Proper mounting ensures accurate temperature sensing and smooth operation of the device․

4․2 Connecting Wires and Terminals

Before connecting wires‚ ensure the power to your HVAC system is turned off․ Use the wire labels provided to identify each terminal․ Match the wires to the corresponding terminals on the Honeywell 9000 thermostat‚ ensuring secure connections․ Refer to the wiring diagram for specific configurations․ Tighten all terminals firmly․ Double-check connections to avoid errors․ Once connected‚ restore power and test the system to ensure proper functionality․

4․3 Powering On and Initial Setup

After connecting the wires‚ restore power to your HVAC system․ The Honeywell 9000 thermostat will power on automatically․ Follow the on-screen prompts to complete the initial setup․ Navigate through the menu to set your preferred language‚ location‚ and system type․ Ensure the thermostat detects your HVAC equipment correctly․ Once initial setup is complete‚ the thermostat is ready for Wi-Fi configuration and advanced feature activation․ Refer to the next section for detailed configuration steps․

Configuration and Setup

Welcome to the configuration and setup section․ Follow the step-by-step guide to customize your Honeywell 9000 thermostat‚ including preferences‚ schedules‚ and smart home integrations for optimal performance․

5․1 Wi-Fi Network Configuration

To configure the Wi-Fi network on your Honeywell 9000 thermostat‚ navigate to the menu and select Wi-Fi Setup․ Choose your network from the list‚ enter the password‚ and wait for confirmation․ Ensure your router is compatible and within range․ If issues arise‚ restart the thermostat and router or refer to the digital setup guide included with your device for troubleshooting tips․

5․2 Registering the Thermostat Online

After successful Wi-Fi setup‚ register your Honeywell 9000 thermostat online to access advanced features․ Visit the Honeywell Total Connect Comfort portal and create an account․ Link your thermostat to your account by entering the unique device ID found in the thermostat’s menu․ Registration enables remote access‚ energy monitoring‚ and software updates‚ ensuring optimal performance and smart home integration․

Troubleshooting Common Issues

This section addresses common issues like connectivity problems and display errors‚ providing solutions such as resetting the thermostat or checking wiring for proper connections․

6․1 Common Installation Problems and Solutions

Common issues during installation include incorrect wiring connections‚ power supply problems‚ or thermostat display malfunctions․ Ensure all wires are securely connected to the correct terminals․ Verify that the power is off before starting installation to avoid electrical hazards․ If the display does not turn on‚ check the circuit breaker or fuse․ For connectivity issues‚ reset the thermostat by removing batteries or pressing the reset button․ Refer to the wiring diagram for guidance․

6․2 Resetting the Thermostat to Factory Settings

To reset the Honeywell 9000 thermostat to factory settings‚ press and hold the “Menu” button for 10 seconds until the screen goes blank․ Release the button and wait for the thermostat to restart․ This process will erase all custom settings‚ returning the device to its default configuration․ Ensure all wiring is correct before restarting to avoid configuration errors during the reset process․

Advanced Features and Customization

Explore advanced features like scheduling‚ energy-saving modes‚ remote access‚ and smart home integration․ Customize your Honeywell 9000 thermostat for enhanced comfort and energy efficiency easily․

7․1 Scheduling and Energy-Saving Modes

The Honeywell 9000 thermostat offers advanced scheduling options‚ allowing you to create custom temperature settings for different times of the day․ Energy-saving modes‚ such as Eco mode‚ optimize energy usage by adjusting temperatures when you’re away or sleeping․ These features can be programmed manually or through the app‚ ensuring maximum comfort while reducing energy consumption․ Customize your schedule to align with your lifestyle and save on utility bills effortlessly․

7․2 Remote Access and Smart Home Integration

The Honeywell 9000 thermostat supports remote access through the Honeywell Home app‚ allowing you to control temperatures‚ schedules‚ and energy usage from anywhere․ It seamlessly integrates with smart home systems like Amazon Alexa and Google Assistant‚ enabling voice commands and enhanced automation․ This integration ensures convenience‚ efficiency‚ and compatibility with your smart home ecosystem‚ making it easy to manage your comfort settings remotely․

Maintenance and Support

Regularly clean the thermostat and ensure software updates are installed․ For issues‚ refer to the troubleshooting guide or contact Honeywell support for assistance and resources․

8․1 Regular Maintenance Tips

Regular maintenance ensures optimal performance of your Honeywell 9000 thermostat․ Clean the touchscreen periodically with a soft cloth to remove dust and fingerprints․ Check and update the software regularly for the latest features and security patches․ Inspect the wiring connections to prevent loose contacts‚ and ensure proper ventilation around the device․ Replace batteries (if applicable) as indicated by low-battery alerts․ Schedule annual professional HVAC system checks to maintain compatibility and efficiency․

8․2 Contacting Honeywell Support

For assistance with your Honeywell 9000 thermostat‚ visit the official Honeywell website or use the Total Connect Comfort portal․ Contact support via phone‚ email‚ or live chat for troubleshooting and technical help․ Refer to the user manual or online resources for guidance․ Ensure you have your thermostat model number and registration details ready for efficient support services․ Honeywell’s customer support team is available to address installation‚ configuration‚ or maintenance issues․

Congratulations on completing the installation of your Honeywell 9000 thermostat! This manual has guided you through setup‚ configuration‚ and troubleshooting․ For further assistance‚ visit Honeywell’s official website or access the Total Connect Comfort portal․ Explore additional resources like video tutorials‚ FAQs‚ and user forums․ Regularly update your thermostat’s software and refer to the Honeywell Support team for any unresolved issues․ Enjoy enhanced comfort and energy efficiency with your smart thermostat․

ap physics 1 barrons pdf

Overview of the AP Physics 1 Course

AP Physics 1 is an algebra-based, introductory college-level course covering Newtonian mechanics, motion, force, work, energy, and rotational motion. It includes lab work and prepares students for the exam, with resources like Barron’s guide aiding in comprehensive review and practice.

1.1. Key Topics Covered in AP Physics 1

AP Physics 1 focuses on Newtonian mechanics, including kinematics, dynamics, work, energy, and rotational motion. It covers forces, momentum, and collisions, as well as mechanical waves and sound. Students explore systems, fields, and conservation principles through algebra-based problem-solving. Barron’s guide provides detailed chapter summaries and practice problems to master these concepts effectively for exam success.

1.2. Importance of the Barron’s AP Physics 1 PDF

Barron’s AP Physics 1 PDF is a vital resource for exam preparation, offering in-depth content review, practice tests, and detailed solutions. Its structured approach aligns with the course curriculum, helping students master key concepts and improve problem-solving skills. The guide is widely regarded for its clarity and effectiveness in preparing students for the challenges of the AP Physics 1 exam.

Structure of the AP Physics 1 Exam

The AP Physics 1 exam lasts 3 hours, divided into two sections: multiple-choice questions and free-response problems. It assesses understanding of key physics concepts and problem-solving skills.

2.1. Exam Format and Timing

The AP Physics 1 exam consists of two sections: a 50-minute multiple-choice section with 50 questions and a 90-minute free-response section with five problems. Total exam duration is 3 hours, designed to test both conceptual understanding and practical application of physics principles. Effective time management is crucial for tackling all questions comprehensively.

2.2. Sections and Weightage

The AP Physics 1 exam is divided into two sections, each contributing 50% to the total score. The multiple-choice section contains 50 questions, testing conceptual knowledge, while the free-response section includes five problems, assessing problem-solving and analytical skills. Understanding the weightage of both sections is crucial for effective preparation and balanced study strategies.

Benefits of Using Barron’s AP Physics 1 Guide

Barron’s guide provides comprehensive content review, practice tests, and online resources, helping students master challenging topics and improve exam performance through structured study materials.

3.1. Comprehensive Content Review

Barron’s AP Physics 1 guide offers a detailed review of all course topics, including Newtonian mechanics, motion, forces, work, energy, and rotational motion. It breaks down complex concepts into clear, concise explanations, supported by diagrams and examples. The guide aligns with the AP Physics 1 curriculum, ensuring students cover every essential topic thoroughly. Supplementary materials like chapter summaries and concept reviews further enhance understanding and retention.

3.2. Practice Tests and Online Resources

Barron’s AP Physics 1 guide includes four full-length practice tests with detailed answer explanations. Additional online resources provide interactive quizzes, problem sets, and video lectures. These tools help students assess their knowledge, identify weak areas, and refine their problem-solving skills, ensuring they are well-prepared for the exam.

Key Features of the Barron’s AP Physics 1 PDF

Barron’s guide offers detailed chapter summaries, practice problems with solutions, and comprehensive content review. It provides a structured approach to mastering physics concepts and exam preparation.

4.1. Detailed Chapter Summaries

Barron’s AP Physics 1 PDF includes detailed chapter summaries that break down complex topics into digestible sections. Each summary covers key concepts, formulas, and examples, ensuring a thorough understanding of Newtonian mechanics, motion, and energy. Visual aids like diagrams and charts complement the text, making it easier for students to review and retain information. These summaries are designed to align with the course curriculum, helping students focus on essential material for exam success.

4.2. Practice Problems with Solutions

Barron’s AP Physics 1 guide offers comprehensive practice problems with detailed solutions, covering topics like motion, forces, and energy. Each problem is structured to test understanding and application, with step-by-step solutions that clarify thought processes and methods. This resource helps students identify weak areas and improve problem-solving skills, building confidence for the exam.

Supplementary Resources for AP Physics 1 Preparation

Supplement your studies with online quizzes, video lectures, and practice workbooks. These resources, like problem sets and video demonstrations, enhance understanding and exam readiness.

5.1. Online Quizzes and Problem Sets

Enhance your preparation with online quizzes and problem sets organized by topic. These resources offer multiple-choice questions, detailed solutions, and varying difficulty levels. Websites like APlus Physics provide PDF problem sets with solutions, while online platforms host interactive quizzes. Regular practice with these tools helps reinforce concepts, identify weaknesses, and build exam confidence effectively.

5.2. Video Lectures and Demonstrations

Video lectures and demonstrations are invaluable for visualizing complex physics concepts. Platforms like YouTube offer comprehensive reviews of AP Physics 1 topics, while websites provide animations and step-by-step explanations. These resources cover major subjects, such as motion, forces, and energy, and are accessible online for flexible learning. They complement traditional study materials, enhancing understanding and exam readiness through engaging, interactive content.

How to Effectively Use the Barron’s Guide

Use Barron’s AP Physics 1 guide by reviewing chapter summaries, practicing problems, and taking full-length tests. Regularly review weak areas and track progress to ensure exam readiness.

6.1. Study Schedule and Planning

Create a structured study plan using Barron’s AP Physics 1 guide. Distribute study time evenly across topics like motion, forces, and energy. Use chapter summaries for quick reviews and practice problems for hands-on learning. Incorporate full-length practice tests to simulate exam conditions. Set weekly goals, track progress, and adjust your schedule as needed to ensure thorough preparation and mastery of key concepts.

6.2. Focused Practice on Weak Areas

Use Barron’s practice tests to identify and target weak areas. Focus on challenging topics like rotational motion and energy conservation. Review problem sets and solutions to improve understanding. Allocate extra study time to these sections. Regularly revisit and apply concepts to build confidence and mastery. Consistent practice ensures a strong foundation for exam success.

Understanding the AP Physics 1 Scoring System

AP Physics 1 scores range from 1 to 5, based on performance in multiple-choice and free-response sections. Understanding the scoring system helps students focus on improving weak areas, as Barron’s guide emphasizes, to maximize their final score effectively.

7.1. Grading Criteria and Scale

AP Physics 1 scores range from 1 to 5, determined by performance on multiple-choice and free-response sections. The grading criteria emphasize understanding and mastering fundamental physics concepts, with a focus on problem-solving skills. Barron’s guide provides detailed insights into the scoring scale, helping students target areas for improvement to achieve higher scores effectively.

7.2. Tips to Maximize Your Score

To maximize your AP Physics 1 score, focus on understanding key concepts and practicing problem-solving techniques. Utilize Barron’s guide for targeted review and practice tests to identify weak areas. Time management during the exam is crucial, ensuring all questions are attempted. Thoroughly review notes, summaries, and online resources to build confidence and mastery of the material effectively.

Common Challenges in AP Physics 1

AP Physics 1 challenges include mastering difficult topics like kinematics and dynamics, applying concepts practically, and managing exam time effectively to ensure comprehensive understanding and problem-solving skills.

8.1. Difficult Topics and Concepts

AP Physics 1 presents challenges with complex topics like Newtonian mechanics, kinematics, and dynamics. Students often struggle with rotational motion, work, energy, and momentum. Mastering these concepts requires strong algebraic manipulation and problem-solving skills. Additionally, applying principles to real-world scenarios and understanding abstract relationships between forces and motion can be particularly demanding for many students.

8.2. Time Management During the Exam

Effective time management is crucial for success in the AP Physics 1 exam. Allocate time wisely, spending about one minute per multiple-choice question and 15-20 minutes per free-response question. Skim through the test to identify easier questions first, building confidence and saving time for challenging ones. Avoid getting stuck on a single question; move forward and return later. Practice under timed conditions using resources like Barron’s guide to enhance efficiency.

Final Preparation Strategies

Review notes, summaries, and practice tests to reinforce understanding. Utilize Barron’s guide for targeted review and practice. Ensure a well-rested and focused mindset on exam day.

9.1. Reviewing Notes and Summaries

Thoroughly go through your class notes and chapter summaries from the Barron’s guide. Focus on key concepts like kinematics, dynamics, and energy. Highlight and organize important formulas and definitions. Regular review helps reinforce memory and clarifies doubts, ensuring a solid foundation for the exam. Use the summaries to quickly recap complex topics and identify areas needing more practice.

9.2. Taking Full-Length Practice Tests

Taking full-length practice tests from Barron’s guide simulates exam conditions, helping you manage time effectively. Complete each test without breaks to build stamina. Review answers to identify weak areas and understand common mistakes. Track your progress to refine strategies and improve performance. Regular practice tests boost confidence and reduce exam anxiety, ensuring you’re well-prepared for the actual AP Physics 1 exam.

Mastering AP Physics 1 requires dedication and the right tools. Barron’s guide provides comprehensive resources to help you excel. Stay focused, practice consistently, and aim for success with confidence!

10.1. Summary of Key Points

Barron’s AP Physics 1 guide offers in-depth content reviews, practice tests, and online resources, aligning with the revised 2024-25 course. It covers key topics like Newtonian mechanics, motion, and energy, providing detailed solutions and study strategies. This comprehensive tool is essential for effective preparation, ensuring students grasp complex concepts and perform well on the exam.

10.2. Encouragement for Success

Embrace the challenge of AP Physics 1 with confidence. Utilize Barron’s guide to reinforce your understanding and practice consistently. Stay focused, review thoroughly, and trust your preparation. With dedication and the right resources, you’ll excel and achieve your goals in this course and beyond.

pilates bar exercises pdf

The Pilates bar is a versatile tool offering targeted workouts for full-body engagement. It enhances core strength, improves posture, and boosts flexibility through controlled movements. Perfect for home use, it replicates reformer exercises without the expense. With a variety of exercises like squats, lunges, and wood chops, it’s ideal for all fitness levels. A free downloadable PDF guide provides step-by-step instructions to get you started on your Pilates journey.

What is a Pilates Bar?

A Pilates bar is a versatile fitness tool designed to enhance strength, flexibility, and posture. It typically features a spring-loaded bar or resistance system, often with accessories like straps or foot loops. This compact equipment mimics Reformer exercises, allowing for a full-body workout at home. Its adjustable resistance makes it suitable for beginners and advanced users alike, providing a cost-effective alternative to studio-based Pilates machines;

Benefits of Using a Pilates Bar

Using a Pilates bar offers numerous benefits, including enhanced core strength, improved posture, and increased flexibility. It provides low-impact exercises, making it ideal for joint health. The bar’s versatility allows for a full-body workout, targeting muscles in the arms, legs, and glutes. Its compact design makes it perfect for home use, and the adjustable resistance caters to all fitness levels, from beginners to advanced users seeking a challenging session.

Essential Pilates Bar Exercises

The Pilates bar offers a variety of effective exercises targeting core strength, flexibility, and full-body engagement. From squats to wood chops, these movements enhance muscle tone and improve posture efficiently.

Pilates Bar Squats

Pilates Bar Squats are an excellent full-body exercise that targets the legs, glutes, and core. Stand with your feet shoulder-width apart, hold the bar securely, and lower your body into a squat. Keep your back straight, chest upright, and engage your core. Push through your heels to return to a standing position. This exercise improves balance, strength, and overall lower body stability. Perform 12-15 reps for optimal results.

Pilates Bar Lunges

Pilates Bar Lunges are a dynamic exercise that strengthens the legs, glutes, and core while improving balance. Hold the bar firmly, take a large step forward, and lower your body until both knees form 90-degree angles. Keep your front knee over your ankle and maintain a straight back. Push back to the starting position and alternate legs. This exercise enhances mobility and coordination, with 10-12 reps per leg recommended for effectiveness.

Pilates Bar Wood Chop

The Pilates Bar Wood Chop targets the core, obliques, and rotational strength. Stand tall, grip the bar, and twist your torso, keeping arms straight. Focus on controlled, powerful movements, engaging your core throughout. This exercise improves posture, balance, and overall stability. For advanced users, single-leg variations can enhance challenge. Perform 12-15 reps per side for optimal results, ensuring precise form to maximize benefits and prevent strain.

Pilates Bar Deadlift

The Pilates Bar Deadlift works the hamstrings, glutes, and lower back. Stand with feet shoulder-width apart, bend at the hips, and grip the bar. Engage your core, lift the bar with control, and hinge back slightly. Lower slowly, maintaining form. This exercise strengthens posture muscles and improves mobility. Aim for 10-12 reps, focusing on proper alignment to avoid strain and maximize effectiveness for a strong, stable lower body.

Pilates Bar Push-Through

The Pilates Bar Push-Through targets the chest and shoulders, promoting upper body strength. Hold the bar with an overhand grip, bend slightly, and engage your core. Push the bar away, extending your arms fully, then return to the starting position. This exercise enhances posture and sculpts the upper body. Perform 10-12 reps, focusing on controlled movements to avoid strain and maximize results for a stronger, toned physique.

Full-Body Workout Routine Using a Pilates Bar

A Pilates bar routine engages the core, arms, and legs for a comprehensive workout. Combine squats, lunges, wood chops, and push-throughs to strengthen and tone your entire body effectively.

Core Strengthening Exercises

The Pilates bar excels at targeting core muscles through controlled movements. Exercises like the wood chop and push-through engage the abdominals, while dynamic twists enhance rotational strength. These movements improve posture, stability, and overall core endurance, forming the foundation of a strong, balanced body. Proper form and controlled breathing are essential for maximizing results and preventing injury.

Arm and Shoulder Engagements

Pilates bar exercises effectively target the arms and shoulders, enhancing strength and definition. Movements like push-throughs and lateral raises tone the triceps and deltoids, while controlled resistance engages the muscles for a full range of motion. These exercises improve posture, reduce shoulder tension, and contribute to overall upper body stability. They are adaptable to different fitness levels, ensuring a challenging yet safe workout for arms and shoulders.

Leg and Glute Activations

Pilates bar exercises are excellent for strengthening the legs and glutes; Movements like squats, lunges, and deadlifts target the quadriceps, hamstrings, and glutes, promoting muscle activation and tone. These exercises enhance lower body stability, improve balance, and boost overall leg strength. By engaging the glutes and legs, they help maintain proper posture and movement mechanics, making them essential for a well-rounded Pilates routine.

Downloading the Free Pilates Bar Exercises PDF Guide

Download your free Pilates bar exercises guide for a comprehensive workout plan. This printable PDF offers step-by-step instructions and tips to enhance your home routine effectively.

How to Access the PDF

To access the free Pilates bar exercises PDF, visit the official website and click the download link. Enter a valid email address to receive the guide instantly. The PDF includes detailed workout plans, step-by-step instructions, and visual guides for exercises like squats, lunges, and wood chops. Perfect for all fitness levels, it’s a great resource to enhance your home workout routine with structured and effective Pilates bar exercises.

What to Expect in the Guide

The free Pilates bar exercises PDF guide offers a comprehensive workout plan with clear instructions and photos for each exercise. It includes essential movements like squats, lunges, and wood chops, as well as variations for beginners and advanced users. The guide also provides tips for proper form, safety precautions, and a structured 6-day challenge to help you stay motivated and track your progress effectively.

Modifying Pilates Bar Exercises

Pilates bar exercises can be tailored to suit all fitness levels. Beginners can start with simpler movements, while advanced users can add resistance or complexity for a greater challenge.

Adjusting for Beginners

Modifying Pilates bar exercises for beginners is essential for a safe and effective workout. Start with simpler movements, reducing resistance and focusing on controlled actions; Use shorter ranges of motion and incorporate support when needed. Break exercises into smaller parts to build strength and confidence gradually. Focus on proper form and breathing techniques to ensure a solid foundation. This approach helps prevent injury and makes the exercises more accessible for those new to Pilates bar training.

Advanced Variations

For advanced users, Pilates bar exercises can be intensified with single-leg variations, dynamic movement combinations, and increased resistance. Incorporate HIIT elements for added cardio challenge. Focus on complex sequences that engage multiple muscle groups simultaneously. Advanced movements like single-leg deadlifts or wood chops with rotational twists enhance balance and core strength. These variations push the body further, promoting greater strength, flexibility, and coordination while maintaining proper form and control throughout each exercise.

Safety Tips and Precautions

Always consult a physician before starting a new exercise program. Inspect the Pilates bar for damage and ensure proper setup. Perform movements with controlled precision to avoid injury. Warm up thoroughly and rest between sets to maintain safety and effectiveness during workouts.

Proper Form and Alignment

Maintaining proper form is crucial for effective and safe Pilates bar exercises. Keep your core engaged, shoulders relaxed, and spine aligned. Focus on controlled movements to maximize results and prevent injury. Pay attention to body positioning, ensuring alignment with the bar to target the correct muscles. Proper breathing techniques also enhance performance and overall workout efficiency. Consistent practice improves posture and reduces strain during exercises.

Warm-Up and Cool-Down Routines

A proper warm-up prepares your body for exercise, preventing injuries and enhancing performance. Begin with 3-5 minutes of light cardio, followed by dynamic stretches like leg swings and arm circles. Post-workout, cool down with static stretches to improve flexibility and reduce muscle tension. Incorporate deep breathing exercises to relax and rejuvenate. Hydration and gentle movements aid in recovery, ensuring your body is ready for the next session. Consistency is key for optimal results.

Incorporating the Pilates Bar Into Your Routine

Easily combine the Pilates bar with other workouts like Barre or HIIT for a well-rounded fitness plan. Ideal for home use, it suits all fitness levels. The free PDF guide offers structured routines to help you stay consistent and achieve your goals effectively.

Combining with Other Workouts

The Pilates bar seamlessly integrates with various fitness routines, enhancing their effectiveness. Pair it with Barre for strength and grace, or HIIT for added intensity. It also complements yoga flows and traditional strength training, boosting core engagement and posture. This versatility allows for a balanced workout, ensuring a full-body transformation. The free PDF guide provides structured plans to incorporate the Pilates bar into your existing routines for optimal results.

Setting Goals and Tracking Progress

Setting clear goals and tracking progress is essential for a successful Pilates bar journey. Start by defining specific objectives, such as improving core strength or increasing flexibility. Use the free PDF guide to monitor your workouts and track improvements. Regularly assess your form and gradually increase intensity as you advance. Celebrate milestones and adjust goals to stay motivated and ensure continued growth in your fitness routine.

Advanced Pilates Bar Exercises

Advanced users can enhance balance and challenge leg strength with single-leg Pilates bar exercises. These variations target stability and core engagement, improving overall muscle coordination and control effectively.

Single-Leg Variations

Single-leg Pilates bar exercises elevate balance and challenge leg strength. Perform squats or lunges on one leg for enhanced stability and core engagement. These advanced movements target specific muscle groups, improving coordination and overall strength. Controlled execution is key to avoid injury and maximize benefits. Ideal for intermediate users seeking progression, single-leg variations add complexity to routines while maintaining the Pilates principles of precision and flow. Proper form ensures effectiveness and safety.

Dynamic Movement Combinations

Dynamic movement combinations blend strength and fluidity, creating engaging workouts. Pair exercises like wood chops with squats or lunges for a full-body challenge. These sequences enhance endurance, coordination, and core activation. By integrating multiple muscle groups, they simulate real-life movements, improving functional fitness. Smooth transitions between exercises maintain Pilates’ flow, ensuring a balanced and dynamic session. This approach keeps routines exciting while maximizing efficiency and results. Proper form and control are essential for safety and effectiveness.

6-Day Pilates Bar Challenge

Transform your body with a 6-Day Pilates Bar Challenge. Progress through daily exercises, targeting core, arms, and legs. Download the free PDF guide for a structured workout plan.

Day-by-Day Workout Plan

Our 6-Day Pilates Bar Challenge offers a structured workout plan. Each day focuses on different muscle groups. Day 1 targets core strength with squats and push-throughs. Day 2 emphasizes leg and glute activation through lunges and deadlifts; Day 3 combines dynamic movements like wood chops and single-leg variations. Day 4 focuses on full-body engagement. Day 5 introduces advanced combinations. Day 6 reviews progress. The free PDF guide provides detailed instructions for each exercise.

Tracking Progress and Staying Motivated

Track your progress by noting improvements in strength, flexibility, and posture. Use a journal to record each workout, focusing on form and repetitions. Stay motivated by setting achievable goals and celebrating milestones. The free Pilates Bar PDF guide includes a progress tracker to monitor your journey. Share achievements with friends or join a community for support. Consistency is key to seeing results and maintaining motivation throughout the challenge.

Embrace the Pilates bar for a transformative fitness journey. Download the free PDF guide, stay consistent, and enjoy improved strength and flexibility. Start your journey today!

Summarizing the Benefits

The Pilates bar enhances core strength, improves posture, and boosts flexibility. It engages multiple muscle groups, offering a full-body workout. Low-impact and versatile, it suits all fitness levels, reducing joint strain. Regular use improves balance and coordination while sculpting lean muscles. The free PDF guide provides structured routines, making it easy to incorporate into your fitness journey and achieve lasting results.

Encouragement to Start Your Journey

Embark on your Pilates bar journey today and transform your body with ease. The free PDF guide offers simple, effective routines to kickstart your fitness adventure. Perfect for all levels, the Pilates bar helps you build strength, improve flexibility, and enhance posture. With consistent practice, you’ll achieve a stronger, leaner physique. Start now, stay motivated, and unlock a healthier, more energized version of yourself!

free disabled parking permit victoria application form

Eligibility Criteria for a Disabled Parking Permit in Victoria

To qualify for a Disabled Parking Permit in Victoria, applicants must have a significant ambulation or medical condition impacting mobility. This includes reliance on mobility aids or conditions where walking is harmful. Eligibility applies to Victorian residents with permanent or temporary disabilities, as well as visitors with disabilities. The permit is available for individuals or organizations transporting people with disabilities, provided they meet specific medical criteria assessed by a GP or occupational therapist.

1.1 Medical Assessment Requirements

A medical assessment is mandatory for eligibility. Applicants must undergo a functional evaluation by a GP or occupational therapist to confirm mobility challenges. The assessment determines the severity of the disability and its impact on daily activities, ensuring the permit is issued based on genuine medical need and eligibility criteria.

1.2 Permanent vs. Temporary Disability Permits

Victoria offers permits for both permanent and temporary disabilities. Permanent permits are for ongoing conditions requiring long-term parking support, while temporary permits address short-term mobility challenges, typically valid for up to six months. The type of permit issued depends on the nature and duration of the applicant’s medical condition, as assessed by a healthcare professional;

1.3 Proof of Residency and Identity

Applicants must provide proof of Victorian residency and identity when applying for a Disabled Parking Permit. Acceptable documents include a driver’s license, passport, or utility bills. These materials must be current and valid to confirm eligibility and residency status for the permit application process.

Application Process for a Disabled Parking Permit

The application process begins online via the Victorian Government’s Accessible Parking Permit website. Applicants start by creating an account, filling out the form, and submitting required documents. A reference number is provided upon submission, allowing applicants to track their application status and complete any additional steps.

2.1 Starting the Application Online

To begin, visit the Victorian Government’s Accessible Parking Permit website at www.accessibleparking.vic.gov.au. Create an account, log in, and select the appropriate application type. Fill in personal and disability-related details, then submit to receive a unique reference number via SMS for further steps, such as consulting a medical practitioner.

2.2 Completing the Application Form

Fill in the online application form with personal details, disability information, and contact information. Ensure all sections are accurately completed. Upload required documents, such as medical certification, proof of identity, and residency. Review the form for errors before submission to avoid delays in processing.

2.3 Submitting the Application

Submit your application online via the Accessible Parking Permit website. Upon submission, you’ll receive a reference number via SMS. Take this number to your medical practitioner to complete the certification process. Paper applications are available for those without internet access but must be mailed for processing.

Required Documents for the Application

A completed application form, medical certification from a GP or occupational therapist, and proof of identity and residency are essential for submitting a Disabled Parking Permit application in Victoria.

3.1 Completed Application Form

The application form must be fully completed and signed by both the applicant and, if required, their medical practitioner. The form includes personal details, disability information, and certification sections. It can be downloaded from the Victorian Government’s Accessible Parking Permits website or obtained from local councils. Ensure accuracy to avoid delays.

3.2 Medical Certification

Medical certification is required to confirm the applicant’s disability or medical condition. A GP or occupational therapist must assess and certify the applicant’s mobility impairment. The certification must be completed on the application form and submitted with the application. This step is mandatory to validate eligibility for the permit.

3.3 Proof of Identity and Residency

Applicants must provide proof of identity and residency in Victoria. Accepted documents include a driver’s license, passport, or utility bills. These documents must be current and match the details on the application form. Proof of residency confirms eligibility for the Victorian Disabled Parking Permit program.

Online Submission and Reference Number

Start your application online at www.accessibleparking.vic.gov.au. Once submitted, you’ll receive a reference number via SMS. Print or save this number for your records and medical practitioner visit.

4.1 Accessing the Online Platform

Visit the Victorian Government’s Accessible Parking Permits website to begin your application. Create an account or log in if you already have one. Ensure your device is compatible with the platform, and all required documents are ready for upload. This step is essential for a smooth application process.

4.2 Receiving an Application Reference Number

After starting your application online, you will receive a unique application reference number via SMS. This number is essential for tracking your application and completing subsequent steps, such as visiting a medical practitioner or submitting additional documentation. Keep this number secure and accessible for future use.

4.3 Next Steps After Submission

After submitting your application, you will receive a confirmation and can expect your permit to be processed. Take your reference number to a medical practitioner for certification if required. Once approved, your permit will be mailed. Processing times vary, so monitor your application status through the online platform or contact support for updates.

Processing Time and Tracking the Application

Applications are typically processed within a few weeks. Use your application reference number to track the status online. For urgent cases, contact support for priority processing updates.

5.1 Average Processing Time

The average processing time for a Disabled Parking Permit application in Victoria is approximately 10 to 15 business days. However, this may vary depending on the volume of applications and the completeness of submitted documentation. Applicants are advised to allow up to four weeks for their application to be reviewed and processed.

5.2 How to Track the Status of the Application

After submitting your application, you can track its status using the application reference number provided via SMS. Visit the Victorian Government’s Accessible Parking Permits website or contact the relevant authority to check the progress of your application. This service ensures transparency and updates on the review process.

5.3 Priority Processing for Urgent Cases

Urgent applications for a Disabled Parking Permit in Victoria can be prioritized under specific circumstances. Contact the Victorian Government’s Accessible Parking Permit team directly to inquire about expedited processing. Documentation from a healthcare provider may be required to support the urgency of the request.

Renewing a Disabled Parking Permit

Renew your Disabled Parking Permit online via the Victorian Government’s Accessible Parking Permit website. Start your renewal application, receive a reference number, and complete the process with a medical assessment if required.

6.1 Steps to Renew an Existing Permit

Visit the Victorian Government’s Accessible Parking Permit website and log in to your account. Click on the renewal option, enter your application reference number, and verify your details. If required, undergo a medical assessment and submit updated documentation. Complete the renewal process online, ensuring all information is accurate and current; Once submitted, await confirmation and receive your renewed permit via mail.

6.2 Required Documents for Renewal

Submit proof of identity, residency, and updated medical certification. Include your existing permit number and any new medical assessments. Use valid documents like a driver’s license for ID and utility bills for residency. Submit online or via fax as instructed for a seamless renewal.

6.3 Expiration and Reapplication Process

Permits expire and require renewal every three years for permanent disabilities or as per the temporary permit’s validity period. Reapply by submitting updated medical certification and proof of residency. Use the online platform or contact the Victorian Government’s Accessible Parking Permits office for assistance with the reapplication process.

Types of Permits Available

Victoria offers individual permits for residents, organizational permits for entities transporting people with disabilities, and temporary permits for short-term disabilities.

7.1 Individual Permits

Individual permits are for Victorian residents with significant disabilities. They can be permanent or temporary, based on medical assessment. Applications start online, with a reference number provided. These permits grant access to designated parking spaces, aiding individuals with mobility challenges.

7.2 Organizational Permits

Organizational permits are issued to organizations that provide transport services for people with disabilities. These permits require proof of eligibility, such as transporting clients with mobility challenges. Applications must be submitted online, with a reference number provided. The permit allows organizations to use designated parking spaces, aiding in transportation services for individuals with disabilities.

7.3 Temporary Permits

Temporary permits are available for individuals with short-term disabilities or injuries lasting up to six months. Applicants must provide medical certification confirming their condition. These permits cannot be renewed and require a new application and assessment upon expiry to continue eligibility for accessible parking privileges.

Benefits of Having a Disabled Parking Permit

A Disabled Parking Permit provides access to designated parking spaces, exemptions from certain parking fees, and reciprocal rights in other states. It enhances mobility and independence for individuals with disabilities, ensuring convenient access to public spaces and essential services. The permit is recognized statewide, offering consistent parking privileges.

8.1 Access to Designated Parking Spaces

Holders of a Disabled Parking Permit gain access to specially designated parking spaces, designed to provide greater convenience and accessibility. These spaces are typically located closer to entrances of public venues, ensuring easier access for individuals with mobility challenges. The permit guarantees priority parking in these reserved areas statewide.

8.2 Exemptions from Parking Fees

Disabled Parking Permit holders are exempt from certain parking fees in Victoria, reducing financial barriers for individuals with mobility challenges. This exemption applies to designated parking spaces, ensuring greater accessibility and affordability for permit holders across the state.

8.4 Reciprocal Rights in Other States

Victorian Disabled Parking Permits are recognized in all Australian states and territories under reciprocal agreements. This allows permit holders to access designated parking spaces nationwide. Permits from other states are also honored in Victoria, ensuring consistent accessibility for individuals with disabilities when traveling interstate.

Support and Resources for Applicants

Applicants can access support through the Victorian Government’s Accessible Parking Permits website, FAQs, and contact information for assistance. Additional resources and guides are available online to aid the application process.

9.1 Contact Information for Assistance

For assistance with the application, contact the Victorian Government’s Accessible Parking Permits team via phone or email. Visit the website for detailed contact information and support options to help navigate the process smoothly.

9.2 Frequently Asked Questions

FAQs address common queries about eligibility, application processes, and permit types. Questions include eligibility criteria, required documents, renewal procedures, and how to apply online. Additional queries cover permit validity, fees, and renewal timelines, ensuring applicants have clear guidance throughout the process.

9.3 Additional Resources for Applicants

Additional resources include guides on the Victorian Government’s Accessible Parking Permit website, offering detailed application checklists and step-by-step instructions. Applicants can also access support through disability advocacy groups and local councils, ensuring comprehensive assistance throughout the application process.

lochinvar troubleshooting guide

Welcome to the Lochinvar Water Heater Troubleshooting Guide! This guide helps identify and resolve common issues, ensuring your water heater operates efficiently and safely․ Regular maintenance and proper diagnostics can extend its lifespan and prevent unexpected breakdowns․ Whether addressing error codes, leaks, or ignition problems, this guide provides step-by-step solutions for DIY enthusiasts and professionals alike․ Always refer to your manual for specific instructions and safety precautions․

1․1 Common Issues and Initial Diagnostic Steps

Common issues with Lochinvar water heaters include error codes, leaks, ignition problems, and temperature inconsistencies․ Start by checking the power supply, ensuring the circuit breaker isn’t tripped․ Review the error codes for specific fault indicators․ Perform a visual inspection for leaks or damage․ Always refer to the user manual for initial troubleshooting steps before attempting repairs․

1․2 Importance of Regular Maintenance

Regular maintenance is crucial for optimal performance and longevity of your Lochinvar water heater; It helps prevent unexpected breakdowns, reduces energy bills, and ensures safety․ Tasks like inspecting connections, checking for leaks, and flushing sediment buildup are essential․ A well-maintained system operates more efficiently and reliably, avoiding costly repairs․ Always refer to your manual for specific maintenance schedules and guidelines to keep your heater in top condition․

Understanding Lochinvar Error Codes

Lochinvar water heaters display error codes to indicate specific issues․ These codes help diagnose problems quickly, from faulty sensors to ignition failures․ Understanding them is key to effective troubleshooting and ensures proper repairs, minimizing downtime and maintaining efficiency․ Always refer to your manual for code meanings and solutions tailored to your model․

2․1 Common Error Codes and Their Meanings

Lochinvar water heaters use specific error codes to indicate issues․ Codes like E12 often signify ignition or sensor problems, while others may point to gas supply or temperature malfunctions․ Understanding these codes helps identify the root cause quickly․ For example, E12 might indicate a faulty thermocouple or flame sensor, while E01 could signal a communication error․ Always consult the manual for precise code meanings and solutions․

2․2 How to Retrieve and Interpret Error Codes

To retrieve Lochinvar error codes, check the digital display or consult the control panel․ Codes like E12 or E01 indicate specific issues․ Use the user manual or online resources to match codes with meanings․ For example, E12 often relates to ignition or sensor faults, while E01 may indicate communication errors․ Record the code for reference and follow recommended troubleshooting steps or professional assistance if needed․

Troubleshooting Ignition Issues

Identify common ignition problems like pilot light failure or spark issues․ Check for faulty thermocouples or gas supply obstructions․ Ensure proper ventilation and clean components for reliable operation․

3․1 Pilot Light Problems and Solutions

If the pilot light refuses to stay lit, inspect the thermocouple for damage or dirt․ Ensure the gas supply is unobstructed and verify proper ventilation․ Clean or replace the thermocouple if necessary․ Relight the pilot following the manual’s instructions․ If issues persist, check for drafts or gas valve malfunctions and consult a professional for assistance․

3․2 Spark Ignition Troubleshooting Steps

For spark ignition issues, start by checking the igniter’s condition and ensuring proper gas flow; Verify electrical connections to the ignition module․ Clean the burner orifice and ensure the spark gap is correct․ If the igniter fails to spark, replace it․ Consult the manual for specific steps and safety precautions to avoid gas leaks or further damage․

Addressing Leaks in Lochinvar Water Heaters

Leaks in Lochinvar water heaters often stem from loose connections, faulty valves, or damaged seals․ Inspect the temperature-pressure relief valve and anode rod for corrosion․ Early detection and prompt repair are crucial to prevent water damage and ensure system efficiency․ Always turn off power and water supply before attempting any fixes․

4․1 Identifying Common Leak Locations

Leaks in Lochinvar water heaters often occur at the temperature and pressure relief valve, anode rod, or tank connections․ Inspect these areas regularly for signs of moisture or corrosion․ Additionally, check the drain valve and inlet/outlet pipes for loose fittings or worn gaskets․ Addressing leaks promptly prevents water damage and maintains efficiency․ Always turn off the power and water supply before inspecting․

4․2 Repairing Leaks and Preventing Future Occurrences

Tighten loose connections and replace worn-out gaskets or seals to fix leaks․ Inspect and clean the temperature and pressure relief valve․ Replace corroded or damaged parts immediately․ Regularly check the anode rod and drain sediment from the tank to prevent future leaks․ Annual inspections and maintenance can help identify potential issues before they escalate, ensuring long-term reliability and safety of your Lochinvar water heater․

Resolving Temperature-Related Problems

Diagnose temperature issues by checking thermostat settings and sensor accuracy․ Clean or replace faulty sensors and ensure proper water flow․ Regular maintenance prevents extreme temperature fluctuations and ensures consistent performance․

5․1 Diagnosing Incorrect Temperature Settings

Incorrect temperature settings can lead to scalding water or insufficient heating․ Check the thermostat calibration and ensure it’s set between 120-140°F․ Verify if the temperature sensor is faulty by comparing readings with a thermostat․ If issues persist, refer to the user manual for recalibration or consider replacing the thermostat or sensor․ Regular checks prevent such problems․

5․2 Fixing Faulty Thermostat or Temperature Sensors

If the thermostat or sensor is faulty, replace them promptly․ Ensure the new components are compatible with your Lochinvar model․ Follow the manual for installation steps․ After replacement, test the water heater to confirm accurate temperature readings․ Regular maintenance can prevent future malfunctions․ Always adhere to safety guidelines during repairs to avoid injury or further damage․ Proper installation ensures optimal performance and safety․

Troubleshooting Power Supply Issues

Check circuit breakers and fuses to ensure power is restored․ Verify electrical connections and consult the manual for specific reset procedures․ Power outages or tripped breakers are common causes․ If issues persist, contact a licensed technician to diagnose and repair electrical faults․ Always follow safety guidelines when working with electrical systems to avoid hazards․

6․1 Checking Circuit Breakers and Fuses

Start by checking the circuit breaker or fuse box to ensure the water heater’s circuit is not tripped or blown․ Reset any tripped breakers and replace blown fuses․ Verify that the electrical connections are secure and undamaged․ If the issue persists, consult the user manual for specific guidance or consider hiring a licensed electrician to inspect the system․ Always prioritize safety when handling electrical components․

6․2 Resetting the Water Heater and Testing Power Supply

Turn off the power supply to the water heater at the circuit breaker․ Wait for 30 minutes to allow the system to cool․ Restore power and check if the issue is resolved․ If the heater still doesn’t function, test the voltage at the terminal block using a multimeter to ensure it matches the specified requirements․ Consult the user manual for guidance or contact a professional if problems persist․

Venting and Gas Supply Problems

Proper venting and gas supply are crucial for safe operation․ Blockages can cause performance or safety issues․ Ensure correct installation to prevent future problems and maintain efficiency․

7․1 Identifying and Clearing Vent Blockages

Inspect vent pipes for obstructions like debris or nests․ Check for error codes indicating venting issues․ Ensure proper airflow by cleaning or replacing blocked components․ Verify vent termination is clear and installed correctly․ Consult the manual for specific instructions on clearing blockages safely․ Regular maintenance can prevent future venting problems and ensure efficient operation of your Lochinvar water heater․

7․2 Ensuring Proper Gas Supply and Venting Installation

Verify that the gas supply line is properly connected and meets the heater’s specifications․ Ensure venting is installed according to local codes and manufacturer guidelines․ Check for any blockages or damage in vent pipes․ Confirm that vent termination is correctly positioned to avoid backdrafts․ Regularly inspect connections for leaks or wear․ Proper installation ensures safe and efficient operation of your Lochinvar water heater․

Dealing with Sediment Buildup

Sediment buildup in your Lochinvar water heater can reduce efficiency and cause damage․ Regular flushing of the tank helps prevent accumulation and maintains optimal performance․ Hard water areas are more prone to sediment issues, so routine maintenance is essential to ensure long-term reliability and energy savings․ Always follow manufacturer guidelines for cleaning․

8․1 Causes and Effects of Sediment in the Tank

Sediment buildup in the tank primarily occurs from hard water, containing minerals like calcium and magnesium․ Over time, these minerals settle at the tank’s bottom, reducing efficiency and increasing energy bills․ Excessive sediment can lead to corrosion, damaging the tank and heating elements․ It also acts as an insulator, reducing heat transfer and causing the heater to work harder, potentially leading to premature failure if left untreated․

8․2 Flushing the Tank and Preventing Future Buildup

Flushing the tank annually helps remove sediment and maintain efficiency․ Turn off power and water supply, then attach a hose to the drain valve․ Open the valve and allow the tank to drain completely․ For prevention, consider installing a water softener to reduce mineral content․ Regular inspections and flushing ensure optimal performance and extend the heater’s lifespan, preventing costly repairs․

Electrical Component Failures

Faulty heating elements or thermostats can disrupt operation․ Check connections for wear or corrosion and replace damaged parts․ Consult the manual or a technician for complex issues․

9․1 Identifying Faulty Heating Elements or Thermostats

9․2 Checking and Replacing Electrical Connections

Always begin by turning off the power supply to the water heater․ Inspect electrical connections for wear, corrosion, or loose wires․ Check for signs of arcing or overheating․ Verify that all connections are secure and meet manufacturer specifications․ If damaged, replace the faulty connections promptly․ Ensure proper voltage supply to avoid further issues․ This step is crucial for maintaining safe and efficient operation․

When to Call a Professional

Call a professional if issues persist despite troubleshooting or require advanced technical expertise․ Complex problems like internal malfunctions or safety hazards should only be handled by qualified technicians to ensure safety and proper repairs․

10․1 Recognizing Complex Issues Beyond DIY

Some issues, like internal component failures or gas line problems, require professional expertise․ If you encounter persistent errors, safety hazards, or complex system malfunctions, it’s crucial to recognize your limits․ DIY attempts here can worsen the issue or pose safety risks․ Always seek a qualified technician for such scenarios to ensure proper and safe resolution․

10․2 Finding a Qualified Lochinvar Service Technician

Finding a qualified Lochinvar service technician is essential for complex repairs․ Start by checking Lochinvar’s official website for authorized service providers․ Verify the technician’s certifications and experience with Lochinvar products․ Reading reviews and asking for recommendations can help ensure reliability․ Always confirm that the technician is properly licensed and insured to handle your specific water heater issues effectively․

printable yahtzee score card pdf

Printable Yahtzee score cards are convenient tools for tracking game progress․ Available in color and black-and-white, they offer a structured way to record upper and lower section scores, bonuses, and totals, ensuring accurate gameplay and easy comparison of results․

History and Importance of Yahtzee Score Cards

Yahtzee score cards have been essential since the game’s creation in the 1950s by Edwin S․ Lowe․ They provide a structured way to track scores, ensuring clarity and fairness in gameplay․ The upper and lower sections, along with bonuses, are clearly defined, making it easier for players to calculate their totals accurately․ Printable PDF versions have become popular, offering convenience and accessibility for players to download and use, enhancing the overall gaming experience while preserving the game’s integrity․

Why Use a Printable Yahtzee Score Card?

Printable Yahtzee score cards offer convenience, organization, and cost-effectiveness․ They eliminate the need for handwritten notes, reducing errors and saving time․ Easily downloadable as PDFs, they are accessible to everyone and can be customized to suit various game versions․ Using these cards ensures all players have a consistent and clear way to track their scores, making gameplay more enjoyable and streamlined, while also providing a professional touch to your gaming sessions․

Understanding the Upper Section Scoring

The upper section focuses on summing dice values for each category, like aces or sixes․ Scores are calculated by adding the total of selected dice, with a bonus awarded if the total reaches 63 or more․

Aces: Count and Add Only Aces

In the Aces category, players sum only the dice showing a value of 1․ For example, if the dice show 1, 1, 3, 4, 6, the score is 2․ This category is straightforward, focusing solely on the number of aces rolled, with no additional bonuses or multipliers․ It’s an excellent starting point for new players to get familiar with scoring mechanics in Yahtzee․

Twos: Count and Add Only Twos

In the Twos category, players sum only the dice showing a value of 2․ For example, if the dice show 2, 2, 3, 4, 5, the score is 4․ This category is simple, focusing solely on the number of twos rolled․ It’s a great way for new players to familiarize themselves with the scoring system without the complexity of other categories․ The goal is to maximize the total by rolling as many twos as possible․

Threes: Count and Add Only Threes

The Threes category involves summing only the dice that display a 3․ For instance, if the dice show 3, 3, 5, 6, 2, the score is 6․ This category is straightforward, focusing solely on the number of threes rolled․ It’s an excellent way for players to practice basic scoring without the intricacies of other categories․ The objective is to achieve the highest possible total by rolling multiple threes, making it a fun and simple challenge for all skill levels․

Fours: Count and Add Only Fours

The Fours category requires players to sum only the dice showing a 4․ For example, rolling 4, 4, 5, 3, 2 results in a score of 8․ This category is simple, focusing solely on the number of fours․ It’s a great way to practice basic scoring and strategy․ The goal is to maximize the total by rolling multiple fours, making it a fun and straightforward challenge for all players․ Accuracy is key to achieving the highest possible score in this category․ Ensuring correct addition is crucial for optimal results․ The category is easy to understand, making it accessible for new players; Proper scoring helps maintain fair gameplay and keeps the game enjoyable for everyone involved․ Using a printable score card can help streamline this process, ensuring accuracy and efficiency․ By focusing only on fours, players can develop their observational skills and dice-rolling strategies․ This category is a fundamental part of Yahtzee, providing a solid foundation for more complex scoring categories․ Mastering the Fours category is essential for improving overall game performance․ Players can track their progress using the score card, identifying areas for improvement․ The simplicity of this category makes it an excellent starting point for learning the game․ As players gain experience, they can apply similar strategies to other categories, enhancing their overall gameplay․ The Fours category is a timeless classic, offering endless opportunities for skill development and fun․ Its straightforward nature ensures that it remains a favorite among players of all levels․ By consistently practicing and refining their approach, players can achieve higher scores and enjoy a more rewarding gaming experience․ The Fours category is an integral part of Yahtzee, providing a simple yet effective way to improve scoring abilities․ Utilizing a printable score card can help players stay organized and focused, leading to better overall performance․ Whether playing casually or competitively, mastering the Fours category is a must for any Yahtzee enthusiast․ The category’s simplicity allows players to concentrate on dice selection and strategy, fostering a deeper understanding of the game․ As players progress, they can apply the skills learned in the Fours category to more complex sections, ultimately becoming well-rounded Yahtzee players․ The Fours category is a cornerstone of the game, offering a blend of simplicity and strategy that appeals to everyone․ By dedicating time to perfecting this category, players can elevate their gameplay and enjoy the satisfaction of achieving higher scores․ The Fours category is a testament to the enduring appeal of Yahtzee, providing a fun and challenging way to enhance scoring skills․ With consistent practice and the right tools, such as a printable score card, players can continuously improve their performance․ The Fours category is a delightful combination of ease and engagement, making it a staple in every Yahtzee session․ Embracing this category allows players to build a strong foundation, paving the way for future successes in the game․ The Fours category is a celebration of strategic thinking and attention to detail, essential qualities for any Yahtzee player․ By immersing themselves in this category, players can unlock new levels of enjoyment and competition․ The Fours category is a beautiful blend of simplicity and sophistication, offering something for every player․ It’s a reminder that even the most straightforward elements can hold the key to mastering the game․ The Fours category is a shining example of how Yahtzee combines fun with strategy, making it a beloved pastime for many․ Players who dedicate time to this category will find their overall gaming experience enriched and their skills sharpened․ The Fours category is a gateway to the exciting world of Yahtzee, inviting players to explore, learn, and grow with each roll of the dice․

Fives: Count and Add Only Fives

The Fives category requires adding only the dice that show a 5․ For example, rolling 5, 5, 2, 3, 4 gives a score of 10․ This category is straightforward, focusing solely on fives․ It’s an excellent way to practice strategic dice selection․ Players aim to maximize their score by rolling multiple fives, making it a fun and challenging category․ Using a printable score card ensures accurate tracking of scores, helping players stay organized and focused during gameplay․ The Fives category is a fan favorite, offering a perfect blend of simplicity and strategy․ Its clarity makes it accessible to new players while providing experienced players with opportunities to refine their skills․ By concentrating on fives, players can develop their ability to prioritize and optimize dice rolls․ This category is a great way to build confidence and improve overall Yahtzee performance․ The Fives section is a key part of the game, offering endless opportunities for scoring and enjoyment․ Players of all levels can benefit from mastering this category, as it enhances their understanding of the game’s mechanics․ The Fives category is a timeless feature of Yahtzee, providing a simple yet engaging way to enhance scoring abilities․ With a printable score card, players can easily track their progress and strive for higher scores․ The Fives category is a delightful combination of ease and strategy, making it a staple in every Yahtzee session․ By focusing on fives, players can refine their approach and enjoy the satisfaction of achieving their goals․ The Fives category is a celebration of precision and focus, essential qualities for any Yahtzee enthusiast․ It’s a reminder that even the most straightforward elements can hold the key to mastering the game․ The Fives category is a shining example of how Yahtzee combines fun with strategy, making it a beloved pastime for many․ Players who dedicate time to this category will find their overall gaming experience enriched and their skills sharpened․ The Fives category is a gateway to the exciting world of Yahtzee, inviting players to explore, learn, and grow with each roll of the dice․

Sixes: Count and Add Only Sixes

The Sixes category involves summing only the dice showing a 6․ For instance, rolling 6, 6, 3, 4, 2 results in a score of 12․ This category is similar to the Fives but focuses on the highest single number․ Players aim to maximize their score by rolling multiple sixes․ It’s a great way to practice strategic thinking and improve dice selection skills․ Using a printable score card ensures accurate tracking and organization․ The Sixes category is a popular choice among players due to its simplicity and potential for high scores․ By focusing on sixes, players can enhance their ability to prioritize and optimize each roll․ This category is an excellent way to build confidence and refine strategies․ The Sixes section is a key part of the game, offering endless opportunities for scoring and enjoyment․ Players of all levels can benefit from mastering this category, as it enhances their understanding of the game’s mechanics․ The Sixes category is a timeless feature of Yahtzee, providing a simple yet engaging way to enhance scoring abilities․ With a printable score card, players can easily track their progress and strive for higher scores․ The Sixes category is a delightful combination of ease and strategy, making it a staple in every Yahtzee session․ By focusing on sixes, players can refine their approach and enjoy the satisfaction of achieving their goals․ The Sixes category is a celebration of precision and focus, essential qualities for any Yahtzee enthusiast․ It’s a reminder that even the most straightforward elements can hold the key to mastering the game․ The Sixes category is a shining example of how Yahtzee combines fun with strategy, making it a beloved pastime for many․ Players who dedicate time to this category will find their overall gaming experience enriched and their skills sharpened․ The Sixes category is a gateway to the exciting world of Yahtzee, inviting players to explore, learn, and grow with each roll of the dice․

Lower Section Scoring Categories

The lower section offers various scoring categories like Three of a Kind, Full House, and Yahtzee, requiring strategic dice combinations to maximize points, all tracked on a printable score card․

Three of a Kind: Add Total of All Dice

Three of a Kind requires rolling at least three dice showing the same number․ To score, add the total of all five dice․ If you achieve this, sum all dice; otherwise, score zero․ This category rewards strategic dice selection and is tracked on printable Yahtzee score cards for easy recording․ It’s a versatile option, offering moderate points based on dice values․ Use it wisely to maximize your game’s potential and track progress effectively with a score card․

Four of a Kind: Add Total of All Dice

Four of a Kind is scored by rolling four dice with the same number․ To calculate the score, add the total of all five dice․ This category offers higher potential points than Three of a Kind․ If successful, sum all dice; otherwise, score zero․ Printable Yahtzee score cards provide a clear section for recording this category, helping you keep track of your progress and strategize effectively during gameplay․ It’s a popular choice for maximizing points quickly․

Full House: Score 25

A Full House is achieved by rolling three dice of one number and two of another․ This category awards a fixed score of 25 points․ Unlike other categories, it doesn’t depend on the dice values but rather the combination․ If you roll a Full House, you automatically score 25; otherwise, it scores zero․ Printable Yahtzee score cards simplify tracking this category, ensuring accurate scoring and helping you focus on achieving this rewarding combination during gameplay․

Small Straight: Score 30

A Small Straight is achieved by rolling four sequential numbers on the dice․ This category awards a fixed score of 30 points․ For example, combinations like 1-2-3-4, 2-3-4-5, or 3-4-5-6 qualify․ If your roll doesn’t meet this criterion, it scores zero․ Printable Yahtzee score cards make it easy to track this category, helping you quickly identify when you’ve achieved a Small Straight and add the 30 points to your total score effectively․

Large Straight: Score 40

A Large Straight is when you roll five sequential numbers, such as 1-2-3-4-5 or 2-3-4-5-6․ This category awards a fixed score of 40 points․ If the dice don’t form a sequence of five consecutive numbers, it scores zero․ Printable Yahtzee score cards simplify tracking, allowing you to easily record the 40 points when you achieve a Large Straight and update your total score accordingly during gameplay․

Yahtzee: Score 50

A Yahtzee occurs when all five dice show the same number, scoring 50 points․ It’s the highest single-category score in Yahtzee․ If you’ve already used your Yahtzee bonus, additional Yahtzees score 100 points each․ Printable score cards make it easy to track Yahtzees and apply bonuses correctly, ensuring accurate scoring and maximizing your game strategy․ This rare but powerful roll can drastically boost your total score, making it a key target for skilled players․

Chance: Add Total of All Dice

The Chance category allows you to score by adding the total of all five dice, regardless of their values․ It’s a flexible option for when no other scoring category applies․ Since there are no specific number or combination requirements, it’s a great fallback to ensure you always have a way to earn points․ Printable Yahtzee score cards make it easy to track and calculate Chance scores, helping you maximize your total even when other categories don’t align with your dice rolls․

How to Create a Custom Yahtzee Score Card

Customize your Yahtzee score card by using templates from sites like TemplateLab․ Personalize sections, add players’ names, and tailor categories to suit your gameplay preferences easily․

Design Tips for Your Score Card

When designing a custom Yahtzee score card, ensure clarity and readability․ Use distinct sections for upper and lower categories, bold headings for visibility, and sufficient spacing for easy score entry․ Include columns for multiple games to track progress over time․ Add visual cues like score boxes or lines to keep entries organized․ Choose fonts and colors that enhance readability, making it easy for all players to follow along during the game․ This ensures smooth gameplay and reduces errors․

dreamcloud bed frame with headboard assembly instructions

The DreamCloud Bed Frame with Headboard offers a sleek, modern design with a button-tufted, upholstered headboard, combining style and comfort for a luxurious bedroom experience.

Overview of the DreamCloud Bed Frame Design

The DreamCloud Bed Frame with Headboard features a modern, sleek design with a button-tufted, upholstered headboard, blending sophistication and comfort. Constructed from sturdy metal and wood, it eliminates the need for a box spring, offering a clean, low-profile aesthetic. The frame’s slightly tapered legs provide stability, while its robust build ensures durability. Available in Grey or Linen colors, it complements various bedroom styles, adding a touch of luxury. The design prioritizes functionality, with easy assembly and a tool-free setup process. Its elegant combination of wood and fabric makes it a standout piece, offering both style and practicality for a refined sleep environment.

Importance of Proper Assembly for Optimal Functionality

Proper assembly of the DreamCloud Bed Frame with Headboard is crucial for ensuring stability, safety, and optimal performance. Incorrect assembly can lead to instability, compromising both functionality and longevity. Following the provided instructions meticulously ensures all components are securely fastened, preventing potential hazards like wobbling or structural failure. Proper assembly also guarantees that features such as the adjustable base operate smoothly, providing the intended comfort and convenience. Additionally, correct assembly protects the product’s warranty and maintains its aesthetic appeal. It is recommended to assemble the frame in the intended room due to its size and weight, and to have at least two people assist for heavier parts, especially the adjustable base. Adhering to these guidelines ensures a seamless and durable setup.

Preparation for Assembly

Begin by clearing a large, flat workspace and unpacking all components. Ensure all parts and hardware are present before starting to avoid delays during assembly.

Essential Tools and Materials Needed

Assembly requires basic tools like an Allen wrench, screwdriver, and wrench, typically included in the package. Ensure all hardware, bolts, and screws are organized and accounted for. Double-check the instruction manual for specific tools needed, as some models may vary. Clear workspace and protective clothing are recommended to ensure safety and efficiency during assembly. Proper organization of parts and tools will streamline the process and prevent delays. Make sure all components are unpacked and inventoried before starting, as missing items could halt progress. Familiarize yourself with the instructions to understand the sequence and requirements fully. No specialized tools are needed, making the process accessible for most users.

Choosing the Right Location for Assembly

Selecting the right location for assembling the DreamCloud Bed Frame with Headboard is crucial for a smooth and efficient process. Choose a spacious, flat area where you can lay out all components without obstruction. Ideally, assemble the bed in the room where it will be used to avoid moving heavy parts later. Ensure the floor is level and sturdy to support the bed’s weight. Clear the area of any breakable items or tripping hazards to minimize risks. If assembling an adjustable base, ensure proximity to a power outlet. Proper lighting and ventilation will enhance comfort during assembly. Avoid confined spaces that could complicate handling large pieces, and consider having a second person assist for heavier components. A well-chosen location will make assembly safer and less stressful.

Unpacking and Organizing Components

Begin by carefully unpacking all components from the boxes, ensuring no parts are damaged. Organize hardware and instructions separately for easy access during assembly.

Identifying and Listing All Parts and Hardware

Start by identifying and listing all parts and hardware included in the DreamCloud bed frame package. This ensures no components are missing and streamlines assembly. Typically, the set includes side rails, support legs, headboard connection bolts, washers, and screws. Carefully match each item to the instructions to avoid confusion. Organizing parts by category, such as bolts and screws, can prevent mix-ups. Double-checking the packaging list against the provided hardware guarantees everything is accounted for. This step is crucial for a smooth and efficient assembly process, minimizing delays and ensuring all pieces fit together seamlessly. Proper identification prevents errors and ensures stability in the final product.

Organizing Components for Efficient Assembly

Organizing components is essential for a smooth assembly process. Begin by laying out all parts on a clean, flat surface, grouping similar items together. Separate bolts, screws, and washers into small containers or bags for easy access. Use the instruction manual to identify each component, ensuring you understand its purpose. Place larger pieces, such as side rails and the headboard, in a logical order based on assembly steps. Keep tools, like an Allen wrench or screwdriver, within reach. This methodical approach reduces assembly time and minimizes the risk of misplaced parts. By organizing components strategically, you can follow the instructions seamlessly, ensuring a stress-free and efficient setup. Proper organization is key to achieving a stable and secure final product.

Main Assembly Steps

Attach the headboard, secure side rails, and connect support legs. Ensure all bolts and screws are tightly fastened for stability. Follow instructions step-by-step for a seamless setup.

Attaching the Headboard to the Bed Frame

Align the headboard connection bolts with the side rails’ holes. Secure them using the provided washers and bolts. Tighten firmly to ensure stability. If needed, use a wrench for extra grip. Ensure all connections are snug to avoid wobbling. Double-check the alignment before final tightening. This step is crucial for the bed’s structural integrity. Follow the instructions carefully to achieve a sturdy attachment. Proper alignment ensures the headboard stays securely in place, enhancing the bed’s overall durability and aesthetic appeal. Complete this step before moving on to securing the side rails and support legs.

Securing the Side Rails and Support Legs

Once the headboard is attached, focus on securing the side rails and support legs. Use the provided bolts to fasten the rails to the bed frame, ensuring they are tightly fitted. Next, attach the support legs to the side rails, making sure they are evenly spaced for optimal stability. Tighten all screws firmly to prevent any movement or wobbling. Double-check each connection to ensure everything is secure. Properly secured side rails and support legs are essential for the bed’s stability and durability. This step ensures the bed frame remains sturdy and provides a solid foundation for the mattress. Follow the instructions closely to complete this process efficiently and safely.

Final Touches and Safety Checks

After assembly, tighten all bolts and screws, ensuring the bed frame is stable and level. Check for any wobbling or loose parts and secure them if necessary.

Tightening All Bolts and Screws

Tightening all bolts and screws is a critical step to ensure the DreamCloud bed frame’s stability and safety. Begin by reviewing the instructions to identify all connection points. Use the provided wrench or Allen wrench to secure each bolt and screw firmly, but avoid overtightening, which could damage the frame. Pay special attention to the headboard attachments and side rails, as these are key structural points. Double-check each connection to ensure they are snug and even. If assembling alone, consider enlisting a second person to help with heavier or larger components. Properly tightened hardware guarantees a sturdy and durable bed frame, enhancing both safety and comfort for years to come.

Ensuring Stability and Leveling the Bed Frame

Ensuring the stability and leveling of the DreamCloud bed frame is essential for optimal performance and safety. After assembly, place the bed on a firm, even surface. Check the legs and support feet to confirm they are evenly balanced. If the floor is uneven, adjust the feet by rotating them until the frame is level. Use a spirit level tool to verify alignment. Stability is crucial, especially for adjustable bases, to prevent wobbling or tipping. Ensure all bolts and screws are tightened securely, as loose connections can compromise balance. A stable and level bed frame provides a solid foundation for the mattress, ensuring a comfortable and secure sleeping experience.

what darwin never knew worksheet answers pdf

This worksheet provides a comprehensive guide to understanding the video “What Darwin Never Knew,” exploring modern evolutionary biology and genetic evidence supporting Darwin’s theory.

Overview of the Worksheet

The worksheet accompanies the video “What Darwin Never Knew,” offering a structured guide for students to engage with modern evolutionary concepts. It includes questions about Darwin’s journey on the HMS Beagle, genetic evidence for evolution, and recent scientific discoveries. The PDF format ensures easy access and printing, making it a valuable resource for classroom or self-study use. Questions range from multiple-choice to short-answer and essay prompts, encouraging critical thinking. Topics covered include the Beagle’s mission, Darwin’s role, and contemporary advancements in evolutionary biology. This worksheet is widely available online, often through educational platforms like PBS LearningMedia or university course materials.

Importance of the Topic in Modern Biology

Understanding Darwin’s contributions and modern evolutionary biology is crucial for grasping key biological concepts. The worksheet highlights how genetic evidence supports evolution, linking Darwin’s theories to contemporary research. It bridges the gap between historical discoveries and cutting-edge science, emphasizing the relevance of evolution in fields like medicine, genetics, and ecology. By exploring these connections, students gain a deeper appreciation for how evolutionary principles shape our understanding of life’s diversity and complexity. This topic remains foundational in biology education, fostering critical thinking and scientific literacy among learners.

The HMS Beagle and Darwin’s Journey

The HMS Beagle’s mission was to survey South American waters, offering Darwin a naturalist role. His five-year voyage aboard the ship shaped his evolutionary theories through groundbreaking observations.

Mission of the HMS Beagle

The HMS Beagle’s primary mission was to conduct a hydrographic survey of South America, mapping coastal waters and islands. This expedition aimed to aid naval navigation and expand British maritime knowledge. Charles Darwin, aboard as the ship’s naturalist, collected specimens and data crucial for his later theories. The Beagle’s journey lasted five years, covering over 40,000 miles, and significantly contributed to both geography and biology. Darwin’s observations during this voyage laid the foundation for his groundbreaking work on evolution and natural selection.

Darwin’s Role on the Ship

Charles Darwin served as the naturalist aboard the HMS Beagle, responsible for collecting and studying geological and biological specimens. His role involved documenting species, fossils, and landforms encountered during the voyage. Darwin’s observations of finches, tortoises, and other organisms later became pivotal in shaping his theory of evolution. He also maintained detailed journals of his findings, which were shared with scientists back in England. Darwin’s interactions with Captain Robert FitzRoy and the crew further enriched his understanding of the natural world. His experiences on the Beagle laid the groundwork for his revolutionary ideas about life’s diversity and adaptability.

Key Concepts from the Video “What Darwin Never Knew”

The video explores modern discoveries in evolutionary biology, revealing how genetic evidence supports Darwin’s theories. It connects ancient fossils with living species, showing life’s adaptability and diversity.

Modern Discoveries in Evolutionary Biology

Modern discoveries have significantly advanced our understanding of evolution, revealing genetic mechanisms that Darwin couldn’t have imagined. These findings include the role of DNA mutations, gene regulation, and epigenetics in driving species adaptation. The identification of shared genetic codes across different organisms highlights the interconnectedness of life on Earth. Additionally, the study of fossils and comparative anatomy has provided insights into how ancient life forms transitioned into modern species. These advancements not only support Darwin’s original theories but also expand our knowledge of how life evolves and diversifies over time, offering a deeper appreciation for the complexity of evolutionary processes.

Genetic Evidence Supporting Evolution

Genetic evidence has become a cornerstone in validating evolutionary theory. Shared DNA sequences across species demonstrate common ancestry, while variations in genes explain adaptive traits. Fossil records align with genetic timelines, showing gradual changes. Comparative genomics reveals similarities, such as humans and chimps sharing 98% of their DNA. Mutations and natural selection drive these genetic changes, supporting Darwin’s ideas. This evidence bridges the gap between Darwin’s observations and modern biology, providing a molecular basis for evolution and showcasing how life adapts and evolves over millennia, confirming the interconnectedness of all living organisms through shared genetic material and evolutionary processes.

Answers to the Worksheet Questions

The worksheet answers provide clear explanations to questions about Darwin’s journey, modern evolutionary discoveries, and genetic evidence, offering a detailed understanding of the topic.

Structure of the Worksheet

The worksheet is divided into sections, each focusing on key concepts from the video “What Darwin Never Knew.” It begins with questions about Darwin’s journey aboard the HMS Beagle, followed by sections on modern evolutionary biology and genetic evidence. The format includes fill-in-the-blank questions, true/false statements, and short-answer prompts. Additionally, there are sections for interpreting diagrams and charts related to evolutionary processes. The worksheet concludes with essay-style questions that require synthesis of the material. This structure ensures a thorough understanding of both historical and contemporary aspects of evolutionary theory, making it an effective study guide for students.

Common Questions and Their Solutions

Common questions from the worksheet include identifying the mission of the HMS Beagle and Darwin’s role on the ship. Many students inquire about the genetic evidence supporting evolution, such as similarities in key genes across species. Another frequently asked question is how diverse life forms arise from a limited number of genes. Solutions provided in the worksheet answers highlight Darwin’s realization that species change over time and the role of genetic variation in driving evolution. These answers emphasize the connection between historical discoveries and modern biological understanding, aiding students in grasping complex evolutionary concepts.

Where to Find the PDF Version of the Worksheet

The PDF version of the worksheet is available on educational platforms like Quizlet and PBS Nova. Many universities offer free access through their digital libraries for students.

Online Resources and Educational Platforms

The “What Darwin Never Knew” worksheet and its answers are widely available on educational platforms like Quizlet, PBS Nova, and university websites. Students can access the PDF version for free through digital libraries or by downloading it directly from trusted sources. Platforms like pdfFiller also offer editable versions, making it easy to complete assignments. Additionally, many biology courses, such as General Biology (BIOL 10), provide this resource as part of their study materials. These platforms ensure that learners can easily find and utilize the worksheet to deepen their understanding of evolutionary biology and Darwin’s contributions.

Accessing the Worksheet for Free

The “What Darwin Never Knew” worksheet and its answers can be accessed for free through various online platforms. Educational websites like Quizlet and PBS Nova offer downloadable PDF versions of the worksheet, making it easily accessible for students. Additionally, many universities and educational institutions provide free access to this resource through their digital libraries or course materials. Platforms such as pdfFiller also allow users to download and edit the worksheet conveniently. This widespread availability ensures that students can obtain the worksheet without any cost, facilitating their study of evolutionary biology and Darwin’s groundbreaking discoveries.

The “What Darwin Never Knew” worksheet answers PDF is a valuable resource that bridges Darwin’s original theories with modern discoveries in evolutionary biology, enhancing learning and understanding.

The worksheet accompanying the video “What Darwin Never Knew” delves into Charles Darwin’s journey aboard the HMS Beagle, his discoveries, and modern evolutionary insights. It explores how genetic evidence supports Darwin’s theories, such as similarities in key genes across species and the mechanisms driving biodiversity. The worksheet also addresses common questions about evolution, providing clear solutions. Designed for educational purposes, it bridges the gap between Darwin’s original ideas and contemporary scientific understanding, making it a valuable resource for students and educators seeking to deepen their knowledge of evolutionary biology.

Final Thoughts on Darwin’s Contributions to Evolution

Charles Darwin’s groundbreaking work laid the foundation for modern evolutionary biology. His observations during the HMS Beagle voyage and subsequent theories revolutionized scientific understanding. The worksheet highlights how Darwin’s ideas, combined with contemporary genetic discoveries, provide a deeper insight into biodiversity. By exploring these connections, the resource underscores Darwin’s enduring influence on science. His contributions remain essential for understanding life’s complexity and continue to inspire further exploration into evolution’s mechanisms. Darwin’s legacy is a testament to the power of curiosity and the importance of bridging past discoveries with modern advancements in biology.

wonderful wizard of oz pdf

The Wonderful Wizard of Oz is a timeless children’s novel that aspires to be a modernized fairy tale, captivating readers with its magical storytelling and universal themes.

Written by L. Frank Baum, it follows Dorothy’s journey through the enchanting Land of Oz, blending wonder, adventure, and moral lessons that resonate with readers of all ages.

Available in PDF format, this beloved classic offers a convenient way to experience the tale, making it accessible to contemporary readers while preserving its original charm and appeal.

1.1 Overview of the Book

The Wonderful Wizard of Oz, written by L. Frank Baum, is a classic children’s novel published in 1900. It tells the story of Dorothy, a young girl from Kansas, and her adventures in the magical Land of Oz after a cyclone sweeps her away.

Filled with enchanting characters like the Scarecrow, Tin Woodman, and Cowardly Lion, the book explores themes of courage, friendship, and the desire to find home. Its whimsical narrative and moral lessons have made it a beloved tale for generations.

Available in PDF format, the book can be downloaded for free, allowing readers to enjoy this timeless story in a convenient and accessible way, ensuring its magic endures for modern audiences.

1.2 Historical Context and Publication

The Wonderful Wizard of Oz was first published in 1900, marking a significant milestone in children’s literature. Authored by L. Frank Baum, the book was designed to delight young readers with its imaginative storytelling and moral lessons. The novel gained immediate popularity, becoming a cultural phenomenon and paving the way for future adaptations. Its publication in various formats, including free PDF downloads, has ensured its accessibility and enduring appeal across generations.

Plot Summary

The Wonderful Wizard of Oz follows Dorothy, a young girl from Kansas, as she is swept away to Oz by a cyclone. On her quest to find home, she meets a Scarecrow, Tin Man, and Cowardly Lion, facing the Wicked Witch and discovering bravery and friendship.

2.1 Main Characters and Their Roles

Dorothy Gale: The protagonist, a young girl from Kansas, symbolizing innocence and resilience. Scarecrow: A kind, stuffed man seeking a brain, representing humility and wisdom. Tin Man: A hollow knight desiring a heart, embodying loyalty and compassion. Cowardly Lion: A timid beast wanting courage, highlighting bravery and friendship. Wicked Witch of the West: The antagonist, seeking revenge and control, testing Dorothy’s resolve. Together, they form a bond, guiding Dorothy home while discovering their own truths.

2.2 Key Events in the Story

A cyclone sweeps Dorothy to the Land of Oz, where her house crushes the Wicked Witch of the East, freeing the Munchkins. Dorothy embarks on a journey along the Yellow Brick Road, meeting a Scarecrow, Tin Man, and Cowardly Lion. The group faces the Wicked Witch of the West, who seeks revenge. Ultimately, Dorothy discovers the Wizard’s illusion and learns she can return home by clicking her magical silver shoes.

Availability in PDF Format

The Wonderful Wizard of Oz is available as a free PDF download, allowing readers to access the timeless story in a convenient digital format easily.

3.1 Free Download Options

Readers can easily download The Wonderful Wizard of Oz in PDF format for free from various online platforms, ensuring access to the classic tale without any cost or registration requirements. The novel is available on multiple websites, offering a seamless reading experience for audiences worldwide. This accessibility has made the story a convenient choice for both casual readers and educators. Additionally, the PDF version preserves the original text’s charm, making it a preferred option for those who appreciate the book’s timeless appeal. The availability of free downloads has further popularized the story, introducing it to new generations of readers who can now enjoy it digitally. This convenient access ensures that Dorothy’s adventures remain widely accessible and easily shareable.

3.2 Reading the Book Online

Readers can enjoy The Wonderful Wizard of Oz online without downloading, as it is available on various websites in PDF, EPUB, and Kindle formats. This convenient option allows readers to access the story instantly, making it ideal for those who prefer not to download files. The online version is free and does not require registration, ensuring easy and quick access to Dorothy’s adventures. This accessibility makes the story even more popular among modern readers. Additionally, the online format is user-friendly and compatible with multiple devices, offering a seamless reading experience for everyone. The availability of the book online has further expanded its reach, allowing new generations to discover its magic effortlessly. This digital convenience ensures that the timeless tale remains accessible and engaging for readers worldwide. The online version also provides an environmentally friendly way to enjoy the story, appealing to eco-conscious readers. Overall, reading The Wonderful Wizard of Oz online is a practical and enjoyable option for fans of the classic novel. The story’s availability in digital formats has made it easier than ever to explore the enchanting Land of Oz from anywhere in the world. With just a few clicks, readers can immerse themselves in Dorothy’s journey, experiencing the wonder and magic that have captivated audiences for over a century. The online version also offers the flexibility to adjust font sizes and settings, enhancing readability for diverse audiences. This adaptability ensures that the story remains accessible to readers of all ages and preferences, further solidifying its place as a beloved classic in modern times. The convenience of online reading has introduced The Wonderful Wizard of Oz to a new generation of readers who appreciate its timeless themes and captivating narrative. By making the book available online, the story continues to inspire and entertain readers globally, ensuring its legacy endures for years to come. This digital accessibility has also enabled educators to incorporate the novel into their curricula more easily, fostering a deeper appreciation for children’s literature. The online version of The Wonderful Wizard of Oz is a testament to the enduring appeal of Baum’s work, offering a bridge between the past and present for readers of all backgrounds. Through its online availability, the story remains a vital part of cultural and literary heritage, inviting readers to experience its magic in a contemporary way; The ease of access provided by online platforms ensures that The Wonderful Wizard of Oz continues to enchant readers, maintaining its relevance in an ever-changing world. This digital presence has also sparked new adaptations and interpretations, further enriching the story’s legacy. By embracing modern technology, the classic tale has evolved to meet the needs of today’s readers, ensuring its timeless appeal remains uninterrupted. The availability of The Wonderful Wizard of Oz online has created a new chapter in its history, allowing it to thrive in the digital age while retaining its original charm. This seamless transition into the online realm highlights the story’s adaptability and enduring popularity, making it a staple of both traditional and modern literature. The online version of the book serves as a reminder of the power of storytelling to transcend time and technology, connecting readers across generations. By offering The Wonderful Wizard of Oz online, the story continues to inspire imagination and wonder, proving that its magic is as relevant today as it was when first published. The convenience and accessibility of the online format ensure that Dorothy’s adventures will remain a beloved part of literary history for years to come.

The Author and His Vision

L. Frank Baum wrote The Wonderful Wizard of Oz to enchant children with a modern fairy tale. His background in folklore inspired stories blending wonder and moral lessons.

4.1 L. Frank Baum’s Background

L. Frank Baum, born in 1856, grew up with a passion for storytelling and folklore. Before becoming an author, he worked as a journalist, actor, and entrepreneur. His experiences shaped his creative vision, leading him to write The Wonderful Wizard of Oz in 1900, blending traditional fairy tales with modern twists to create a beloved classic.

4.2 Baum’s Approach to Writing for Children

L. Frank Baum crafted The Wonderful Wizard of Oz to delight children with imaginative storytelling, blending humor, adventure, and moral lessons. He aimed to create a modern fairy tale that resonated with young readers, emphasizing wonder and simplicity. Baum’s approach was innovative, as he focused on entertaining children while subtly embedding life lessons, making his work a cornerstone of children’s literature.

His storytelling style was spare yet vivid, appealing directly to children’s imaginations and sense of curiosity, ensuring the tale’s enduring appeal across generations.

Cultural and Literary Significance

The Wonderful Wizard of Oz is a cultural icon, influencing literature, film, and art. Its enduring popularity reflects its universal themes and imaginative storytelling, captivating audiences globally.

5.1 Impact on Children’s Literature

The Wonderful Wizard of Oz revolutionized children’s literature by introducing a modernized fairy tale that captivated young readers with its imaginative storytelling and vibrant characters.

Its innovative approach, blending fantasy with moral lessons, set a new standard for children’s books, inspiring future authors and solidifying its place as a foundational work in the genre.

The book’s accessibility in PDF format ensures its timeless appeal, allowing new generations to discover its magic and enduring cultural significance effortlessly.

5.2 Adaptations and Legacy

The Wonderful Wizard of Oz has inspired countless adaptations, including the iconic 1939 film, stage plays, and various interpretations, cementing its legacy as a cultural phenomenon.

Its enduring popularity is evident in its availability in PDF and other digital formats, ensuring that Dorothy’s magical journey remains accessible to new generations of readers and audiences worldwide.

This timeless tale continues to captivate hearts, proving its adaptability and relevance in modern media and literature.

Themes and Moral Lessons

The Wonderful Wizard of Oz explores themes of courage, friendship, and the importance of home, offering moral lessons about perseverance and the value of relationships.

6.1 Courage, Friendship, and Home

Dorothy’s journey exemplifies courage as she faces unknown challenges, demonstrating resilience and determination. Friendship is central, as she forms bonds with the Scarecrow, Tin Woodman, and Cowardly Lion, highlighting loyalty and support. The story underscores the importance of home, as Dorothy’s quest to return to Kansas symbolizes the comfort and security of one’s origins. These themes resonate universally, making the tale timeless and relatable.

6.2 The Role of Magic and Wonder

Magic and wonder are central to the story, creating an enchanting world that captivates readers. The Land of Oz, with its talking trees, magical slippers, and powerful wizards, sparks imagination and curiosity. Baum uses these elements to convey moral lessons and inspire awe, making the story a timeless fairy tale that appeals to both children and adults, fostering a sense of curiosity and enchantment.

The Wonderful Wizard of Oz in Modern Times

The Wonderful Wizard of Oz remains a beloved classic, with its PDF versions widely available, ensuring its timeless story reaches new generations, maintaining its relevance and charm today.

7.1 Popularity and Relevance Today

The Wonderful Wizard of Oz continues to captivate readers, its PDF versions making it easily accessible. The story’s themes of courage, friendship, and home remain timeless, appealing to both children and adults. Its modernized fairy tale elements and magical wonder ensure its relevance in contemporary culture, solidifying its place as a beloved classic in literature and popular media.

7.2 Educational Value for Contemporary Readers

The Wonderful Wizard of Oz offers significant educational value, fostering critical thinking and creativity through its enchanting narrative. The PDF format makes it accessible for classroom use, allowing students to explore timeless themes like courage, friendship, and perseverance. Its moral lessons and rich imagery inspire reflection, making it a valuable tool for teaching literature, ethics, and cultural heritage to modern readers of all ages.

The Wonderful Wizard of Oz and Its Adaptations

The Wonderful Wizard of Oz has inspired numerous adaptations, most notably the 1939 film, which introduced Hollywood embellishments while preserving the essence of Baum’s original tale.

8.1 The 1939 Film and Its Differences from the Book

The 1939 film adaptation of The Wonderful Wizard of Oz differs significantly from the original book, adding iconic songs and elaborate visual effects that enhance its magical appeal.

While the film captures the essence of Baum’s story, it incorporates Hollywood embellishments, such as Dorothy’s ruby slippers, which were silver shoes in the book, reflecting creative liberties taken to adapt the tale for the screen.

The Wonderful Wizard of Oz as a Fairy Tale

The Wonderful Wizard of Oz blends traditional fairy tale elements with modern storytelling, offering timeless wonder and moral lessons, making it a beloved classic for generations.

9.1 Modernized Fairy Tale Elements

The Wonderful Wizard of Oz reimagines traditional fairy tale tropes with a fresh, American twist, blending magic, memorable characters, and moral lessons. Baum’s storytelling introduces a young heroine, Dorothy, and her journey through a fantastical land, incorporating elements like talking animals and enchanted objects. The story’s use of vivid imagery and relatable themes modernizes the fairy tale genre, appealing to both children and adults. Its adaptation into films, notably the 1939 version, further popularized its magical elements and enduring charm.

The Wonderful Wizard of Oz remains a timeless classic, offering enchanting storytelling, universal themes, and a magical world that captivates readers of all ages in its PDF format.

10.1 Final Thoughts on the Book’s Timeless Appeal

The Wonderful Wizard of Oz endures as a beloved classic, captivating readers with its enchanting tale of courage, friendship, and the magic of home. Its themes of perseverance and kindness resonate across generations, making it a cherished story for both children and adults. Available in PDF format, the book remains accessible and relevant, ensuring its timeless appeal continues to inspire readers worldwide.

Its modernized fairy tale elements and universal lessons guarantee that Dorothy’s journey will forever hold a special place in literature and the hearts of its audience.