Monthly Archives: September 2024

amga rock guide

The American Mountain Guides Association (AMGA) offers the Rock Guide certification, a prestigious credential for aspiring guides. It ensures high standards of safety, technical skill, and teaching ability.

Certification Process

The AMGA certification process includes completing the Rock Guide Course (RGC) and passing a rigorous exam, requiring significant time and financial investment.

2.1. Rock Guide Course (RGC)

The Rock Guide Course (RGC) is the entry-level program for AMGA certification, designed for climbers with strong technical skills. The course focuses on teaching and guiding techniques, emphasizing safety, risk management, and client care. Participants learn how to instruct various climbing disciplines, including single-pitch and multi-pitch environments. The RGC also covers essential skills like anchor placement, rope management, and group dynamics. It serves as a foundation for further certification, preparing candidates for the rigorous Rock Guide Exam. The course is both physically and mentally challenging, ensuring that guides meet the highest industry standards. Completion of the RGC is a critical step toward becoming a certified AMGA Rock Guide.

2.2. Rock Guide Exam

The Rock Guide Exam is a rigorous assessment of a candidate’s technical, instructional, and decision-making skills. Conducted over five days, it evaluates the ability to guide safely and effectively in various rock climbing environments. Candidates are tested on their proficiency in multi-pitch and single-pitch scenarios, including anchor placement, rope management, and client care. The exam is known for its intensity, pushing candidates to demonstrate expertise under pressure.

Passing the Rock Guide Exam is a significant achievement, confirming a guide’s ability to meet the AMGA’s high standards. The exam is a critical step toward certification, ensuring that only the most skilled and capable guides earn the Rock Guide credential.

Single-Pitch Teaching

The AMGA emphasizes single-pitch teaching as a foundational skill for rock guides, focusing on clear communication and effective demonstration of climbing techniques to ensure client safety and skill development.

3.1. Challenges in the Single-Pitch Environment

The single-pitch environment presents unique challenges for AMGA Rock Guides, including managing varied client skill levels and ensuring safety; Limited time to teach complex techniques requires clear communication and effective demonstration. Guides must also handle unpredictable weather and environmental hazards while maintaining client engagement and confidence. Additionally, the physical demands of setting up and managing climbs can be exhausting. These challenges demand a combination of technical expertise, teaching skills, and adaptability; The AMGA emphasizes strategies to overcome these obstacles, ensuring guides can provide a safe and educational experience for clients.

3.2. Best Practices for Effective Teaching

Effective teaching in the single-pitch environment requires clear communication, patience, and adaptability. Breaking down complex skills into manageable steps ensures clients grasp key concepts. Demonstrating techniques visually and reinforcing them with hands-on practice enhances learning; Providing constructive feedback and encouraging questions fosters a supportive atmosphere. Guides should also emphasize safety protocols and decision-making processes. Creating a positive and inclusive environment helps build client confidence. The AMGA recommends tailoring instruction to individual needs, leveraging real-world examples, and maintaining a balance between teaching and climbing. By focusing on these best practices, guides can deliver a comprehensive and engaging educational experience, preparing clients for future climbs while ensuring their safety and enjoyment.

Becoming a Certified Guide

Becoming a certified AMGA Rock Guide involves a rigorous process that combines technical expertise, teaching skills, and practical experience. The journey begins with a strong foundation in rock climbing, followed by enrollment in the Rock Guide Course (RGC). This course hones instructional and guiding techniques, emphasizing safety and client management. Candidates must demonstrate proficiency in leading climbs, setting up protection, and navigating various terrains. After completing the course, aspiring guides undergo a comprehensive exam to assess their abilities. The certification signifies a high level of competence and dedication, enabling guides to lead climbers safely and effectively. The process is challenging but rewarding, preparing individuals for a successful career in rock guiding.

Cost and Time Investment

The AMGA Rock Guide certification requires a significant financial and time commitment. The cost of the program, including courses and exams, can exceed $8,000, which is substantial for many aspiring guides. Additionally, the process typically spans several years, as candidates need to gain extensive climbing experience and complete multiple stages of training. The Rock Guide Course alone is a major time investment, followed by a rigorous exam period. While the exact duration varies, it often takes at least two winters to finish the program. Despite the challenges, many find the investment worthwhile for the prestige and career opportunities it provides. The cost reflects the high standards and comprehensive training required to become a certified guide.

Required Skills for Certification

To become an AMGA-certified Rock Guide, candidates must possess a strong technical climbing background and versatility across various rock types. Proficiency in leading 5.9 trad routes and experience with 5.10a climbs is essential. Additionally, guides need expertise in anchoring, rope management, and rescue techniques. The ability to teach and communicate effectively is crucial, as is a deep understanding of safety protocols and risk management. Physical stamina and mental endurance are also vital, given the demanding nature of guiding. Candidates must demonstrate these skills consistently during both the Rock Guide Course and the exam to meet the AMGA’s high standards. These requirements ensure that certified guides can safely and effectively lead clients in diverse climbing environments.

The Rock Guide Exam Experience

The AMGA Rock Guide Exam is an intensive evaluation of a candidate’s technical, teaching, and decision-making skills. Conducted over five days, it involves guiding experienced instructors on multi-pitch routes, showcasing proficiency in anchoring, rope management, and rescue techniques. Candidates must demonstrate the ability to lead complex climbs efficiently and safely. The exam is mentally and physically demanding, requiring stamina and focus. Instructors assess not only technical skills but also the ability to communicate clearly and manage risk. Passing the exam is a significant achievement, reflecting a high level of competence and readiness to guide clients professionally. The rigorous process ensures that certified guides meet the AMGA’s elite standards for safety and expertise in rock climbing environments.

Career as a Rock Guide

A career as a rock guide requires significant time and financial investment, with certification costing around $8,000 and taking at least two winters to complete. Many guides work for large companies, which handle permits and insurance, allowing them to focus on guiding. While challenging, the role offers the opportunity to share a passion for climbing and the outdoors with clients. Diversifying skills across rock, alpine, and ski guiding can enhance career stability and opportunities.

8.1. Full-Time vs. Part-Time Guiding

Full-time rock guiding offers stability for those passionate about climbing, often involving employment with established companies that handle permits and insurance. This allows guides to focus on their craft and client interactions. Part-time guiding, however, provides flexibility, enabling individuals to balance other careers or pursuits with their love for climbing. Many guides start part-time to gain experience before transitioning to full-time roles. Both paths require dedication and continuous skill development. While full-time guiding can be demanding, it offers the opportunity to immerse oneself in the climbing world. Part-time guiding, on the other hand, allows for a diverse lifestyle, though it may lack the consistency of full-time work. Each option has its unique challenges and rewards.

8.2. Finding Work as a Guide

Finding work as a certified AMGA Rock Guide involves leveraging networks, skills, and experience. Many guides secure positions with established guide services, which handle logistics and client acquisition. Others freelance, building their own client bases through reputation and marketing. Some combine guiding with related roles, such as instructing or gear sales, to diversify income. Networking within the climbing community and staying updated on industry trends are key to opportunities. Certification is often a requirement for guide services, ensuring trust and reliability. Starting with part-time or assistant roles can lead to full-time positions. Patience and persistence are crucial as guides build their careers in this competitive yet rewarding field.

Alpine Guide Course Overview

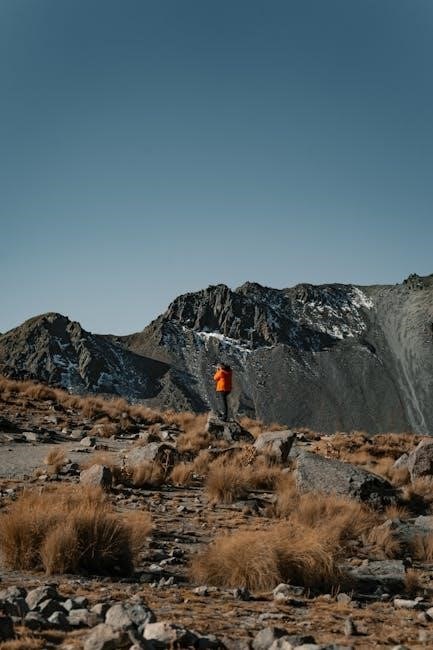
The Alpine Guide Course is an advanced program within the AMGA certification pathway, designed for experienced climbers seeking expertise in alpine environments. It focuses on refining technical skills in glaciated terrain, multi-pitch climbing, and high-altitude conditions. The course emphasizes risk management, route planning, and client care in challenging alpine settings. Participants engage in hands-on training, applying advanced techniques for navigating complex routes and handling emergencies. Successful completion prepares guides to lead expeditions in diverse alpine regions worldwide. The course builds on foundational skills, ensuring guides are adept at managing the unique challenges of alpine climbing. It is a crucial step for those aiming to achieve full IFMGA certification, enhancing both competence and confidence in high-mountain scenarios.

International Recognition of AMGA Certification

AMGA certification is globally recognized through the International Federation of Mountain Guides Associations (IFMGA), ensuring certified guides meet standardized international criteria. This recognition allows AMGA guides to work worldwide, demonstrating their expertise in rock, alpine, and ski guiding. The IFMGA endorsement validates the rigorous training and assessment processes of the AMGA, making its certifications highly respected across borders. With this international validation, AMGA-certified guides can lead expeditions in diverse international settings, from the European Alps to the Himalayas, without additional certifications. This recognition underscores the AMGA’s commitment to maintaining high standards, ensuring guides are well-prepared for global mountaineering challenges. Consequently, AMGA certification opens doors to international guiding opportunities, enhancing career prospects for aspiring mountain professionals.

The AMGA Rock Guide certification is a pinnacle of professional achievement for climbers seeking to guide safely and effectively. It demands rigorous training, hands-on experience, and a deep commitment to continuous learning. By mastering technical skills, risk management, and client care, certified guides earn the trust of climbers worldwide. The certification not only enhances career opportunities but also contributes to the broader climbing community by upholding high standards. For those passionate about sharing the joy of climbing, the AMGA Rock Guide program offers a clear path to excellence, ensuring a legacy of safety and expertise in the mountains. This esteemed certification remains a cornerstone for professional guides aiming to inspire and lead with confidence.

plant guide for pet owners

Welcome to our comprehensive guide on pet-safe plants! Discover how to create a beautiful, hazard-free environment for your furry friends. Learn which plants are safe and which to avoid, ensuring your pets’ health and happiness.

Understanding the Importance of Pet-Safe Plants

Pet-safe plants are essential for creating a harmonious and safe environment for both you and your furry friends. Many common houseplants and garden flowers can be toxic to cats and dogs, causing mild to severe health issues. Even small amounts of certain plants, such as lilies or sago palms, can be life-threatening to pets. Understanding which plants are toxic and which are safe allows you to enjoy the beauty of nature while protecting your pets from harm. By choosing pet-friendly plants, you can avoid accidental poisoning and ensure your home remains a welcoming space for all family members, including your cats and dogs. Always double-check the toxicity of any plant before bringing it into your home to keep your pets safe and healthy.

Toxic Plants to Avoid

Toxic plants pose serious risks to pets, with some causing vomiting, organ damage, or even death. Common culprits include lilies, sago palms, azaleas, tulips, and castor beans. Keep these deadly plants far from your pets.

Common Toxic Plants for Dogs

Several plants pose significant risks to dogs due to their toxic properties. Lilies, for instance, are highly poisonous, with even small amounts causing severe kidney damage. Sago palms are equally dangerous, as their seeds contain cycasin, which can lead to liver failure. Tulips and daffodils, while beautiful, contain toxic compounds that can cause vomiting, diarrhea, and respiratory issues in dogs. Castor beans, found in some gardens, are also deadly, as they contain ricin, a potent toxin. Azaleas and rhododendrons can trigger gastrointestinal distress and heart issues, while oleander is toxic to the heart, leading to arrhythmias and death. Daffodils, with their toxic bulbs, can cause severe symptoms if ingested. It’s crucial for dog owners to identify and remove these plants from their environments to ensure their pets’ safety. Always double-check the ASPCA’s list of toxic plants and consult a vet immediately if ingestion occurs.

Common Toxic Plants for Cats

Cats are particularly vulnerable to certain plants, which can cause severe health issues. Lily of the valley is one of the most poisonous plants, affecting the heart, nervous system, and digestion. Chrysanthemums contain toxic compounds that can lead to vomiting, diarrhea, and skin irritation in cats. Snake plants, while popular indoors, are toxic to cats and can cause nausea and vomiting if ingested. Hemlock, a highly toxic plant, can cause seizures, tremors, and respiratory failure. Other dangerous plants include dieffenbachia, which can lead to oral and gastrointestinal irritation, and cyclamen, whose roots are toxic and can cause heart arrhythmias. Cat owners must be vigilant about these plants, as even small amounts can be harmful. Always consult a veterinarian immediately if ingestion is suspected, and consider removing these plants from your home to ensure your cat’s safety.

Safe Plants for Pets

Welcome to our guide on pet-friendly plants! Discover non-toxic options like Spider Plants, ZZ Plants, and Parlor Palms, which are safe for your furry friends. These plants bring beauty without risking your pets’ health, creating a safer, greener space for everyone.

Non-Toxic Indoor Plants for Dogs

Creating a pet-friendly home doesn’t mean sacrificing style! Many indoor plants are safe for dogs and can brighten up your space. The Spider Plant is a great option, easy to care for and perfect for hanging baskets. The ZZ Plant is another low-maintenance choice that thrives in low-light conditions, making it ideal for busy pet owners. For a touch of greenery, the Parlor Palm is non-toxic to dogs and adds a tropical vibe to any room. Other safe options include Peperomia and Polka Dot Plants, which are small, stylish, and harmless to your furry friends. These plants not only purify the air but also create a welcoming environment for both you and your dog. Always double-check plant safety before bringing them home to ensure your pets stay healthy and happy.

Pet-Friendly Houseplants for Cats

Bringing plants into your home can be a joy, but it’s essential to choose ones that are safe for your feline friends. Calathea plants are a fantastic option, with stunning leaves and no toxicity to cats. The Prayer Plant (Maranta) is another beautiful choice, offering vibrant foliage and a safe environment for your pets. For a delicate touch, African Violets are non-toxic to cats and add a pop of color to any room. Orchids are also a great pick, as they are harmless to cats and come in a variety of elegant styles. These plants not only enhance your home’s beauty but also provide peace of mind, knowing your curious cat can explore without risk. Always verify the toxicity of any plant before introducing it to your cat’s environment to ensure their health and safety.

Outdoor Plants and Safety

When designing your outdoor space, choose pet-friendly plants like Buddleia, Gerbera, and Hollyhock to ensure your garden is safe for cats and dogs. Always verify plant toxicity to protect your pets from harm.

Safe Outdoor Plants for Dogs

Creating a pet-friendly garden involves selecting plants that are safe for your furry friends. Buddleia, commonly known as Butterfly Bush, is a great choice as it attracts pollinators and is non-toxic to dogs. Gerbera daisies and Hollyhock are also excellent options, adding vibrant colors without posing risks. Nasturtium and Geraniums are similarly safe and can thrive in various outdoor conditions. These plants are not only beautiful but also ensure your dog’s safety while exploring the garden. Always double-check the toxicity of any plant before introducing it to your outdoor space to protect your pets from accidental ingestion.

Pet-Friendly Garden Plants for Cats

When designing a garden that’s safe for your feline friends, choose plants that are non-toxic and appealing to cats. Buddleia (Butterfly Bush) and Gerbera daisies are excellent options, offering vibrant blooms without posing a risk. Hollyhock and Nasturtium are also safe and add color and texture to your outdoor space. These plants are not only visually stunning but also ensure your cat’s safety while they explore. Additionally, Petunias are a great choice, as they are harmless to cats and come in a variety of colors. Always verify the toxicity of any plant before planting to protect your pets from accidental ingestion. By selecting these pet-friendly options, you can create a beautiful and secure garden environment for your cats to enjoy.

What to Do If Your Pet Ingests a Toxic Plant

If your pet ingests a toxic plant, contact your veterinarian immediately. Induce vomiting only under professional advice and avoid administering antidotes without guidance to prevent further harm.

Immediate Steps to Take

If your pet ingests a toxic plant, act quickly to minimize harm. First, contact your veterinarian or a pet poison hotline immediately for professional guidance. Do not attempt to induce vomiting unless explicitly instructed by a veterinary professional, as this can worsen the situation. Identify the plant if possible, as this helps determine the best course of action. Keep a sample of the plant or take photos for identification. Monitor your pet closely for symptoms such as vomiting, drooling, or lethargy, and report these to your vet. If severe symptoms like seizures or difficulty breathing occur, seek emergency veterinary care right away. Time is critical in preventing long-term damage or complications. Always prioritize professional advice to ensure your pet receives the appropriate treatment promptly.

indy evo manual

Welcome to the Skullcandy Indy Evo manual, your comprehensive guide to unlocking the full potential of your wireless earbuds. This manual provides detailed instructions, troubleshooting tips, and essential information to ensure a seamless and enjoyable user experience.

Overview of the Skullcandy Indy Evo

The Skullcandy Indy Evo is a cutting-edge true wireless earbud designed for seamless audio experiences. It features Bluetooth 5.0 connectivity, water resistance, and a sleek design. The earbuds offer touch controls, ambient mode, and Tile integration for easy tracking. With a focus on durability and comfort, the Indy Evo is built to deliver high-quality sound and long battery life. This guide provides a detailed overview of its features, ensuring users can maximize their listening experience with ease and confidence.

Purpose of the Manual

This manual serves as a complete guide for Skullcandy Indy Evo users, offering step-by-step instructions and essential information. It covers pairing, controls, battery management, and troubleshooting to enhance user experience. The manual ensures users understand all features and settings, from ambient mode to Tile integration, providing a comprehensive resource for optimal use and care of the earbuds. By following this guide, users can maximize functionality and enjoyment of their Indy Evo earbuds.

Key Features and Specifications

The Skullcandy Indy Evo boasts Bluetooth 5.0, water resistance, and extended battery life. It offers a durable design, touch controls, and features like ambient mode and Tile integration for enhanced functionality.

Bluetooth Version and Compatibility

The Skullcandy Indy Evo operates on Bluetooth 5.0, ensuring robust and reliable wireless connectivity. It is compatible with a wide range of devices, including smartphones, tablets, and computers. The advanced Bluetooth version offers improved range, faster pairing, and enhanced stability, making it ideal for seamless audio streaming and calls. Additionally, the earbuds support multi-device pairing, allowing users to switch between devices effortlessly. This feature-rich connectivity ensures a hassle-free experience across various platforms.

Water Resistance and Durability

The Skullcandy Indy Evo earbuds feature a sweat- and water-resistant design, making them ideal for active lifestyles. With an IPX4 rating, they can withstand sweat and water splashes, ensuring durability during workouts or rainy days. The earbuds and charging case are built with premium materials, offering a sturdy construction that withstands daily wear and tear. This combination of water resistance and robust build quality ensures long-lasting performance and reliability, making them a great choice for everyday use and outdoor adventures.

Battery Life and Charging

The Skullcandy Indy Evo offers up to 6 hours of playtime on a single charge and an additional 16 hours with the charging case, providing a total of 22 hours of battery life. The earbuds support rapid charging, with 10 minutes of charging delivering 2 hours of playback. They use a USB-C charging port for convenience and efficiency. The case also features LED indicators to show charging status, ensuring you’re always informed about your battery levels. This combination of long-lasting performance and quick charging makes the Indy Evo ideal for all-day use.

Pairing and Connectivity

The Skullcandy Indy Evo supports Bluetooth 5.0, offering a stable and seamless connection with a range of up to 30 feet. It can pair with multiple devices, ensuring versatile connectivity and an uninterrupted listening experience.

Step-by-Step Pairing Process

To pair your Skullcandy Indy Evo earbuds, start by ensuring they are in pairing mode. Remove the earbuds from the charging case, and they will automatically enter pairing mode. On your device, go to Bluetooth settings and select “Skullcandy Indy Evo” from the available options. If prompted, confirm the connection. Once paired, you can enjoy your audio. For troubleshooting, restart both the earbuds and your device or reset the earbuds if necessary. Pairing multiple devices is possible by repeating the process for each device.

Pairing with Multiple Devices

The Skullcandy Indy Evo earbuds support pairing with multiple devices, allowing seamless switching between your phone, tablet, or computer. To pair with a second device, put the earbuds in pairing mode and select “Skullcandy Indy Evo” from the new device’s Bluetooth menu. The earbuds will remember previously paired devices, but only one device can be connected at a time. This feature enhances flexibility, enabling you to use your earbuds across different devices without repeating the pairing process each time.

Troubleshooting Pairing Issues

If you encounter pairing issues with your Indy Evo earbuds, start by ensuring both the earbuds and device are in pairing mode. Restart your device and earbuds, then reset the earbuds by holding the touch sensors for 10 seconds until the LED flashes red. Clear your device’s Bluetooth cache and attempt pairing again. If issues persist, check for firmware updates or consult the manual for detailed reset instructions. These steps should resolve most connectivity problems and restore proper pairing functionality.

User Guide and Controls

This section provides a detailed guide to operating your Indy Evo earbuds, including touch controls, gesture commands, and ambient mode settings for an enhanced listening experience.

Touch Controls and Gestures

Master the Indy Evo’s intuitive touch controls to manage your audio experience effortlessly. Tap once to play or pause music, twice to skip tracks, or three times to rewind. Answer calls with a single tap and end them with a double tap. Press and hold to activate voice assistant or switch between noise cancellation modes. These gestures ensure seamless control without needing your device, enhancing your overall listening convenience and satisfaction.

Ambient Mode and EQ Settings

Enhance your listening experience with the Indy Evo’s Ambient Mode, allowing you to stay aware of your surroundings while enjoying your music. Enable this mode by pressing and holding the earbud to let external sounds in. Additionally, customize your sound experience with EQ settings, which let you adjust bass, treble, and midrange levels to suit your preferences. These features ensure a tailored audio experience, whether you’re in a quiet room or an active environment, providing both convenience and sonic versatility.

Charging and Maintenance

Proper charging and maintenance are crucial for extending the life of your Indy Evo earbuds. Charge the earbuds and case using the provided USB-C cable, ensuring they reach full battery before first use. Regularly clean the earbuds and case to prevent dust buildup, and avoid exposing them to extreme temperatures or moisture. These practices will help maintain optimal performance and ensure long-lasting functionality.

How to Charge the Earbuds and Case

To charge your Indy Evo earbuds and case, use the provided USB-C cable. Plug one end into the case’s USB-C port and the other into a compatible power source; The case’s LED will indicate charging status: red for charging and blue when fully charged. The earbuds will automatically charge when placed inside the case. Ensure the case is fully charged before first use for optimal performance. Avoid overcharging to maintain battery health, and clean the charging contacts regularly for uninterrupted power flow.

Optimizing Battery Life

To maximize the battery life of your Indy Evo earbuds, store them in the charging case when not in use and avoid extreme temperatures. Keep the earbuds and case clean to ensure proper charging. Use the provided USB-C cable for charging, and avoid overcharging, as this can degrade battery health over time. For optimal performance, charge the case fully before first use. Regularly updating your earbuds’ firmware can also improve battery efficiency and overall functionality.

Additional Features

The Indy Evo offers Tile integration for tracking lost earbuds and enhanced sound customization with EQ settings. Ambient mode allows external sound for awareness, while touch controls provide easy access to features like play, pause, and volume adjustment, ensuring a tailored listening experience.

Tile Integration for Tracking

The Indy Evo earbuds feature Tile integration, enabling users to locate misplaced devices effortlessly. By utilizing the Tile app, owners can track the last known location of their earbuds on a map. This innovative feature provides peace of mind, ensuring that your Indy Evo remains connected and easily recoverable. Activate the Tile feature through the Skullcandy app to enhance security and convenience, making it simpler than ever to keep track of your wireless earbuds.

Troubleshooting Common Issues

Resolve sound and connectivity problems by resetting your earbuds, clearing paired devices, or updating firmware. Ensure proper fit and check for debris in the earbuds or charging case.

Resolving Sound and Connectivity Problems

If you experience sound issues or connectivity problems with your Indy Evo earbuds, start by resetting them. Place the earbuds in the case, then hold the case’s button for 15 seconds until the LED flashes red. Re-pair the earbuds with your device. Check for debris in the earbuds or case, as this can disrupt sound quality. Ensure proper fit and verify that both buds are fully charged. If issues persist, update the firmware or contact Skullcandy support for assistance.

Regulatory and Safety Information

The Skullcandy Indy Evo complies with FCC guidelines and safety standards. Ensure proper disposal of batteries and avoid exposure to extreme temperatures. Do not modify the device.

FCC Compliance and Safety Precautions

The Skullcandy Indy Evo is FCC ID: Y22-S1IVW compliant, ensuring it meets federal safety and emissions standards. Avoid exposure to extreme temperatures or moisture. Properly recycle batteries to prevent environmental harm. Do not modify the device, as this may void certification and pose safety risks. Keep the earbuds out of reach of children and avoid using them near sensitive electronic equipment. Follow all safety guidelines to ensure optimal performance and user safety.

Final Tips for Optimal Use

For the best experience with your Skullcandy Indy Evo earbuds, regularly clean the earbuds and charging case to prevent debris buildup. Ensure proper fit for optimal sound quality and comfort. Avoid exposing the earbuds to extreme temperatures or moisture. Update your earbuds’ firmware when available to access new features and improvements. Store the case in a cool, dry place when not in use. Charge the case fully before extended periods without access to power. Happy listening!

the savior’s gang trophy guide

Welcome to The Saviors Gang Trophy Guide, your ultimate resource for unlocking all 37 trophies in this unique strategy game. With 22 bronze, 9 silver, 5 gold, and 1 platinum trophy, the journey is both challenging and rewarding. This guide provides a detailed roadmap to help you navigate the game’s traps, puzzles, and humorous twists, ensuring you achieve the coveted platinum trophy efficiently.

Overview of the Game and Trophy System

The Saviors Gang is a strategy game developed by Catness Game Studios, offering a unique blend of humor, puzzles, and trap-filled levels. The trophy system is designed to reward players for completing specific tasks, with a total of 37 trophies: 22 bronze, 9 silver, 5 gold, and 1 platinum. The platinum trophy, titled “The Son of God,” requires unlocking all other trophies, showcasing the game’s achievable yet challenging design. Players can expect to spend around 6-10 hours to platinum the game, with a difficulty rating of 3/10. The trophy system is structured to guide players through the game’s storyline, art style, and mechanics, ensuring a smooth and rewarding experience. This guide will help you navigate the requirements for each trophy, making your journey to the platinum trophy efficient and enjoyable.

Bronze Trophies

The Saviors Gang features 22 Bronze Trophies, each with unique objectives like collecting Holy Grails or completing specific in-game actions, detailed in individual guides throughout the game.

Walking Dead ౼ Get 3 Holy Grails

To unlock the Walking Dead Bronze Trophy, you must collect 3 Holy Grails scattered throughout the game. These sacred items are hidden in various levels, requiring keen exploration and careful navigation. Each Holy Grail is located in hard-to-reach areas, often behind traps or secret paths. To find them, thoroughly explore each level, using your followers to uncover hidden passages. Once you’ve collected three, the trophy will automatically unlock, rewarding your dedication to uncovering the game’s secrets. Keep in mind that progress saves after each level, so ensure you track your Grail count. This trophy is a great introduction to the game’s hidden collectibles and sets the stage for further challenges;

Finding Altenum ౼ Get 3 Altenum Crystals

Earning the Finding Altenum Bronze Trophy requires collecting 3 Altenum Crystals, a challenging task that only 7.7% of players have achieved. These rare crystals are hidden in specific levels, often in hard-to-reach areas or behind intricate puzzles. To locate them, explore every nook and cranny, utilizing your followers to uncover hidden paths. Each crystal emits a faint glow, making them slightly easier to spot once you know where to look. The journey to collect all three is both rewarding and frustrating, as the crystals are well-concealed. Be patient and meticulous in your search, as missing even one will require replaying levels. This trophy tests your dedication and eye for detail, making it a memorable milestone in your progress toward the platinum trophy.

Out of Cover ― Hang Up the Phone to Worshippers 5 Times

The Out of Cover Bronze Trophy is unlocked by hanging up the phone to your worshippers 5 times. This trophy is straightforward but requires consistent action. Each time you interact with the phone, you have the option to end the call abruptly. To achieve this, simply repeat the action of hanging up five times across different instances in the game. It’s important to note that this trophy doesn’t require any specific conditions beyond the repeated action. Players can accomplish this by incorporating it into their regular gameplay. While it may seem trivial, it’s a fun way to engage with the game’s mechanics and adds to your trophy collection. This trophy is a small but memorable step toward earning the platinum trophy, showcasing your mastery of the game’s unique interactions.

Silver and Gold Trophies

The Silver and Gold trophies in The Saviors Gang add depth to your journey, with challenges like Fart-holic, requiring over 100 seconds of poison gas inhalation. These trophies test dedication and creativity.

Fart-holic ౼ Inhale Poison Gas for Over 100 Seconds

Fart-holic is a Silver trophy that challenges players to inhale poison gas for over 100 seconds. This unique and somewhat humorous achievement requires careful planning. To unlock it, locate the poison gas room in the map and stay within its area without leaving. Avoid distractions like worshippers or traps, as they might interrupt your progress. The game tracks the time spent in the gas, so patience is key. Interestingly, only 7.7% of players have managed to earn this trophy, making it a rare accomplishment. Use the in-game timer to monitor your progress and ensure you meet the 100-second requirement. This trophy highlights the game’s quirky design and adds a fun, albeit challenging, element to your platinum journey. Stay focused and persistent to claim this unusual achievement!

The Son of God ― Get All Trophies

The Son of God is the ultimate platinum trophy in The Saviors Gang, awarded for unlocking all 37 trophies. This achievement requires dedication and a thorough understanding of the game’s mechanics. With 22 bronze, 9 silver, 5 gold, and 1 platinum trophy to collect, players must navigate the game’s unique challenges, including quirky achievements like Fart-holic and Walking Dead. Tracking progress is essential, as some trophies are rare or tricky, such as Finding Altenum, which only 7.7% of players have achieved. Completing the platinum is estimated to take 6-10 hours, but careful planning and attention to detail are crucial. This trophy represents mastery of the game and is a rewarding conclusion to your journey through The Saviors Gang.

Platinum Trophy

The Savior Comes First is the platinum trophy, awarded for calming your worshippers with children conversations. This rare trophy, achieved by only 3% of players, signifies completion of all challenges and-story-related tasks, marking true mastery of The Saviors Gang.

The Savior Comes First ― Calm Your Worshippers with Children Conversations

The Savior Comes First is a rare platinum trophy, achieved by only 7.7% of players, requiring you to calm your worshippers using children’s conversations. This trophy is unlocked by successfully resolving conflicts through dialogue, showcasing your leadership skills. To earn it, focus on maintaining calm during intense moments and prioritize peaceful resolutions. Consistent interaction with your followers and strategic decision-making are key. This trophy symbolizes mastery of the game’s core mechanics and story completion. It is the final step toward achieving the platinum trophy, marking your journey as a true savior. With dedication and careful planning, this prestigious award is within reach, completing your The Saviors Gang trophy collection.

Trophy Guide and Road Map

The Saviors Gang Trophy Guide and Road Map outlines strategies for the 37 trophies (22 bronze, 9 silver, 5 gold, 1 platinum). Complete the journey in 6-10 hours with peaceful conflict resolution.

Estimated Trophy Difficulty and Time to Platinum

The trophy difficulty for The Saviors Gang is rated 3/10, making it an accessible platinum for most players. The estimated time to unlock all trophies, including the platinum, is between 6 to 10 hours. With a total of 37 trophies (22 bronze, 9 silver, 5 gold, and 1 platinum), the game offers a balanced challenge without excessive grind. Players can expect to complete the game in a short timeframe, as the trophy requirements are straightforward. The platinum trophy, The Son of God, is awarded for unlocking all other trophies, requiring dedication but no extreme skill. This makes The Saviors Gang an excellent choice for those seeking a quick and enjoyable platinum experience.

chosen study guide

A study guide is a structured resource designed to organize information, align with learning objectives, and provide clear direction for academic success. It helps identify research gaps, supports evidence-based conclusions, and accommodates various learning styles. By using digital tools and active learning techniques, it enhances understanding and retention of complex topics.

1.1 Understanding the Purpose of a Study Guide

A study guide serves as a structured resource to simplify complex topics, aiding students in achieving their learning objectives. It organizes information, highlights key concepts, and addresses research gaps, ensuring a focused approach. By providing evidence-based content, it helps learners develop a deeper understanding and form well-supported conclusions. A well-crafted guide accommodates diverse learning styles, fostering engagement and retention. Its ultimate goal is to act as a roadmap, guiding learners through their academic journey effectively and efficiently.

1.2 The Importance of a Well-Structured Study Guide

A well-structured study guide is essential for effective learning, as it provides a clear roadmap for understanding complex topics. It ensures that key concepts are emphasized, research gaps are addressed, and evidence-based conclusions are supported. A structured guide enhances retention, promotes critical thinking, and accommodates diverse learning styles. By organizing information logically, it helps learners stay focused, achieve their objectives, and develop a deeper understanding of the subject matter with greater efficiency and clarity.

How to Choose the Right Study Guide

Selecting the right study guide involves identifying your learning goals and evaluating content relevance. Ensure it aligns with your objectives, offers clear structure, and supports effective learning outcomes.

2.1 Identifying Your Learning Objectives

Identifying your learning objectives is crucial for selecting an effective study guide. Start by determining what you aim to achieve, ensuring your goals are specific and measurable. This clarity helps narrow down the content you need, focusing on relevance and depth. A well-defined objective guides your study direction, making the selection process more efficient and aligned with your academic or professional aspirations. This step ensures the guide you choose directly supports your learning journey.

2.2 Evaluating the Relevance of the Content

Evaluating the relevance of the content is essential to ensure the study guide aligns with your objectives. Look for material that directly addresses your research questions and fills identified gaps. Ensure the information is up-to-date and supported by credible sources. Avoid overly complex or redundant content that does not contribute to your understanding. The guide should provide clear, concise, and evidence-based information to support your learning journey effectively.

Key Components of an Effective Study Guide

A study guide must include clear objectives, well-organized information, and evidence-based content. It should address research gaps, provide actionable insights, and adapt to diverse learning styles effectively.

3.1 Clear Research Questions and Objectives

Clear research questions and objectives are essential for guiding the study and ensuring focus. They help identify gaps in existing knowledge and direct the investigation toward meaningful outcomes. Well-defined questions should be specific, feasible, and complex enough to warrant detailed exploration. Objectives align with these questions, outlining what the study aims to achieve. Together, they provide a roadmap for the research, ensuring that the study remains purposeful and aligned with its goals. This clarity enhances the overall effectiveness of the study guide.

3.2 Organized and Accessible Information

Organized and accessible information is crucial for effective learning. A well-structured study guide ensures content is logically arranged, making it easy to follow and review. Clear sections, bullet points, and summaries enhance comprehension. Digital tools, such as interactive modules and search functions, further improve accessibility. Visual aids like diagrams and charts also support understanding. By presenting information in a user-friendly format, the study guide caters to diverse learning styles, ensuring that learners can efficiently navigate and retain the material.

Effective Strategies for Using a Study Guide

Engage with active learning techniques, such as summarizing key points and self-quizzing. Prioritize time management by setting schedules and breaking content into manageable sections for better organization.

4.1 Active Learning Techniques

Active learning involves engaging with material through techniques like summarizing, self-quizzing, and elaboration. Summarizing helps condense information, while self-quizzing reinforces memory. Discussing concepts with peers or mentors enhances understanding. Applying knowledge to real-world scenarios bridges theory and practice. These methods encourage critical thinking and retention, making study sessions more effective and dynamic. Incorporating these techniques into your routine can significantly improve learning outcomes and overall academic performance.

4.2 Time Management and Study Schedules

Effective time management is crucial for maximizing learning outcomes. Create a balanced schedule that allocates specific blocks for studying, reviewing, and practicing. Prioritize tasks based on importance and deadlines, ensuring regular breaks to maintain focus. Regularly review and adjust your schedule to accommodate new topics or challenges. Consistency is key to building a routine that supports long-term retention and academic success. A well-planned schedule helps avoid procrastination and ensures steady progress toward your goals.

Common Mistakes to Avoid When Creating a Study Guide

Overcomplicating content, ignoring research gaps, and poor organization are common pitfalls. Ensure clarity, relevance, and a logical structure to maximize effectiveness and avoid overwhelming users with unnecessary information.

5.1 Overcomplicating the Content

Overcomplicating content is a common mistake that can confuse users. It often arises from including too much detail or unnecessary information. To avoid this, focus on clarity and conciseness. Use bullet points, visuals, and clear headings to make the guide easy to follow. Avoid jargon and ensure each section directly relates to the learning objectives. Simplifying complex topics without losing essential details is key to creating an effective and user-friendly study guide.

5.2 Ignoring Research Gaps and Questions

Ignoring research gaps and questions is a significant oversight in creating a study guide. A research gap refers to unaddressed questions or problems within a field. Failing to identify these gaps can make the guide incomplete or irrelevant. To avoid this, conduct thorough literature reviews and engage with existing studies. Systematic searches and expert consultations can help uncover overlooked areas. Addressing research gaps ensures the guide is comprehensive, up-to-date, and aligned with learner needs, fostering deeper understanding and critical thinking.

Adapting the Study Guide to Different Learning Styles

A well-adapted study guide accommodates visual, auditory, and kinesthetic learners. Incorporate diagrams, audio explanations, and interactive exercises to cater to diverse learning preferences, ensuring inclusivity and effectiveness.

6.1 Visual, Auditory, and Kinesthetic Approaches

Visual learners benefit from diagrams, charts, and images. Auditory learners thrive with podcasts, lectures, and discussions. Kinesthetic learners engage through hands-on activities and interactive exercises. By integrating these methods, a study guide becomes versatile, catering to diverse preferences and enhancing comprehension. This approach ensures that all learners can access information in a way that suits their unique needs, fostering a more inclusive and effective learning environment.

6.2 Tailoring the Guide for Individual Needs

Tailoring a study guide involves personalizing content to meet individual preferences and learning gaps. Assessments can identify strengths and weaknesses, enabling customization. Customizable templates allow users to adapt the guide’s structure and focus. Incorporating adaptable content ensures the guide remains relevant and effective for diverse learners. This personalized approach fosters engagement and maximizes learning outcomes, making the study guide a flexible and valuable resource for achieving academic and professional goals.

The Role of Technology in Modern Study Guides

Technology enhances learning through digital tools, AI personalizes study experiences, and online resources make information accessible, fostering engagement and improving retention in modern study guides.

7.1 Digital Tools for Enhanced Learning

Digital tools revolutionize learning by offering interactive platforms, multimedia resources, and real-time collaboration features. E-learning platforms, interactive simulations, and AI-driven apps provide personalized learning experiences. These tools enhance engagement, improve retention, and support active learning techniques. They also enable access to a vast library of resources, making studying flexible and efficient. By leveraging these technologies, learners can explore complex topics in-depth, fostering a deeper understanding and improving overall academic performance. Digital tools are essential for modern, effective study guides.

7.2 Leveraging AI and Online Resources

AI and online resources significantly enhance the effectiveness of study guides by providing instant access to relevant information and advanced learning tools. AI can assist in researching topics, organizing content, and even suggesting relevant questions. Online platforms offer comprehensive databases, systematic reviews, and interactive materials. By integrating these resources, study guides become more dynamic and tailored to individual needs, ensuring a deeper understanding of complex subjects and fostering academic excellence through innovative solutions. This approach streamlines the learning process and improves outcomes.

A well-crafted study guide serves as a valuable tool for academic success, offering clarity, structure, and focus. It empowers learners to achieve their goals effectively while fostering continuous improvement and deeper understanding of their chosen subject.

8.1 Summarizing the Key Takeaways

A well-structured study guide is essential for achieving academic success, providing clear objectives, organized information, and active learning techniques. It addresses research gaps, supports evidence-based conclusions, and adapts to diverse learning styles. By leveraging technology and continuous improvement, a study guide becomes a dynamic tool for deeper understanding and retention. Ultimately, it empowers learners to stay focused, efficient, and confident in their educational journey, ensuring long-term mastery of the chosen subject.

8.2 Encouraging Continuous Improvement

Continuous improvement is vital for maximizing the effectiveness of a study guide. Regularly updating content, incorporating feedback, and refining strategies ensure relevance and clarity. Learners should revisit and reflect on material to deepen understanding. Encouraging self-assessment and seeking new resources fosters growth and adaptability. By embracing lifelong learning, individuals can stay updated with evolving knowledge and enhance their academic and professional development, ultimately achieving greater mastery of their chosen subject.

1987 porsche 944 factory interior colors brochure pdf

The 1987 Porsche 944 Factory Interior Colors Brochure is a detailed guide showcasing the available interior color options, fabrics, and upholstery designs for the model year. It features fabric samples, standard and special colors, and provides a comprehensive overview of the design philosophy behind the 944’s interior. This brochure is a valuable resource for enthusiasts and restorers, offering insights into the era’s aesthetic choices and materials.

Historical Context and Design Philosophy of the 1987 Porsche 944

The 1987 Porsche 944 emerged during a pivotal era for the brand, blending sportiness with accessibility. Introduced in the mid-1980s, the 944 was designed to appeal to a broader audience while maintaining Porsche’s performance heritage. Its design philosophy emphasized clean lines, aerodynamic efficiency, and a balance between form and function. The interior reflected this approach, focusing on functional elegance and ergonomic design. The 944’s development marked a shift toward more refined interiors, catering to drivers who valued both performance and comfort. This philosophy influenced the creation of the Factory Interior Colors Brochure, which showcased a harmonious blend of aesthetics and practicality, aligning with Porsche’s reputation for precision and sophistication.

Overview of the 1987 Porsche 944 Factory Interior Colors Brochure

The 1987 Porsche 944 Factory Interior Colors Brochure is a comprehensive guide with 6 pages of color options, fabric samples, essential for enthusiasts and restorers.

3.1. Significance of the Brochure for Porsche Enthusiasts

The 1987 Porsche 944 Factory Interior Colors Brochure holds immense significance for enthusiasts, serving as a vital reference for restoring and maintaining the car’s original aesthetic integrity. It provides detailed insights into the available interior color options, fabric samples, and upholstery designs, allowing collectors and restorers to accurately recreate the period-correct interior. Additionally, the brochure offers a glimpse into Porsche’s design philosophy of the era, showcasing the brand’s commitment to quality and craftsmanship. For those passionate about the 944, this document is an indispensable resource, ensuring authenticity and precision in preservation efforts. Its historical value also makes it a sought-after collectible among Porsche aficionados.

3.2. Structure and Content of the Brochure

The 1987 Porsche 944 Factory Interior Colors Brochure is structured to provide a comprehensive overview of the interior design options available for the model year. It features six pages filled with detailed fabric samples, showcasing both standard and special interior colors. The brochure also includes sections dedicated to exterior paint codes, ensuring a harmonious coordination between interior and exterior aesthetics. Upholstery patterns, such as leather, leatherette, and velour options, are prominently displayed, offering insights into the materials and craftsmanship of the era. Additionally, the document highlights custom interior trim choices and carpet colors, catering to individual preferences. This organized layout makes it an essential tool for enthusiasts and restorers aiming to maintain or recreate the original factory specifications with precision and authenticity.

Interior Color Options for the 1987 Porsche 944

The 1987 Porsche 944 offered a range of interior color options, including leather, leatherette, velour, and Porsche cloth, with samples provided in the brochure for selection.

4.1. Standard Interior Color Options

The 1987 Porsche 944 featured standard interior color options that emphasized simplicity and elegance. Black, Black/White, and other neutral tones were prominent, aligning with the car’s sporty yet refined aesthetic. These colors were available across various materials, including leatherette and cloth, ensuring consistency and durability. The brochure highlighted these options with fabric samples, allowing buyers to visualize the finishes. These standard choices catered to a broad audience, providing a timeless appeal that complemented the 944’s design philosophy. The focus was on functionality and classic style, making the interiors both practical and visually appealing for everyday use and enthusiast driving.

4.2. Custom and Special Interior Color Options

The 1987 Porsche 944 brochure also presented custom and special interior color options for discerning buyers seeking unique personalization. These options included exclusive leather upholstery colors and contrasting stitching, offering a touch of luxury and individuality. Special color combinations, such as two-tone interiors, were available to match exterior paint codes, creating a cohesive aesthetic. Additionally, the brochure featured premium materials like pin-stripe velours and Studio Check patterns, adding sophistication. These custom options allowed owners to tailor their 944’s interior to their preferences, reflecting Porsche’s commitment to craftsmanship and bespoke design. This level of customization enhanced the car’s appeal among enthusiasts and collectors, making each 944 truly distinctive.

Fabric and Upholstery Options in the 1987 Porsche 944

The 1987 Porsche 944 offered a range of fabric and upholstery options, including leather, leatherette, and Porsche-specific cloths like pin-stripe velours and Studio Check patterns, ensuring premium quality and aesthetics.

5.1. Materials and Quality of Interior Fabrics

The 1987 Porsche 944 featured high-quality interior fabrics, including leather, leatherette, and exclusive Porsche materials like pin-stripe velours and Studio Check patterns. These fabrics were renowned for their durability, comfort, and premium aesthetic appeal. The brochure highlighted the texture and color accuracy of each material, ensuring enthusiasts could visualize the options. Leather options provided a luxurious feel, while cloth choices offered a sporty vibe. The materials were carefully selected to maintain Porsche’s reputation for craftsmanship and attention to detail. This focus on quality ensured the interiors remained timeless, appealing to both drivers and collectors. The fabrics also complemented the exterior color schemes, creating a cohesive design experience.

5.2. Upholstery Patterns and Designs

The 1987 Porsche 944 offered a variety of upholstery patterns and designs, blending style with functionality. The brochure featured options like the classic “Porsche Cloth” and the distinctive “Studio Check” pattern, which added a sporty yet elegant touch. Pin-Stripe Velour upholstery was another highlight, offering a refined aesthetic. These designs were carefully crafted to complement the car’s interior color schemes, ensuring a cohesive and premium look. The patterns were not only visually appealing but also durable, reflecting Porsche’s commitment to quality. The brochure provided detailed images and fabric samples, allowing customers to explore the options and select the perfect match for their vehicle’s interior. This attention to detail made the 944’s upholstery stand out, appealing to both performance enthusiasts and design connoisseurs.

Paint Codes and Interior Color Combinations

The 1987 Porsche 944 Factory Interior Colors Brochure details specific paint codes and interior color combinations, ensuring a harmonious and authentic appearance for restoration and customization projects.

6.1. Decoding Paint and Interior Codes

The 1987 Porsche 944 Factory Interior Colors Brochure provides a detailed system for decoding paint and interior codes, ensuring accuracy in restoration and customization. Each code follows a specific format, such as “XXX YYY,” where “XXX” represents the paint color and “YYY” denotes the interior color. These codes are crucial for identifying original specifications and maintaining authenticity. The brochure includes a chart that cross-references these codes, making it easier to match exterior and interior colors. Additionally, the codes are linked to specific fabric and upholstery options, ensuring a cohesive design. This system is invaluable for enthusiasts and restorers aiming to preserve the car’s original aesthetic or replicate it faithfully.

6.2. Importance of Color Codes for Restoration

Color codes are essential for restoring the 1987 Porsche 944 to its original specifications. These codes ensure authenticity, helping enthusiasts and professionals accurately replicate the car’s factory appearance. The codes guide the selection of correct paint and interior materials, preventing guesswork and ensuring historical accuracy. By referencing the original codes, restorers can maintain the vehicle’s integrity, preserving its value and heritage. The factory brochure serves as a vital resource, providing a clear reference for color matching and material selection. This attention to detail is crucial for achieving a restoration that aligns with Porsche’s original vision, making the color codes indispensable for anyone aiming for a faithful restoration.

The Role of the 944 S in the Evolution of Interior Colors

The 944 S, introduced in 1987, played a significant role in evolving the interior color palette of the Porsche 944. This model emphasized a sportier aesthetic, offering exclusive interior color options that differentiated it from the standard 944. The 944 S featured bold, contrasting color combinations and premium upholstery materials, setting a new standard for interior design. These enhancements influenced subsequent models, expanding the range of available colors and fabrics. The 944 S’s interior updates reflected Porsche’s commitment to blending performance with style, ensuring the car’s appeal to driving enthusiasts and design aficionados alike. This evolution showcased Porsche’s dedication to innovation in both form and function.

Modern Relevance and Collectibility of the Brochure

The 1987 Porsche 944 Factory Interior Colors Brochure has become a sought-after collectible among Porsche enthusiasts and restorers. Its detailed documentation of interior color options, fabric samples, and paint codes makes it an invaluable resource for maintaining authenticity in classic car restorations; As a historical artifact, it provides insights into Porsche’s design philosophy of the era. The brochure’s rarity and the growing interest in vintage Porsche models have increased its collectibility. Digital versions, such as PDF formats, have made it more accessible, yet physical copies remain highly prized. For collectors and historians, this brochure is a testament to the evolution of automotive design and a cherished piece of Porsche’s heritage.

The 1987 Porsche 944 Factory Interior Colors Brochure serves as a vital historical artifact, capturing the design ethos and material choices of its era. It remains a crucial resource for restorers and enthusiasts, ensuring authenticity in preserving the 944’s legacy. The brochure’s detailed documentation of interior colors, fabrics, and paint codes highlights Porsche’s commitment to quality and aesthetics. Its modern relevance lies in its ability to guide restorations and inspire new generations of Porsche aficionados. As a collectible, it symbolizes the enduring appeal of the 944, bridging the past and present for those passionate about Porsche’s heritage. Its significance continues to grow, making it a cherished piece for anyone connected to the 944’s storied history.

whirlpool duet steam washer manual

Safety Precautions for Using the Whirlpool Duet Steam Washer

Always read the manual before use. Ensure proper installation and leveling to avoid vibration. Keep the washer on a stable‚ flat surface away from flammable materials.

  • Avoid overloading the washer to prevent imbalance.
  • Do not leave children unattended near the appliance.
  • Ensure proper ventilation in the laundry area.

Follow all safety guidelines to prevent accidents and ensure optimal performance.

1.1 Important Safety Notices

Ensure proper installation and leveling to prevent vibration. Keep the washer on a stable‚ flat surface away from flammable materials. Avoid overloading‚ as this can cause imbalance. Do not leave children unattended near the appliance. Ensure proper ventilation in the laundry area. Follow all safety guidelines to prevent accidents and ensure optimal performance. Always read the manual before use.

  • Avoid overloading to maintain balance during operation.
  • Keep the area around the washer clear of obstructions.
  • Use only recommended detergents to avoid damage.

Adhere to these precautions to ensure safe and efficient use of your Whirlpool Duet Steam Washer.

1.2 Electrical Requirements and Installation Safety

Ensure the washer is installed on a firm‚ level surface to prevent vibration. Connect to a grounded electrical outlet rated for the washer’s voltage and amperage requirements. Avoid overloading circuits to prevent electrical hazards. Keep the washer away from water sources to reduce risk of electrical shock. Proper installation ensures safe and efficient operation.

  • Use a dedicated 20-amp circuit for optimal performance.
  • Ensure the power cord is securely connected to avoid damage.
  • Follow installation guidelines to maintain warranty coverage.

Correct installation prevents safety risks and ensures reliable functionality.

Understanding the Components of the Whirlpool Duet Steam Washer

Understand the key components‚ including the control panel with LED display‚ steam function button‚ detergent dispenser‚ and washer drum. These features work together for efficient cleaning.

2.1 Control Panel Overview

The control panel features a user-friendly LED display and touch controls. It includes a cycle selection knob‚ steam function button‚ and options for temperature and spin speed. The panel also displays error codes and progress indicators. Additional features like child lock and delay start are accessible. Use the panel to customize wash settings and monitor cycle progress for optimal laundry management.

2.2 Key Features of the Steam Function

The steam function enhances cleaning by penetrating fabrics deeply. It tackles tough stains‚ reduces odors‚ and freshens clothes. The washer offers steam settings for various cycles‚ including sanitize and refresh modes. Steam technology helps preserve colors and fabrics while minimizing wrinkles. This feature is energy-efficient and integrates seamlessly with other washer settings for improved performance and cleaner results.

Wash Cycles and Options

The Whirlpool Duet Steam Washer offers various wash cycles‚ including standard and steam-specific options. Users can customize settings like temperature and spin speed for tailored cleaning.

3.1 Standard Wash Cycles

The Whirlpool Duet Steam Washer features several standard wash cycles‚ including Normal‚ Heavy Duty‚ and Delicate. These cycles cater to different fabric types and soil levels. The Normal cycle is ideal for everyday laundry‚ while Heavy Duty handles heavily soiled items. The Delicate cycle gently cleans fragile fabrics. Each cycle can be customized with options like temperature and spin speed for optimal cleaning and fabric care.

3.2 Steam-Specific Wash Cycles

The Whirlpool Duet Steam Washer offers specialized steam cycles for enhanced cleaning. The Steam Clean cycle uses steam to remove tough stains and odors. The Sanitize cycle combines heat and steam to deeply clean and freshen fabrics. These cycles are designed to penetrate fabrics more effectively than traditional washing methods‚ ensuring a deeper clean while being gentle on clothes.

3.3 Additional Options for Customizing Wash Settings

Customize your wash settings with options like soil level‚ temperature‚ and spin speed. The Steam Boost feature enhances stain removal by adding steam during the wash cycle. Delay Start allows you to set a wash cycle to begin later. These options provide flexibility to tailor wash cycles to specific fabric types and cleaning needs for optimal results.

Maintenance and Cleaning

Regularly clean the washer exterior with a damp cloth. Check and clean the drain pump filter to ensure proper drainage. Leave the door open after use to dry the interior and prevent mildew. Regular maintenance helps maintain efficiency and longevity of the appliance.

4.1 Cleaning the Washer Exterior and Interior

Clean the exterior with a soft‚ damp cloth‚ avoiding harsh chemicals. For the interior‚ run a cleaning cycle or wipe with a mixture of water and vinegar. Regularly check and clean the gasket and detergent dispenser to remove residue. Ensure the drain pump filter is cleared of debris. Leave the door open after use to allow the interior to dry and prevent mildew buildup.

4.2 Checking and Cleaning the Drain Pump Filter

Regularly inspect and clean the drain pump filter to prevent clogs and odors. Locate the filter at the bottom of the washer‚ remove it‚ and rinse with warm water. Replace it securely after cleaning. Check every 1-2 months or when error codes indicate a blockage. Cleaning ensures smooth operation and prevents potential damage.

Troubleshooting Common Issues

Identify and resolve issues promptly to maintain washer performance. Check error codes in the manual for specific solutions. Ensure proper balancing and verify water supply connections. Regular cleaning and maintenance can prevent common problems.

5.1 Identifying and Solving Common Problems

Common issues with the Whirlpool Duet Steam Washer include improper loading‚ excessive noise‚ or poor cleaning performance. Check for unbalanced loads‚ ensure proper detergent usage‚ and verify drain pump functionality. Reset the washer by unplugging it for 30 seconds if it malfunctions. Regular maintenance‚ like cleaning filters‚ can prevent many issues. Always refer to the manual for specific solutions.

5.2 Understanding Error Codes and Solutions

The Whirlpool Duet Steam Washer displays error codes like F02‚ F03‚ or F05‚ indicating specific issues. F02 often relates to drainage problems‚ while F03 and F05 may signal communication errors or sensor malfunctions. Refer to the manual for code meanings and reset procedures. Ensure the washer is properly installed and maintained to minimize error occurrences. Always follow the recommended troubleshooting steps.

Downloading and Accessing the Manual

Visit Whirlpool’s official website to download the manual for your Duet Steam Washer. Enter your model number to access PDF guides‚ including Use and Care‚ Installation‚ and Energy manuals.

6.1 Finding the Correct Manual for Your Model

Visit Whirlpool’s official website and navigate to the Support section. Enter your model number (found on the washer’s back or bottom) in the search bar. Select your specific model to access the corresponding PDF manual. Ensure the manual matches your Duet Steam Washer model for accurate information and guidance.

6.2 Navigating the Manual for Specific Information

Use the table of contents to quickly locate sections like wash cycles‚ maintenance‚ or troubleshooting. Employ the search function in the PDF to find keywords. Refer to the index for specific topics. Pay attention to highlighted sections for critical information. Save or print relevant pages for easy access. This ensures efficient use of the manual for your Whirlpool Duet Steam Washer needs.

Energy Efficiency and Eco-Mode

The Whirlpool Duet Steam Washer features energy-saving technology to reduce water and electricity consumption. The Eco-Mode optimizes wash cycles for lower energy use while maintaining performance.

  • Energy-efficient design meets ENERGY STAR® standards.
  • Eco-Mode adjusts water temperature and cycle length.
  • Smart sensors optimize energy usage based on load size.

Using Eco-Mode helps reduce environmental impact and lowers utility bills.

7.1 Energy-Saving Features of the Whirlpool Duet Steam Washer

The Whirlpool Duet Steam Washer is designed with advanced energy-saving features. It includes smart sensors that detect load size and optimize water and energy usage. The washer also offers an Eco-Mode that reduces energy consumption by adjusting cycle length and water temperature. Additionally‚ the ENERGY STAR® certification ensures it meets high efficiency standards‚ helping you save on utility bills while reducing environmental impact.

  • Adaptive technology adjusts energy use based on load size.
  • Eco-Mode lowers energy and water consumption.
  • Steam function enhances cleaning while using less energy.

7.2 Using Eco-Mode for Optimal Energy Consumption

Eco-Mode on the Whirlpool Duet Steam Washer reduces energy and water usage by extending cycle time and lowering temperatures. This mode is ideal for lightly soiled clothes‚ ensuring efficient cleaning while minimizing environmental impact. Activate Eco-Mode via the control panel for energy-conscious operation that maintains performance while lowering utility costs.

  • Select Eco-Mode on the control panel for energy efficiency;
  • It extends wash cycles and uses less water and energy.
  • Perfect for lighter loads to reduce environmental footprint.

Warranty Information

Your Whirlpool Duet Steam Washer is backed by a comprehensive warranty. Register your product to activate coverage and access benefits. Details are provided in the manual or online.

  • Warranty terms vary by region and model.
  • Register your appliance for extended benefits.
  • Refer to the manual or website for specifics.

8.1 Understanding Your Warranty Coverage

Your Whirlpool Duet Steam Washer warranty provides coverage for parts and labor under specific conditions. The warranty period varies by model and region‚ typically covering manufacturing defects. It does not include damage caused by misuse or improper installation. For detailed terms‚ refer to the manual or visit Whirlpool’s official website.

  • Covers parts and labor for manufacturing defects.
  • Duration varies by model and region.
  • Excludes damage from misuse or improper installation.

8.2 Registering Your Product for Warranty Benefits

Register your Whirlpool Duet Steam Washer to activate warranty benefits. Visit Whirlpool’s official website‚ create an account‚ and enter your model number. This ensures extended support and faster service. Keep your purchase receipt and model number handy for registration. For assistance‚ contact Whirlpool Customer Care or refer to the manual for detailed instructions.

  • Visit Whirlpool’s website and create an account.
  • Enter your model number and purchase details.
  • Retain purchase receipt and model number for verification.

Installation Requirements

Ensure the washer is installed on a stable‚ flat surface. Provide adequate ventilation and keep it away from flammable materials. Follow the installation guide in the manual.

  • Ensure proper leveling to prevent vibration.
  • Connect to a grounded electrical outlet.
  • Secure water supply lines tightly.

9.1 Space and Placement Recommendations

Ensure proper clearance around the washer for ventilation. Leave at least 1 inch of space on all sides. Place the washer on a sturdy‚ level floor to prevent vibration and noise. Keep the area clean and clear of clutter. Ensure proximity to water supply and drain for convenient installation. Refer to the manual for specific spacing requirements.

9.2 Leveling and Balancing the Washer

Proper leveling ensures smooth operation and prevents vibration. Use the adjustable feet to stabilize the washer on a firm‚ even surface. Check balance by placing a level on the top. If uneven‚ adjust the feet until balanced. Improper leveling can cause noise or damage. Ensure the washer is stable before use for optimal performance and longevity.

Customer Support and Repair

Contact Whirlpool Customer Care at 1-800-422-1581 for assistance. Visit their official website for live chat‚ troubleshooting guides‚ and to schedule a certified repair service.

10.1 Contacting Whirlpool Customer Care

For assistance‚ contact Whirlpool Customer Care at 1-800-422-1581 or visit their official website; Use the live chat feature or submit a request online. Representatives are available to help with troubleshooting‚ repair scheduling‚ and warranty inquiries. You can also find support resources‚ manuals‚ and repair options on their website. Visit www.whirlpool.com for more details.

  • Phone: 1-800-422-1581
  • Website: www.whirlpool.com
  • Live Chat: Available on the official website
  • Email Support: Submit a request via the website

Reach out for expert assistance with your Whirlpool Duet Steam Washer.

10.2 Scheduling a Repair Service

To schedule a repair‚ visit the Whirlpool website or call 1-800-422-1581. Log in to your account‚ select the service option‚ and provide details about your washer. Choose a convenient time for a certified technician to visit. Ensure your model and serial number are ready for faster service.

  • Visit www.whirlpool.com for online scheduling.
  • Call 1-800-422-1581 for phone assistance.
  • Prepare your model and serial number for service.

Professional technicians will address your repair needs efficiently.

Additional Resources

Visit Whirlpool’s official website for online guides‚ instructional videos‚ and community forums. Explore troubleshooting tips and user discussions for enhanced understanding and maintenance of your washer.

11.1 Online Guides and Videos for Further Assistance

Access detailed online guides and instructional videos on Whirlpool’s official website. These resources provide step-by-step troubleshooting tips‚ repair guidance‚ and maintenance advice. Explore model-specific tutorials for optimal use of your Duet Steam Washer. Utilize these tools to enhance your understanding and ensure proper care for your appliance.

11.2 Community Forums and User Discussions

Engage with online forums and user discussions for shared experiences and solutions. Platforms like Sears Parts Direct and PartSelect host conversations on troubleshooting and maintenance. Users often discuss common issues‚ repair tips‚ and optimal usage of the Whirlpool Duet Steam Washer. These communities provide valuable insights and real-world advice from fellow users.

  • Discover tips from experienced users.
  • Learn about common issues and fixes.
  • Gain insights into optimizing washer performance.

jeans fit guide

Finding the perfect jeans fit can transform your wardrobe. This guide helps you navigate various styles, body types, and measurements to ensure comfort and confidence every time.

1.1 Understanding the Importance of Fit in Jeans

A well-fitting pair of jeans enhances comfort, confidence, and style. Proper fit ensures optimal mobility and flatters your body shape, while poor fit can cause discomfort and an unflattering appearance. Factors like fabric stretch, waist height, and inseam length significantly impact how jeans sit on your body. Understanding your measurements and body type is crucial for selecting the right fit, ensuring both functionality and fashion. A good fit boosts your overall look and feel, making it essential to prioritize when choosing jeans.

1.2 Brief Overview of Jeans Styles and Fits

Jeans come in various styles, each catering to different preferences and body types. Popular fits include skinny, straight, relaxed, and bootcut. High-waisted and low-rise options add versatility, while tapered and slim fits offer modern silhouettes. Understanding these styles helps you choose the best fit for your lifestyle and body, ensuring both comfort and confidence in your denim choices.

Body Types and Jeans Fit

Understanding your body type—petite, tall, hourglass, or pear-shaped—helps determine the best jeans fit. Factors like inseam and fabric stretch ensure comfort and flatter your silhouette perfectly.

2.1 Jeans Fits for Different Body Types (Petite, Tall, Hourglass, etc.)

Jeans fits vary to flatter different body types. Petite frames shine in high-waisted or straight-leg styles, elongating legs. Tall individuals can embrace boyfriend or relaxed fits for a balanced look. Hourglass figures thrive in high-waisted or skinny jeans to accentuate curves. Pear-shaped bodies benefit from flared or bootcut styles to balance hips and thighs. Rectangle body types can opt for straight-leg or boyfriend jeans for a proportional silhouette. Understanding your body type helps in selecting the most flattering fit.

2.2 How to Determine Your Body Type for Jeans Fit

To determine your body type for jeans fit, start by measuring your waist, hips, and inseam. For petite frames, focus on proportions and balance. Tall individuals should look for longer inseams and structured fits. Hourglass shapes accentuate curves, while rectangular body types benefit from styles that create definition. Measure accurately, consider your natural silhouette, and try different fits to find what flatters your form best. Understanding your body type is key to selecting jeans that enhance your comfort and style.

Popular Jeans Fits

Explore the most sought-after jeans fits, including skinny, straight, and relaxed styles, each offering unique comfort and versatility to suit diverse body types and personal preferences.

3.1 Skinny Jeans Fit: Pros and Cons

Skinny jeans offer a sleek, modern look and are versatile for styling. They pair well with boots and can be dressed up or down, making them a wardrobe staple.

However, they may feel restrictive without stretch fabric and aren’t ideal for all body types. Proper sizing is crucial to avoid discomfort and ensure a flattering fit.

3.2 Straight Jeans Fit: Versatility and Comfort

Straight jeans offer a timeless choice, balancing comfort and style. They sit straight from hip to ankle, flattering most body types without clinging too tightly. Pair them with casual tops for a relaxed look or dress them up with blazers for a chic appearance. Their versatility makes them a wardrobe staple, suitable for various occasions. The straight fit ensures ease of movement while maintaining a polished look, making them ideal for everyday wear or special events.

3.3 Relaxed Jeans Fit: Perfect for Casual Looks

Relaxed-fit jeans are perfect for casual, laid-back styles. They feature a loose design through the thigh and knee, offering maximum comfort. Ideal for everyday wear, this fit is versatile and suits various body types. Pair them with sneakers for a sporty look or boots for a rugged vibe. The relaxed fit allows for ease of movement, making it a practical choice for casual outings or weekend errands. Its comfort and versatility make it a timeless option in any wardrobe.

Factors Affecting Jeans Fit

Fabric type, stretch, waist, and inseam measurements are crucial. AI tools now help determine perfect fit by analyzing body scans and size recommendations for optimal comfort.

4.1 Fabric and Stretch: Impact on Comfort and Fit

Fabric and stretch play a crucial role in jeans comfort and fit. Denim blends with elastane offer flexibility, while 100% cotton provides durability but less stretch; High-stretch fabrics, like those with spandex, mold to your body for a snug fit, ideal for active lifestyles. Four-way stretch fabrics enhance mobility, making them perfect for trendy styles. Choosing the right fabric ensures both comfort and style, catering to your lifestyle and body type without compromising on aesthetics or practicality.

4.2 Waist and Inseam Measurements: Key to Perfect Fit

Accurate waist and inseam measurements are crucial for a flawless fit. Measure your natural waistline and inseam carefully to ensure comfort and style. A well-fitted waist avoids gaps or tightness, while the right inseam ensures the perfect break. Proper measurements prevent alterations and guarantee a tailored look. Use a flexible tape measure for accuracy, and consider body type variations. Correct measurements ensure jeans drape naturally, enhancing both comfort and aesthetics for a personalized fit.

Jeans Fit Trends

Current trends include high-waisted, low-rise, and baggy styles, offering versatility for diverse preferences. Sustainable denim and eco-friendly fits are also gaining traction, blending fashion with responsibility.

5.1 Current Trends in Jeans Fits (High-Waisted, Low-Rise, etc.)

High-waisted jeans remain a popular choice for their comfort and versatility, often paired with crop tops for a trendy look. Low-rise styles are making a comeback, especially among younger audiences, offering a retro vibe. Straight-leg and relaxed fits are favored for their casual, laid-back appeal, while slim-fit designs continue to dominate for their sleek, modern aesthetic. These trends emphasize both style and practicality, catering to diverse body types and personal preferences.

5.2 How to Choose a Trendy Fit That Suits Your Body

Staying trendy while flattering your body is key. High-waisted jeans suit hourglass and petite frames, while low-rise styles complement tall body types. Wide-leg jeans balance pear-shaped figures, and straight-leg fits work for most body types. Consider your lifestyle and personal style when selecting a trendy fit. Pairing with tailored tops or statement accessories can elevate the look. Confidence and comfort are the ultimate style enhancers, so choose a fit that makes you feel great!

Tips for Trying Jeans and Ensuring the Best Fit

When trying jeans, ensure the waistband is comfortable and not restrictive. Check the fit while sitting and moving to ensure flexibility and proper inseam length.

6.1 How to Measure Yourself for Jeans Fit

To ensure the best fit, start by measuring your natural waist, hip, and inseam. Use a flexible tape measure, keeping it level and snug but not tight. For your waist, measure the narrowest point above your hips. Your hips should be measured 7-9 inches below your waist. The inseam is the length from the top of your inner thigh to your ankle. Accurate measurements help you choose the right size and style for your body type.

6.2 Trying Jeans On: What to Look For

When trying jeans, ensure the waistband fits comfortably without gaping or digging in. Check the inseam length and how the fabric stretches. Look for even spacing around the hips and thighs. The jeans should move naturally with your body and sit flatteringly on the legs. Pay attention to gaps at the back or tightness in the knees. Consider how they pair with shoes and whether the style complements your proportions. Proper fit enhances both comfort and confidence, making it worth the extra effort to find the right pair.

Maintenance and Care for Jeans Fit

Proper care ensures jeans retain their shape and color. Wash inside out in cold water and air-dry to maintain fit and prevent fading over time.

7.1 How to Maintain the Fit of Your Jeans Over Time

To keep your jeans fitting perfectly, wash them inside out in cold water and avoid using dryers, as heat can shrink or stretch the fabric. Store jeans hanging to prevent creases and loss of shape. For distressed or stretchy jeans, minimal washing and avoiding harsh detergents will preserve their fit. Consider professional tailoring for adjustments and use steam instead of ironing to maintain flexibility. Regular care ensures your jeans remain comfortable and stylish over time.

7.2 Tips for Stretching or Shrinking Jeans to Achieve the Perfect Fit

To stretch jeans, soak them in warm water and gently pull the fabric while damp. For shrinking, wash in hot water and dry on high heat. Use a hairdryer on tight areas to shrink fibers. Freezing can also tighten fabric. Avoid over-stretching, as it may damage material. For significant size adjustments, consider professional tailoring. Regular wear can naturally mold jeans to your body over time, ensuring a personalized fit.

Mastering your jeans fit enhances confidence and style. Remember, perfect fit combines comfort, flattery, and personal flair. Experiment, stay trendy, and own your unique look effortlessly.

8.1 Final Tips for Finding Your Perfect Jeans Fit

To achieve the perfect jeans fit, prioritize comfort and confidence. Consider your lifestyle and personal style when choosing a fit. Invest in quality denim that lasts, and don’t hesitate to seek professional tailoring for adjustments. Remember, trends come and go, but a well-fitting pair of jeans is timeless. Experiment with styles and sizes to find what works best for you, and embrace the versatility of denim to elevate your wardrobe effortlessly.

8.2 How to Style Your Jeans for Different Occasions

Styling jeans for different events is effortless with the right approach. For casual outings, pair high-waisted jeans with a graphic tee and sneakers. Dress them up for semi-formal gatherings by adding a button-up shirt and heels. Formal events call for dark-washed slim-fit jeans, a blazer, and elegant accessories. Experiment with layers, belts, and footwear to create versatile looks. Use online tools or apps to visualize outfits and ensure your jeans fit perfectly for any occasion, enhancing both comfort and style.

ap physics 1 practice problems with answers pdf

Mastering AP Physics 1 requires thorough practice with diverse problem sets. Utilize MCQs, FRQs, and sample responses to refine your understanding and exam strategies effectively.

1.1 Importance of Practice in AP Physics 1 Preparation

Consistent practice is essential for success in AP Physics 1, as it helps students master complex concepts and apply them to various scenarios. Regular problem-solving enhances critical thinking, improves understanding of fundamental principles, and builds exam readiness. By tackling diverse question types, such as multiple-choice and free-response questions, students can identify areas needing improvement and refine their problem-solving strategies. Practice problems also familiarize students with the exam format, reducing anxiety and improving time management during the actual test. Additionally, reviewing solutions and explanations helps clarify misunderstandings and reinforces learning. Ultimately, practice fosters confidence and ensures students are well-prepared to achieve their goals in the AP Physics 1 exam.

1.2 Overview of Common Problem Types

AP Physics 1 practice problems encompass a variety of question types designed to test different skills. Multiple-choice questions (MCQs) assess quick recall and application of concepts, while free-response questions (FRQs) evaluate detailed problem-solving and critical thinking. MCQs often focus on identifying correct formulas, analyzing graphs, or selecting appropriate reasoning steps. FRQs require students to set up equations, perform calculations, and explain their reasoning, often involving multi-step problems. Additionally, experimental design and analysis questions challenge students to interpret data and evaluate scientific methods. These diverse problem types mirror the actual exam format, ensuring comprehensive preparation and familiarizing students with the range of challenges they will encounter on test day.

Key Topics Covered in Practice Problems

Practice problems cover essential topics like 1D motion, kinematics, work, energy, and conservation of energy, ensuring a strong foundation for the AP Physics 1 exam.

2.1 1D Motion and Kinematics

1D motion and kinematics are foundational topics in AP Physics 1, involving concepts like position, velocity, and acceleration. Practice problems often include motion graphs, equations of motion, and projectile motion scenarios. Students are tasked with analyzing data from position vs. time and velocity vs. time graphs to determine key variables. Problems may also involve calculating displacement, average velocity, and acceleration using kinematic equations. Additionally, questions explore the relationship between force and motion, such as constant acceleration and Newton’s second law. These problems help students build analytical skills and apply mathematical models to real-world situations. Resources like practice tests and problem sets provide ample opportunities to master these essential concepts.

2.2 Work, Energy, and Conservation of Energy

Work, energy, and conservation of energy are critical concepts in AP Physics 1, often tested through practical problems. Students analyze how work done by forces translates into energy changes, using the formula ( W = F ot d ot s( heta) ). Problems frequently involve calculating kinetic and potential energy, as well as applying the work-energy theorem. Conservation of energy is explored in scenarios like inclined planes, springs, and collisions. Practice questions also address power and efficiency in energy transfer systems. By solving these problems, students gain a deeper understanding of energy transformations and the principles that govern them. Resources like practice tests and answer keys provide detailed solutions to reinforce these concepts and improve problem-solving skills.

Practice Tests and Problem Sets

Practice tests and problem sets are essential for mastering AP Physics 1. They include multiple-choice and free-response questions, with answer sheets and solutions for thorough preparation.

3.1 Multiple-Choice Questions (MCQs)

Multiple-choice questions (MCQs) are a core component of AP Physics 1 practice tests. These questions assess your ability to apply concepts and formulas to solve problems efficiently. Many resources, such as practice tests and problem sets, include MCQs with detailed answer keys. Websites like APlus Physics offer organized problem sets by topic, helping you focus on specific areas like kinematics or energy conservation. Regular practice with MCQs improves time management and reduces exam anxiety. Additionally, reviewing solutions enhances understanding and highlights common misconceptions. Utilize these resources to refine your problem-solving skills and ensure readiness for the exam. Consistent practice with MCQs is essential for achieving a high score on the AP Physics 1 exam.

3.2 Free-Response Questions (FRQs)

Free-response questions (FRQs) are a critical part of AP Physics 1 exams, requiring detailed explanations and calculations. These questions assess your ability to articulate concepts, set up equations, and solve problems methodically. Practice FRQs are available from past exams, complete with scoring guidelines and sample responses. Websites like College Board and APlus Physics provide access to these resources, allowing you to familiarize yourself with the exam format. Reviewing sample responses helps understand how to allocate points and avoid common errors. FRQs often involve experimental design, data analysis, and justification of answers. Regular practice with these questions enhances your ability to communicate scientific reasoning clearly and effectively, which is vital for success on the AP Physics 1 exam.

Effective Use of Answer Keys and Solutions

Answer keys and solutions are vital for identifying mistakes and understanding correct methods. Use them to review errors, master problem-solving strategies, and improve your physics comprehension.

4.1 Understanding Scoring Guidelines

Scoring guidelines provide clear criteria for evaluating free-response questions. By reviewing these, students can understand how points are allocated, ensuring they address all parts of a question. This helps in organizing answers effectively and meeting the examiners’ expectations. Familiarizing oneself with the scoring rubrics allows for strategic planning during the exam, ensuring no critical points are missed. Additionally, understanding the emphasis on conceptual clarity, mathematical accuracy, and logical reasoning aids in presenting well-structured responses. Regularly reviewing sample responses and their corresponding scores can further enhance a student’s ability to align their answers with the grading standards, ultimately improving their performance and confidence. This preparatory step is essential for achieving optimal results in the AP Physics 1 exam.

4.2 Learning from Sample Responses

Sample responses are invaluable tools for understanding how to approach and answer free-response questions effectively. By analyzing these examples, students can gain insights into how to structure their answers, emphasize key concepts, and present their work clearly. Reviewing sample responses helps identify common mistakes and demonstrates how to allocate points according to the scoring guidelines. This process allows learners to refine their problem-solving strategies and improve their ability to communicate complex ideas succinctly. Additionally, comparing one’s own answers to sample responses fosters a deeper understanding of the material and highlights areas needing further review. Regularly studying these examples enhances both conceptual mastery and exam performance, making it a critical component of AP Physics 1 preparation.

Exam Strategies and Tips

Mastering AP Physics 1 requires strategic exam approaches. Skim questions, manage time wisely, and show all work. Avoid common errors and practice precise, efficient answers.

5.1 Common Mistakes to Avoid

One of the most common mistakes students make in AP Physics 1 is misapplying fundamental concepts, such as confusing velocity and acceleration. Another error is neglecting to consider the direction of forces, leading to incorrect free-body diagrams. Additionally, many students overlook unit consistency, which can result in wrong numerical answers. Misunderstanding key equations, like the distinction between work and energy, is also prevalent. Furthermore, time management issues often cause students to rush through problems, increasing the likelihood of calculation errors. To avoid these pitfalls, it is crucial to thoroughly review problem setups, double-check unit conversions, and allocate sufficient time for each question during practice sessions.

5.2 Time Management During the Exam

Effective time management is critical for success in the AP Physics 1 exam. Allocate approximately one minute per multiple-choice question and 15-20 minutes per free-response question. Begin by skimming through all questions to identify easier ones and tackle them first, ensuring no points are left on the table. For free-response questions, spend a few minutes planning your approach before writing. Avoid spending too much time on a single problem, as this can lead to losing valuable time for others. Practice under timed conditions during your preparation to build stamina and efficiency. Remember, managing your time wisely allows you to address all sections of the exam confidently and thoroughly.

free beanie sewing pattern pdf

Welcome to our guide on free beanie sewing patterns! Discover how to create cozy, stylish hats using downloadable PDF patterns. Perfect for beginners, these patterns offer detailed instructions and are ideal for using leftover fabric or crafting thoughtful gifts. Whether you’re sewing for personal use or as a present, free beanie patterns provide endless possibilities for customization and creativity. Get ready to start your sewing journey with these easy-to-follow designs!

1.1 What is a Beanie Sewing Pattern?

A beanie sewing pattern is a downloadable template or guide that provides instructions and measurements to create a beanie hat. Typically available as a PDF, it includes pattern pieces, step-by-step directions, and tips for sewing a beanie. These patterns cater to various skill levels, making it easy for beginners to craft a stylish, customizable hat. Perfect for utilizing leftover fabric, they offer a cost-effective way to create unique accessories or gifts.

1.2 Why Choose a Free PDF Pattern?

Choosing a free PDF pattern offers a cost-effective way to start sewing beanies. These patterns are beginner-friendly, often with detailed instructions and versatile designs. They allow you to use leftover fabric, making them eco-friendly and budget-conscious. Perfect for quick projects, they provide an excellent way to practice sewing skills while creating personalized gifts or accessories for the whole family;

Types of Beanies You Can Sew

Explore various beanie styles, from cuffed and slouchy to reversible and fleece designs. Each pattern offers unique features, allowing you to create hats that suit different preferences and occasions.

2.1 Cuffed Beanies

Cuffed beanies are a popular style, offering a classic look with a foldable cuff for added warmth. They are quick to sew, often taking just 15 minutes, and are perfect for using leftover fleece. Designed for all skill levels, these patterns include detailed instructions, making them ideal for beginners. The cuffed design allows for versatility, ensuring a snug fit for heads of all sizes, from babies to adults.

2.2 Slouchy Beanies

Slouchy beanies are a trendy and comfortable choice, offering a relaxed fit with a stylish, slouched design. Perfect for all ages, these patterns often include features like reversible options or lining for added warmth. They are great for using leftover fabric and can be customized with embellishments like pom-poms or ribbons. Slouchy beanies are a versatile and fashionable project for sewists of all skill levels.

2.3 Reversible and Lined Beanies

Reversible and lined beanies offer double the style and warmth, allowing you to wear them on either side. These patterns are perfect for showcasing different fabrics or adding a hidden layer of comfort. They are ideal for colder climates and make thoughtful gifts. The reversible feature adds versatility, while the lining ensures extra warmth and a polished finish. Great for intermediate sewists looking to enhance their skills.

2;4 Fleece and Pom-Pom Beanies

Fleece and pom-pom beanies are a delightful combination of warmth and style. Perfect for winter, these patterns use soft, cozy fleece and decorative pom-poms for a playful touch. Ideal for beginners, they often include sizes for all ages and customization options. The pom-poms add a fun, personalized element, while the fleece ensures warmth and comfort. A great way to create unique, trendy hats for yourself or as gifts.

Materials and Tools Needed

Fleece, jersey knit, or stretchy fabric is ideal for beanies. Tools needed include a sewing machine, rotary cutter, mat, ruler, scissors, pins, and a tape measure.

3.1 Fabric Requirements (Fleece, Jersey Knit, etc.)

Fleece and jersey knit fabrics are ideal for beanies due to their stretch, warmth, and softness. Fleece is perfect for winter hats, while jersey knit offers a lightweight, breathable option. For most patterns, you’ll need 1/4 to 1/2 yard of fabric, depending on the beanie size and style. These fabrics are easy to work with, making them great for beginners.

3.2 Sewing Tools and Notions

To sew a beanie, you’ll need basic sewing tools like a sewing machine, rotary cutter, mat, and ruler for cutting fabric accurately. Sharp scissors, pins, and a tape measure are also essential. Use a stretch needle for sewing machines or a size 8 or 10 sharp needle for hand-stitching. Optional notions include a walking foot for smooth stitching or a serger for finishing seams professionally.

Step-by-Step Tutorials for Beginners

Learn to sew a beanie with clear, step-by-step guides designed for beginners. Video tutorials and photo instructions ensure easy understanding and confidence in your sewing skills.

4.1 Video Tutorials for Visual Learners

Video tutorials are perfect for visual learners, offering clear, step-by-step guidance. Watch demonstrations of essential steps like measuring, cutting fabric, and sewing seams. These tutorials cover basic techniques, such as working with stretchy fabrics and fleece, ensuring a smooth sewing experience. They’re ideal for beginners, providing a visual aid to master skills quickly and confidently.

4.2 Written Instructions with Photos

Written instructions with photos provide clear, step-by-step guidance for sewing your beanie. These detailed guides are perfect for visual learners who prefer text over video. Each step is explained with clarity, ensuring you can follow along effortlessly. Photos highlight key techniques, making it easier to understand complex steps. Great for beginners, these instructions help you achieve professional results with confidence and precision;

Customizing Your Beanie

Customizing your beanie allows you to add personal touches like fabric choices, pom-poms, ribbons, or appliques. It’s a great way to express creativity and match your style.

5.1 Choosing the Right Fabric

Selecting the right fabric is crucial for your beanie. Fleece, jersey knit, and sweater knits are popular choices due to their warmth and stretch. Fleece is ideal for winter, offering softness and insulation, while jersey knit provides a snug fit. Consider the season and desired texture when picking your fabric to ensure comfort and style for your beanie.

5.2 Adding Embellishments (Pom-Poms, Ribbons, etc.)

Add a personal touch to your beanie with embellishments like pom-poms, ribbons, or appliques. Pom-poms are a classic choice, easily made from yarn or fabric scraps. Ribbons offer a versatile option, whether tied in a bow or stitched as a band. Appliques add a playful touch, allowing you to customize with shapes or patterns. These details make your beanie unique and thoughtful for gifts or personal style;

Benefits of Sewing Your Own Beanie

Sewing your own beanie is cost-effective, eco-friendly, and allows for personalized styles. It’s a great way to use leftover fabric and create thoughtful gifts or keepsakes.

6.1 Cost-Effective and Eco-Friendly

Sewing your own beanie is a budget-friendly option, as free PDF patterns eliminate the cost of purchasing designs. Using leftover fabric scraps reduces waste, making it an eco-conscious choice. This method allows you to repurpose materials like fleece or jersey knit, creating something useful while minimizing environmental impact. It’s a practical and sustainable way to craft personalized accessories.

6.2 Perfect for Gifts or Personal Use

Beanies made from free PDF patterns make excellent gifts for family and friends, suitable for all ages. They can be personalized with embellishments like pom-poms or ribbons, adding a unique touch. Additionally, sewing your own beanie allows you to create a custom fit and style for personal use. It’s a thoughtful and practical way to enjoy handmade fashion or share your creations with loved ones.

Where to Find Free Beanie Sewing Patterns

Discover free beanie sewing patterns on popular websites, blogs, and platforms like Craftsy, Pinterest, and Etsy. Many offer downloadable PDFs with detailed instructions, perfect for all skill levels. These resources are ideal for finding unique designs and starting your sewing project quickly and effortlessly.

7.1 Popular Websites and Blogs

Popular websites like Pinterest, Etsy, and Craftsy offer a wide range of free beanie sewing patterns in PDF format. Blogs such as “Sewing Parts Online” and “DIY Sewing Tutorials Blog” provide easy-to-download patterns with detailed instructions. These platforms are user-friendly, offering patterns for cuffed, slouchy, and reversible beanies. Perfect for beginners, they ensure a seamless sewing experience with customizable designs, ideal for using leftover fabric or creating personalized gifts.

7.2 How to Download and Print PDF Patterns

To download a free beanie sewing pattern, locate the PDF link on the website or blog. Click the download button, which may require an email sign-up. Once downloaded, open the PDF on your device. For printing, ensure your printer is set to “Actual Size” or “100% scale” to maintain accuracy. Choose the correct paper size, such as A4 or US Letter, as specified in the pattern. Print all pages, including instructions and pattern pieces. Check for a test square to confirm scaling accuracy. If the test square measures correctly, proceed to print the entire pattern. After printing, carefully cut out the pattern pieces along the lines provided. Assemble the pieces by matching edges or notches, following the included instructions closely. For troubleshooting, refer to the website’s FAQs or community forums for assistance. Ensure you have the appropriate fabric ready, such as fleece or stretchy material, before beginning your sewing project.

Tips for Sewing with Fleece

Use a walking foot for smooth stitching. Pre-wash fleece to remove finishes. Opt for a longer stitch length and sharp needles to handle thickness easily.

8.1 Working with Stretchy Fabrics

When sewing with stretchy fabrics like fleece or jersey knit, use a walking foot to maintain even tension and prevent distortion. Pre-wash fabrics to remove finishes that may affect stretch. Cut patterns carefully, aligning edges to ensure stability. Use stretch needles or universal needles to handle thick or stretchy materials effectively. Always sew in the direction of the stretch for professional results.

8.2 Avoiding Common Mistakes

  • Avoid not backstitching at the beginning and end of seams, as this can cause them to come undone.
  • Ensure accurate seam allowances to maintain the shape and fit of the beanie.
  • Prevent stretching of fabric while sewing by using stabilizing techniques or tools like a walking foot.
  • Double-check pattern sizes and fabric requirements before cutting to avoid waste or poor fit.

Sizes and Fit

Free beanie sewing patterns often include multiple sizes, from baby to adult, ensuring a perfect fit for everyone. Measure head circumference accurately to choose the right size for a cozy, comfortable beanie that stays in place without being too tight or loose.

9.1 Patterns for Babies, Toddlers, and Adults

Free beanie sewing patterns are available in various sizes, catering to babies, toddlers, and adults. Whether you’re sewing for a newborn or an adult, these patterns ensure a perfect fit. Designs often include options for different head sizes, making them versatile for gifts or personal use. Many patterns are quick to sew and require minimal fabric, ideal for using up scraps.

9.1 Ensuring the Perfect Fit

Accurate head measurements are key to a well-fitting beanie. Choose the correct size from the pattern, considering stretch in fabrics like fleece or knit. Adjust seams if necessary, and consider adding elastic for a snug fit. Patterns often include features like ribbing or adjustable bands to ensure comfort and the right fit for every wearer.

Troubleshooting Common Issues

Addressing common mistakes like uneven stitches or improper seam allowances ensures a professional finish. Adjust tension, check alignment, and use guides for consistent results. Fixing issues early prevents major rework.

10.1 Dealing with Seam Allowances

Seam allowances are crucial for a professional finish. Most patterns include a standard 3/8″ allowance. Ensure accurate cutting and alignment to maintain consistency. Deviations can lead to ill-fitting beanies. Use a walking foot for smooth sewing and backstitch at the start and end of seams for reinforcement. Addressing seam issues early prevents rework and ensures a polished result.

10.2 Fixing Uneven Stitches

Uneven stitches can mar your beanie’s appearance. Check your machine’s tension settings and ensure proper fabric alignment. Using a walking foot or Teflon presser foot can help maintain even stitching. If stitches remain uneven, adjust your seam allowance slightly or reinforce with hand-stitching. Consistent fabric handling and backstitching at seams will ensure a polished finish. These fixes ensure professional results for your beanie projects.

With free beanie sewing patterns, you can create personalized, cozy hats effortlessly. Perfect for gifts or personal use, these patterns offer a fun and rewarding sewing experience for all skill levels. Start your project today and enjoy the satisfaction of handmade creations!

11.1 Final Thoughts on Sewing Beanies

Sewing beanies is a rewarding craft that offers endless creativity. With free PDF patterns, you can easily create personalized hats for any occasion. Whether for gifts or personal use, each beanie is a testament to your skill and care. Embrace the joy of sewing and continue exploring the world of DIY fashion with confidence and creativity!

11.2 Encouragement to Start Your Project

Don’t hesitate to dive into sewing your own beanie! With free PDF patterns, you’ll find the process simple and enjoyable. Whether you’re a beginner or an experienced sewer, creating a beanie is a great way to express your creativity. Grab your fabric, print your pattern, and start crafting—soon you’ll have a cozy, personalized hat to enjoy or share as a thoughtful gift!